 Helldivers 2
Helldivers 2 Freedom's Beacon Beginner Guide
Quick Answer: Helldivers 2 Freedom's Beacon is easiest for beginners when you focus on learning stratagem inputs, staying with your squad, spending early resources on practical upgrades, and treating survival plus extraction as more important than chasing every fight.
Helldivers 2 works because it throws you into a messy, high-pressure co-op war and expects you to learn by doing. That sounds intimidating at first, but the game is much friendlier once you understand its rhythm: land, read the objective, move with purpose, call the right tools, and leave before greed gets your squad wiped. For anyone starting through the Helldivers 2 Freedom's Beacon experience, the real hurdle is not raw aim. It is decision-making under chaos.
That matters because this is a huge live co-op game with a broad player base. Steam's official page currently lists the game as "Mostly Positive" with 75.1% positive across 1151055 reviews Source, and HowLongToBeat reports roughly 32.43 hours for the main story, 65.01 hours with extras, and 89.29 hours for completion Source. In practice, that means your first few sessions should be about building habits, not rushing to "finish" anything. You are learning a long-form cooperative shooter, not clearing a short campaign and moving on.
What Helldivers 2 Freedom's Beacon Means for New Players
Helldivers 2 Freedom's Beacon is best understood as your early-game learning window, where good habits matter more than unlock count or difficulty pushing. If you are brand new, think of this phase as boot camp with live ammunition: you are not trying to top the scoreboard, you are trying to become reliable.
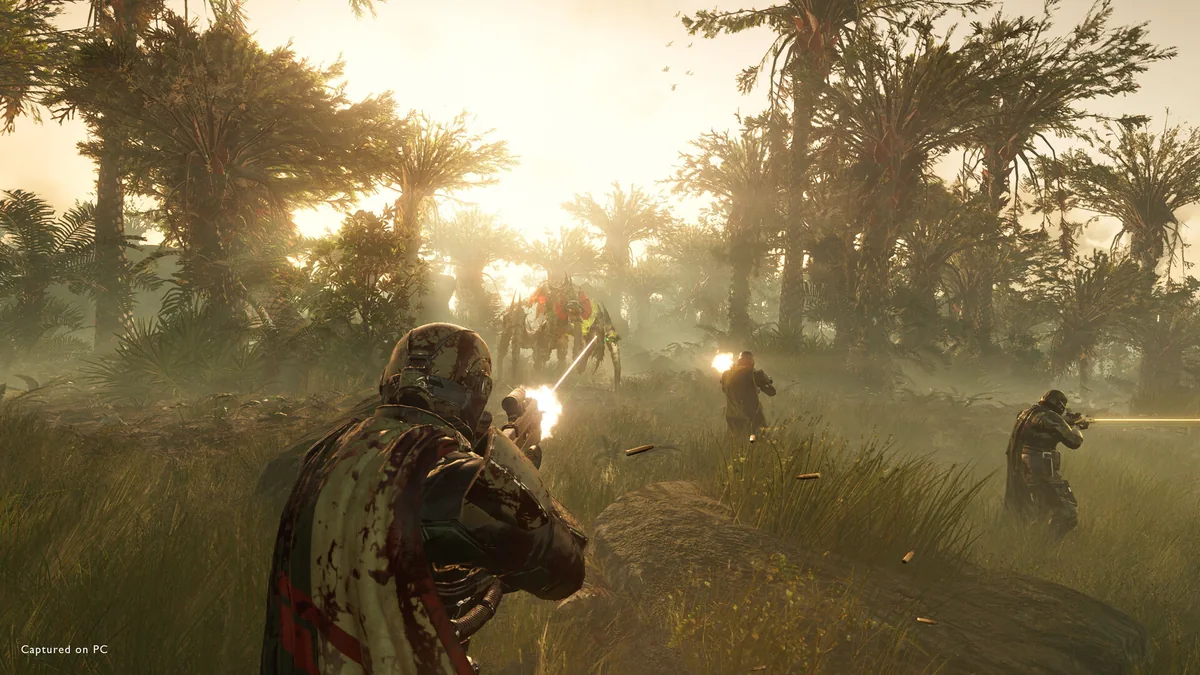
The basic structure is simple. You deploy onto a planet, complete one or more mission objectives, deal with enemy patrols and reinforcements, then extract alive if possible. The game sells itself as "a fast, frantic, and ferocious third-person shooter" on its Steam page Source, and that description is accurate. You will often be juggling primary weapon fire, grenades, support weapons, map reading, objective terminals, and stratagem calls at the same time.
For beginners, three systems define almost everything:
- Stratagems: coded call-ins for supplies, support weapons, turrets, and heavy firepower. Examples include resupplies, defensive emplacements, and orbital support.
- Objectives: the real reason you are on the map. Examples include activating terminals, destroying hostile structures, or recovering mission-critical equipment.
- Extraction pressure: the end phase where many new players panic, overstay, or scatter. Examples include calling extraction too early, standing in the open near the shuttle zone, or wasting heavy tools before the final hold.
The key beginner lesson is that combat is a means to complete objectives, not the objective itself. New players often treat every patrol like a mandatory duel. Veteran squads do the opposite. They fight when they need space, stealth past what they can, and save cooldowns for real threats like armored targets, swarms during uplinks, or extraction waves.
This is also why the beginner phase in Helldivers 2 Freedom's Beacon lasts longer than people expect. You can unlock gear early and still play like a rookie if you keep making the same positioning mistakes. On the other hand, a newer player with a basic rifle, good spacing, and smart stratagem timing can contribute a lot on mid-level operations.
If you want a simple mindset to carry through every mission, use this: stay close enough to support the team, far enough not to wipe each other, and always know what the next objective is. That one habit alone cleans up a surprising number of early failures.
First-Hour Checklist
Your first hour in Helldivers 2 Freedom's Beacon should be spent building muscle memory, not chasing difficulty or trying to farm everything at once. The goal is to come out of that first session knowing how to move, call support, read the map, complete objectives, and extract without turning every mission into a disaster.
Use this checklist in roughly this order:
Finish the tutorial and pay attention to the small rules it teaches. The tutorial is not filler. It introduces movement, weapon handling, stims, grenades, and the simple truth that friendly fire is always part of the battlefield. If you ignore it, you will spend your first real missions accidentally killing teammates with bad throws and careless firing lanes.
Learn your first few stratagem inputs until you can do them under pressure. Start with essentials rather than flashy attacks. Resupply, a dependable support weapon, and a basic defensive or offensive call-in are better training tools than complicated high-impact stratagems you cannot enter quickly. Practice them while moving, while prone, and while enemies are nearby.
Run low-pressure missions before touching harder operations. Pick easier content and use it as a lab. Learn how long it takes to activate a terminal, how enemy alerts escalate, and how extraction feels when you are not overrun. This is where you should test examples like holding a radar-style objective, clearing a nest or fabricator, or moving between marked points without aggroing every patrol.
Open the map constantly. New players get tunnel vision. Build the habit of checking terrain, objective markers, patrol routes, and extraction distance. If your squad is heading east and you are still looting west, the map usually warned you first.
Practice one anti-armor answer and one crowd-control answer. You do not need a perfect loadout yet, but you do need coverage. A squad that only brings rifles suffers against armored enemies. A squad that only brings anti-tank tools gets buried by swarms. Early examples of healthy balance are a support weapon for bigger targets and either grenades, sentries, or area denial for waves.
Extract at least a few times successfully before you experiment. Extraction teaches spacing, firing discipline, and resource timing. It is also where beginner panic shows up the fastest. Learning to survive the final hold is more important than squeezing out one extra side objective.
Spend a few minutes in menus reading what your gear actually does. Many bad early choices come from not understanding tool roles. Some stratagems are best for fortifying a point, some for deleting armor, and some for emergency recovery. Read before you deploy.
Play at least one mission focused on objectives rather than kills. This helps you break the common shooter habit of treating enemy count as success. In Helldivers 2, a clean objective run with controlled fights is usually better than a long bloodbath that drains supplies.
If you only remember three first-hour priorities, make them these:
| First-Hour Priority | Why It Matters | Good Early Example |
|---|---|---|
| Learn core stratagems | You need support tools on demand | Resupply plus one support weapon |
| Stay with the squad | Solo drifting causes most early deaths | Move as a loose pack between markers |
| Extract consistently | Successful missions teach the full loop | Finish objectives and leave without greed |
A final note here: because the broader game can last well beyond a quick weekend, with HowLongToBeat listing 32.43 hours for main story pacing alone Source, there is no advantage in rushing your first hour. Use it to become stable, not impressive.

You might also like
- Helldivers 2 fourth faction alternative multiple enemies planet why Beginner Guide
- Helldivers 2 Which enemy faction do you enjoy fighting in: Beginner Guide
- Helldivers 2 Super Destroyer Screen Display Interactive Update: Beginner Guide
- Helldivers 2 Ground All Terrain Extraction Rig GATER Beginner Guide
- Helldivers 2 Reviewed by Game878Helldivers 2Read Full Review Story5Gameplay9Visuals9Audio8Value forMoney8 Beginner Guide
Resource Priority Order
Your early resource priority in Helldivers 2 Freedom's Beacon should be practical unlocks first, durable account progress second, and luxury experimentation last. Beginners get into trouble when they spend too broadly and end up with lots of toys but no clear answers to the problems they actually face in missions.
The exact names and progression paths can shift as the live game evolves, so it is safer to think in categories. In the current meta, your resources usually feed three different goals: unlocking tools, strengthening your ship and account-wide support, and opening optional gear variety. The beginner mistake is treating all three goals as equally urgent.
Use this spending order:
First priority: unlock dependable mission tools. Your earliest investments should solve common field problems. You want access to:
- a reliable support weapon for armored enemies
- a consistent resupply rhythm
- one defensive call-in such as a turret or emplacement
- one offensive panic button such as an airstrike or orbital option
Practical examples are easier to understand than theory. If your squad struggles against a heavily armored target, a support weapon unlock matters more than a cosmetic armor preference. If you fail extraction because the zone collapses, a defensive stratagem often gives more value than another niche gun.
Second priority: ship or account upgrades that improve mission consistency. Upgrades that make your stratagem package more dependable are usually better than upgrades built around rare edge cases. Think in terms of shorter downtime, better utility, or stronger support infrastructure rather than flashy one-moment power. Anything that makes your regular kit smoother across every mission tends to pay off faster.
Third priority: broader weapon and armor options. Variety is good, but only after you have a backbone loadout. Many new players unlock sideways options too early, then wonder why nothing feels stronger. A new primary weapon may change how you handle light enemies, but it rarely fixes poor anti-armor coverage or weak objective defense by itself.
Fourth priority: hoard premium-value currency until you know what role you like. The patch context around anti-cheat measures specifically mentions Super Credits as the in-game currency tied to warbonds and purchasable items Source. That is exactly why beginners should avoid impulse spending. If you later discover you prefer anti-armor support, area denial, or mobile skirmishing, you will want flexibility.
Here is the cleanest beginner priority table:
| Priority Order | Spend Early | Delay Until Later | Reason |
|---|---|---|---|
| 1 | Core stratagem tools | Niche experiments | Missions punish missing utility more than missing variety |
| 2 | Consistency upgrades | Cosmetic preference picks | Reliable cooldowns and support matter every run |
| 3 | Role-expanding weapons | Duplicate role gear | Build one solid role before branching |
| 4 | Premium-value currency | Impulse unlocks | Saving gives better long-term choice control |
What should you hoard? Anything scarce that can unlock meaningful long-term options later. What should you spend freely? Early progression aimed at making your loadout functional. What should you craft or unlock first? The things that answer real mission failure points you have already seen: armored enemies, extraction pressure, and supply starvation.
A useful self-check is this: after each mission, ask what actually caused the trouble. If the answer is "we ran out of anti-armor," spend toward that. If the answer is "we got flooded while defending a terminal," spend toward control or fortification. Let the battlefield tell you your next purchase.
How to Fight Smarter in Early Missions
The smartest way to fight in Helldivers 2 Freedom's Beacon is to treat positioning, target priority, and cooldown timing as more important than raw aggression. New players often believe they need better aim. Usually they need better choices.
Start with positioning. The game punishes clumping and punishes isolation, which sounds contradictory until you get used to it. You want to move as a spread squad. Close enough to revive, share supplies, and combine fire. Far enough that one grenade, one charger rush, or one orbital mistake does not flatten the whole team. Good spacing is visible in simple scenarios: one player works a terminal while two hold angles and one watches the flank; or the squad retreats together from a wave instead of four players sprinting in four directions.
Target priority is the second big skill. Not every enemy deserves immediate fire. In most fights, you should focus on:
- enemies that can quickly overrun the team
- armored threats your current weapons cannot casually handle
- units pressuring an active objective
- patrols that will trigger a much larger fight if left unmanaged at the wrong moment
Examples make this clearer:
- If your squad is uploading data and a wave is closing in, clear the pressure around the objective before chasing distant targets.
- If a heavily armored enemy enters the fight, the player with the correct support weapon should handle it while others manage escorts.
- If a patrol has not noticed you and your team is low on ammo, bypassing it is often the best "kill."
Cooldown timing is where many beginners waste runs. They throw major stratagems at the first sign of trouble, then have nothing ready when the real crisis starts. A better habit is to classify tools by job:
- use routine tools for routine pressure
- save high-impact calls for armor clusters, objective defense, or extraction
- drop resupplies before the team is fully empty, not after everyone is desperate
You should also learn when not to stand and fight. Retreat is not failure in this game. If a position is bad, move. If a breach spirals, break contact. If your squad is spending too much time farming a pointless fight, ping the objective and reset the pace.
This is one of the reasons the game has lasted with such a large audience, with SteamSpy estimating ownership at 20,000,000 .. 50,000,000 Steam accounts Source. There is a deep skill curve hidden under the shooter surface. It is not just about shooting better. It is about solving chaos faster than it grows.
For beginners, the best early combat pattern is simple:
- identify the real threat
- use the smallest tool that solves it
- keep moving toward the objective
- preserve something strong for extraction
That pattern will carry you much farther than trying to win every firefight through stubbornness alone.
Common Mistakes
The most common Helldivers 2 Freedom's Beacon mistakes are all fixable, and most come from habits players import from other shooters. If you correct these early, your success rate jumps fast.
Mistake: Fighting every patrol you see.
Why players fall into it: many co-op shooters reward constant clearing, so new players assume every enemy group must be deleted.
Fix: only engage patrols that block movement, threaten an objective, or are about to alert a larger force. Otherwise, move around them and keep mission tempo.Mistake: Entering missions without anti-armor coverage.
Why players fall into it: basic rifles feel comfortable early, so squads overinvest in general-purpose guns.
Fix: make sure at least one or two players bring reliable armor answers. In a random group, bring one yourself rather than assuming someone else did.Mistake: Calling stratagems in dangerous or selfish spots.
Why players fall into it: under stress, players drop supplies or fire support exactly where they are standing.
Fix: throw call-ins slightly ahead of team movement, off to the side of firing lanes, or onto enemies with clear warning. Check teammate position before confirming.Mistake: Burning all heavy cooldowns before extraction.
Why players fall into it: early fights feel dramatic, so players overreact and spend everything too soon.
Fix: save at least one major answer for the end of the mission. Extraction is often where the real test begins.Mistake: Splitting too far from the squad for samples or side tasks.
Why players fall into it: players see loot or optional markers and think they can grab them quickly.
Fix: only split with a clear plan, short route, and communication. If you are new, stay with the group until map judgment improves.Mistake: Standing still during objective defense.
Why players fall into it: terminals and hold points trick players into thinking they must anchor in one exact tile.
Fix: defend in a loop or arc. Use cover, reset angles, and kite pressure away from teammates rather than stacking on the terminal.Mistake: Ignoring reinforcement and revive tempo.
Why players fall into it: newer players tunnel on their own survival or their own fight.
Fix: when someone drops, decide immediately whether the area is safe for a revive or if a reinforcement call is cleaner. Fast, calm decisions stop chain wipes.
A good reality check comes from achievements. SteamHunters tracks 38 achievements and 0 currently unobtainable achievements Source, and some of the rarest are tied to disciplined team play rather than brute force. For example, the rarest tracked Steam achievement sits at only 10.7% of players Source. That gap tells you something important: many players keep playing, but far fewer consistently execute clean, controlled runs.
Pro Tips
The best Helldivers 2 Freedom's Beacon pro tips for beginners are small habits that make you look experienced long before your unlocks catch up. These are not flashy tricks. They are the little decisions that keep operations stable.
Tip 1. Reload before you touch the objective
If you are about to activate a terminal, arm a hellbomb, or trigger extraction, top off what you can first. Objective interactions often start a fight on the game's terms, not yours.
Tip 2. Throw support tools where the squad is going, not where it is standing
A resupply behind the team or a turret dropped in a current firing lane creates confusion. Place tools on the next anchor point so they are useful when the line shifts.
Tip 3. Use terrain to break enemy approach paths
Rocks, ridges, wreckage, and elevation changes can funnel enemies into cleaner kill zones. This matters during examples like extraction holds, uplink defense, and bug breach recovery.
Tip 4. Ping before you sprint
A quick ping on a patrol, sample cluster, heavy target, or retreat line solves many random-squad problems. Even without voice chat, it creates shared intent.
Tip 5. Keep one simple loadout you understand deeply
Experimentation is good, but every player benefits from a fallback kit. Learn one comfortable primary, one anti-armor solution, one utility pick, and one panic button. Familiarity beats novelty when missions spiral.
Tip 6. Watch what caused the breach, not just what killed you
If you die to a swarm, the real mistake may have happened ten seconds earlier: a missed patrol, bad spacing, late reload, or wasted cooldown. Review the trigger, not only the death moment.
Tip 7. Extraction is easier when you arrive early and organized
Do not stagger into extraction one by one with empty mags and cooldowns spent. Regroup, reload, and decide where your defense line will be before you call the shuttle.
Tip 8. Learn one "quiet" mission pathing habit
Sometimes the strongest play is disciplined movement. Hug map edges, avoid unnecessary line-of-sight, and rotate around active hot zones. Quiet routes save ammo and reinforcement pressure.
Tip 9. Samples are valuable, but a dead carrier helps no one
If you are holding important pickups and the team is collapsing, shift your priority to survival and regrouping. Greedy last-second detours are one of the most common ways to lose progress.
Tip 10. Treat each faction and mission type as a separate exam
The tools and movement patterns that feel great in one scenario can feel awful in another. A defensive setup that shines on hold objectives may feel slow on mobile sabotage runs. Adjust to the mission, not your ego.
When You Are No Longer a Beginner
You are out of the beginner phase in Helldivers 2 Freedom's Beacon when you can carry your own weight without constant panic, not when you simply own more gear. Progress here is measured more by consistency than by unlock count.
A player is usually ready to graduate from "new" status when these signs start showing up regularly:
You can enter your key stratagems quickly without stopping to think. This is a major threshold. Once support inputs are automatic, your awareness frees up for map reading, target calling, and team movement.
You recognize mission failure patterns early. For example, you can tell when your squad lacks anti-armor, when an objective hold is about to collapse, or when the team should retreat before reinforcements snowball.
You build loadouts for purpose instead of preference alone. A beginner says, "I like this gun." A developing player says, "This operation needs armor answers, area control, and one dependable resupply plan."
You finish operations cleanly on your chosen difficulty more often than not. Not every mission needs to be perfect, but you should feel stable rather than lucky.
You contribute to team flow even in random groups. Examples include pinging routes, covering reload windows, reinforcing quickly, watching for flankers, and not wasting the squad's shared resources.
You know when to skip fights. This is one of the clearest signs of growth. Once you stop measuring success by kill count, your mission efficiency rises sharply.
You can recover from mistakes without emotional spiral. Strong players still die, mistime throws, or misread a push. The difference is they reset fast instead of compounding the problem.
A useful benchmark is not "Can I survive alone?" but "Can I make the squad more stable?" If your presence lowers chaos, improves objective pace, and reduces wasted deaths, you are already beyond the true beginner stage.
This matters because Helldivers 2 has room for long-term mastery. HowLongToBeat's 65.01 hours with extras and 89.29 hours for completion Source suggest the game has plenty of runway. You do not graduate because you saw all the content. You graduate because you understand the battlefield loop well enough to make good decisions on instinct.
Related Guides
If Helldivers 2 Freedom's Beacon helped you get through the opening stretch, these are the next guides that naturally follow:
- helldivers 2 available platforms - Best early stratagem unlocks for new Helldivers
- related guide - Best beginner loadouts for bugs and bots
- a new enemy faction - Sample farming route guide for early upgrades
- related guide - Difficulty progression guide: when to move up
- legendary warbond release date - Best solo-friendly gear picks for public matchmaking
- related guide - Extraction walkthrough and late-mission defense tips
- rock galactic remnant outriders - Warbond buying priority for free and premium players
FAQ
Is Helldivers 2 Freedom's Beacon good for completely new co-op shooter players?
Yes, but only if you treat the first few sessions as a learning phase. The game is mechanically readable, yet it punishes impatience. If you stay on lower-pressure missions, learn your core stratagems, and stick close to your team, it is very manageable.
What should I unlock first in Helldivers 2?
Unlock tools that solve common mission problems first: one anti-armor option, one steady support plan, and one defensive or offensive stratagem you can use reliably. Avoid spending too early on niche gear that does not patch your actual weaknesses.
Should beginners play solo or with random squads?
Random squads are usually better for learning the full mission rhythm because you see more live situations: revives, extraction holds, bad pulls, and objective coordination. Solo play can teach self-reliance, but it also hides the teamwork habits that define the game.
Why do I keep dying at extraction?
Most beginner extraction failures come from three things: arriving disorganized, using major cooldowns too early, and standing in bad terrain. Regroup before calling the shuttle, establish angles, and save at least one strong answer for the final rush.
Are kills more important than objectives?
No. Objectives and successful extraction drive real mission progress. Kills matter only when they create space, protect the squad, or remove threats blocking the objective.
How long does it take to get comfortable with the game?
That depends on your shooter background and how often you play with coordinated teammates, but Helldivers 2 has a meaningful learning curve. With 32.43 hours listed for a main-story pace on HowLongToBeat Source, most players should expect the comfort phase to take several sessions, not just one.
Sources
- https://store.steampowered.com/app/553850/
- https://howlongtobeat.com/?q=helldivers2
- https://steamhunters.com/apps/553850
- https://steamcommunity.com/stats/553850/achievements
- https://steamspy.com/app/553850
- https://steamstore-a.akamaihd.net/news/externalpost/Gamemag.ru/1837955055358705
See also
- Helldivers 2 fan creates indoor dungeon mission concept: Beginner Guide
- Helldivers 2 How to Destroy Fuel Silos and Stockpiled Ammunition
- Helldivers 2 How to Check Galactic War Progress: Beginner Guide
- Helldivers 2 How to Get the EX-03 Prototype 3 Armor Set
- Helldivers 2 How to Fix Stuck in Drop Pod Bug
- Helldivers 2 Pages using DynamicPageList3 parser function: Beginner Guide
- Helldivers 2 Unnamed Super Earth Fighter Craft Beginner Guide
- Helldivers 2 Helldivers 1:Chief Communications Officer Beginner Guide
- Helldivers 2 Pages using Tabber parser tag Beginner Guide
- Helldivers 2 Failed to Establish Network Connection Error Beginner Guide
Screenshots



Reviewed by
HD2 Guides Editorial
Expertise: Editorial team behind HD2 Guides. Content is compiled from official patch notes, community wikis, and playthrough notes, then reviewed and updated on schedule.
Sources
Helldivers 2 Missions Guides →
Browse the complete missions collection and its focused guides.
Related Guides





🔥 Popular Guides
Helldivers 2 Tier List — Weapons, Warbonds, Armor & Stratagems
Master Helldivers 2 tier list hub: warbond rankings, armor passives, weapons, and stratagems. Jump to the warbond or armor list for your build.
Helldivers 2 Armor Tier List — Best Passives Ranked
Helldivers 2 armor tier list ranked by passive value: scout, medium, heavy, and specialist sets. Best passives for solo, co-op, and high difficulties.
Helldivers 2 Warbond Tier List — Best Warbonds to Buy First
Ranked Helldivers 2 warbond tier list: which warbonds to buy first, best value for medals, and what to skip. Updated for current meta.

Helldivers 2 Weapon Tier List: Best Weapons for Every Loadout
Compare the best Helldivers 2 weapons, budget substitutes, late-bloomers, reroll advice, and endgame loadout investments.
📋 Patch Notes & Updates
🛠️ Popular Tools
Frequently Asked Questions
Quick answers from the guide · click a question to expand.
Is Helldivers 2 Freedom's Beacon good for completely new co-op shooter players?
Yes, but only if you treat the first few sessions as a learning phase. The game is mechanically readable, yet it punishes impatience. If you stay on lower-pressure missions, learn your core stratagems, and stick close to your team, it is very manageable.
What should I unlock first in Helldivers 2?
Unlock tools that solve common mission problems first: one anti-armor option, one steady support plan, and one defensive or offensive stratagem you can use reliably. Avoid spending too early on niche gear that does not patch your actual weaknesses.
Should beginners play solo or with random squads?
Random squads are usually better for learning the full mission rhythm because you see more live situations: revives, extraction holds, bad pulls, and objective coordination. Solo play can teach self-reliance, but it also hides the teamwork habits that define the game.
Why do I keep dying at extraction?
Most beginner extraction failures come from three things: arriving disorganized, using major cooldowns too early, and standing in bad terrain. Regroup before calling the shuttle, establish angles, and save at least one strong answer for the final rush.
Are kills more important than objectives?
No. Objectives and successful extraction drive real mission progress. Kills matter only when they create space, protect the squad, or remove threats blocking the objective.
How long does it take to get comfortable with the game?
That depends on your shooter background and how often you play with coordinated teammates, but Helldivers 2 has a meaningful learning curve. With 32.43 hours listed for a main-story pace on HowLongToBeat Source, most players should expect the comfort phase to take several sessions, not just one.
Was this guide helpful?
Rate this guide so we can improve it.
Share your own tip
Found something not in the guide? Submit it below — our editors review every tip before publishing. No account required.