 Helldivers 2
Helldivers 2 Environmental Hazards Beginner Guide
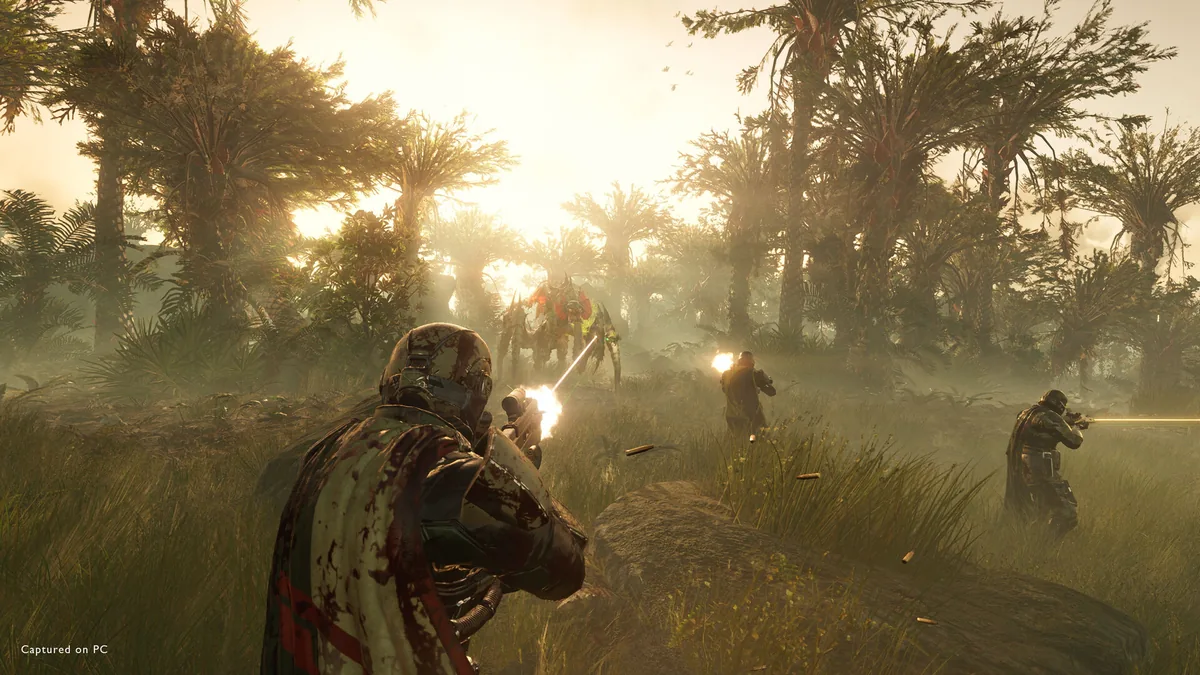
Quick Answer: Helldivers 2 environmental hazards are planet-level threats like fire tornadoes, ion storms, blizzards, sandstorms, and tremors that change visibility, movement, and stratagem reliability, so beginners should identify them before drop-in and build their loadout around survival first.
Helldivers 2 is built around hostile battlefields, not just hostile enemies. The official Steam description calls it a "fast, frantic, and ferocious third-person shooter" Source, and that pace is exactly why environmental threats punish new players so hard: they hit while you are already juggling patrols, objectives, ammo, reinforcement timers, and friendly fire. If you learn the hazard layer early, your missions become much more stable.
That matters because this is a large live co-op game with a long beginner runway. HowLongToBeat puts the main story path at roughly 32.43 hours Source, which means your first few operations are only the opening slice of the real learning curve. On top of that, Steam's official review summary currently reads "Mostly Positive" (75.1% positive) across 1151055 reviews Source, so there is a huge active player base still sorting missions by faction, terrain, and modifier knowledge. For a beginner, understanding Helldivers 2 environmental hazards is one of the fastest ways to stop feeling random and start feeling in control.
What Helldivers 2 Environmental Hazards Actually Do
Helldivers 2 environmental hazards are mission-level battlefield conditions that directly change how you move, see targets, call stratagems, and survive chip damage. They are not cosmetic weather. They are meta-relevant modifiers that alter engagement ranges, timing windows, extraction defense, and even which support weapons feel comfortable.
The simplest beginner mistake is treating hazards as background flavor. In practice, they are part of mission difficulty. A medium fight on clear ground can feel easier than a lighter mission with terrible visibility and constant displacement. If you have ever been flanked by Terminids in a sandstorm, lost a reinforce beacon in an ion storm, or had an objective defense collapse because fire spread through the zone, you have already felt how much the map itself contributes to the threat budget.
Here is the beginner-friendly way to think about the main hazard families:
| Hazard type | What it pressures | Typical beginner problem | Better response |
|---|---|---|---|
| Fire hazards and fire tornadoes | Positioning, pathing, panic movement | Running through open flame or getting boxed in during extraction | Rotate early, keep lateral escape lanes, never tunnel on one firing angle |
| Ion storms or stratagem disruption | Stratagem timing and reliability | Calling support too late and losing the window | Pre-call before contact, carry reliable primary/support options |
| Blizzards, fog, sandstorms | Visibility, target ID, long-range play | Overextending into low vision and getting surrounded | Slow tempo, tighter squad spacing, shorter sightline weapons |
| Tremors or seismic activity | Stability, aiming, traversal | Standing still on exposed terrain during stagger windows | Fight from cover, reload during calm moments, avoid edge positions |
| Extreme heat or cold style conditions | Weapon handling, stamina pacing, sustain | Taking every fight at sprint pace and arriving empty | Use controlled movement, plan resupply around objective chain |
New players should also separate hazards into two categories: predictable and disruptive. Predictable hazards are things like low visibility or temperature-style modifiers that shape the whole mission. You can plan around them from the loadout screen. Disruptive hazards are things like storms, tremors, or roving fire effects that interrupt your execution mid-fight. Those require behavior changes, not just gear changes.
This matters especially because Helldivers 2 missions often fail from compound pressure rather than one mistake. A blizzard reduces sightlines, which causes closer engagements, which increases accidental aggro, which creates reload pressure, which then makes a tremor or fire sweep lethal. Beginners often blame enemy density when the real issue was bad hazard adaptation two minutes earlier.
Your baseline rule is simple: before every drop, ask what the planet is trying to deny you. If the answer is vision, stop bringing a plan that relies on long, calm sightlines. If the answer is stratagem consistency, stop assuming your orbitals will always bail you out. If the answer is space control, start treating movement lanes as more important than kill count.
First-Hour Checklist for Hazard Survival
Your first-hour checklist for Helldivers 2 environmental hazards is to learn the pre-drop warning signs, test movement discipline under pressure, and build one reliable low-complexity loadout that still works when the map turns against you. The first sixty minutes should not be about speed-clearing operations. It should be about pattern recognition.
Use this sequence in your opening sessions:
- Read the operation and planet modifiers before every deployment.
- Identify whether the mission threatens visibility, movement, fire spread, or stratagem use.
- Pick one all-purpose primary you can handle under pressure rather than constantly swapping.
- Bring at least one stratagem that solves space control, such as crowd denial or emergency area cleanup.
- Bring one sustain tool, usually resupply-aware support or defensive utility, instead of loading four aggressive call-ins.
- During the first mission, deliberately stop moving twice to watch how the hazard behaves.
- During the second mission, practice rotating around objectives instead of standing on one strong-looking angle.
- During extraction, prioritize safe ground and escape paths over maximizing kills.
- After each mission, ask what actually caused your deaths: enemies, terrain, visibility loss, or stratagem delay.
That checklist works because beginners tend to overload themselves with unlock envy. They see other players running advanced support weapons, heavy armor setups, or aggressive barrage chains, then copy the surface without understanding the operating conditions. Hazard play punishes that immediately. A beginner with a basic but stable setup will outperform a flashy setup when the map starts disrupting vision, timing, or movement.
Your first hour should also include three practical drills:
Drill 1: Visibility Discipline
Play one mission where your only goal is not to overchase through poor visibility. Examples include pushing through a sandstorm after a retreating patrol, following muzzle flashes into blizzard whiteout, or sprinting downhill through fog because you think the objective is "close enough." Instead, stop, re-center, and move by short bursts between clear landmarks.
Drill 2: Stratagem Timing
Play one mission where you call support early, not late. Beginners often wait until the fight is already collapsing, then discover the hazard window or enemy pressure denies the stratagem value. Practice dropping resupply before the last magazine, area denial before the swarm touches you, and reinforcement beacons from safe terrain rather than from the center of chaos.
Drill 3: Extraction Pathing
Play one extraction where you care more about the route than the hold point. Fire hazards, incoming patrol angles, and visibility loss turn extraction into a map-reading test. Notice where cliffs, rocks, wreckage, and open ground create dead zones. If you can identify one fallback lane and one rally point, you are already ahead of most first-hour players.
As a side note on progression scale, Helldivers 2 has broad long-term retention: SteamSpy estimates ownership at 20,000,000 .. 50,000,000 Steam accounts Source. That wide player base is one reason beginner misinformation spreads so easily. Simple habits like reading modifiers and planning around hazards give you a real edge early.

You might also like
- Helldivers 2 fourth faction alternative multiple enemies planet why Beginner Guide
- Helldivers 2 Which enemy faction do you enjoy fighting in: Beginner Guide
- Helldivers 2 Super Destroyer Screen Display Interactive Update: Beginner Guide
- Helldivers 2 Ground All Terrain Extraction Rig GATER Beginner Guide
- Helldivers 2 Reviewed by Game878Helldivers 2Read Full Review Story5Gameplay9Visuals9Audio8Value forMoney8 Beginner Guide
Resource Priority Order for New Players
Your best resource priority order is to invest first in tools that make missions more stable under bad conditions, then in broad-use upgrades, and only after that in niche unlocks or comfort purchases. In Helldivers 2, the beginner trap is spending for fantasy loadouts before you have the fundamentals to survive hostile planets.
Since live economy values and optimal unlock paths can shift, the safest meta rule is to prioritize by function:
| Priority | What to focus on | Why it matters against hazards | Examples of good beginner logic |
|---|---|---|---|
| 1 | Reliable combat and sustain unlocks | Bad weather and disruption punish fragile setups | Weapons you can aim under stress, support that does not require perfect setup |
| 2 | Stratagems with broad defensive value | Space control saves runs when vision or terrain turns messy | Area denial, emergency anti-armor, dependable resupply rhythm |
| 3 | Ship upgrades that improve mission consistency | Small efficiency gains stack over many drops | Faster support cadence, better sustain flow, smoother team uptime |
| 4 | Specialized counters | Strong, but often map- or faction-dependent | Dedicated anti-heavy or niche utility for known operations |
| 5 | Cosmetic or low-impact picks | No effect on beginner survival | Style choices after your core kit feels stable |
In practical terms, spend with these rules:
- Unlock gear that remains useful against both Automatons and Terminids.
- Favor stratagems that solve common failures: getting overrun, lacking ammo, or failing to clear a hard point.
- Hoard premium or limited-feeling currency until you know your preferred role.
- Avoid buying several overlapping weapons that all fill the same range band.
- Upgrade for consistency before novelty.
New players often ask whether they should spend fast or save hard. The answer is selective spending. If a purchase immediately improves mission uptime across multiple planets, it is worth strong consideration. If it only shines in a narrow matchup or assumes coordinated team play, it can wait. This is especially true on hazard-heavy operations, where flexibility beats specialization.
For example, a beginner who buys into a very stationary damage plan may feel strong on clean terrain but weak in tremors, low visibility, or fire-heavy maps. By contrast, a loadout built around mobile self-sufficiency, ammo discipline, and one panic-button stratagem tends to stay online across more mission types. That translates into better sample extraction, smoother objective completion, and fewer failed deployments.
Another good beginner principle is to separate "hoard" from "ignore." You are not avoiding progression. You are delaying narrow investments until your playstyle stabilizes. If you enjoy anti-armor play, stealth scouting, or turret-heavy defense, that preference will become obvious after several operations. Spend once you can explain why the unlock solves a recurring problem you actually experience.
If you want to broaden progression planning after this hazard-focused article, the natural follow-ups are a legendary warbond release date on early stratagem unlock order and a related guide on best beginner loadouts by faction. Those pair well because resource choices only make sense relative to the kind of missions you expect to run.
How to Read the Battlefield and Adapt Mid-Mission
The best way to handle Helldivers 2 environmental hazards mid-mission is to treat the map as a second enemy faction and constantly update your plan as terrain, visibility, and event timing change. Beginners improve fastest when they stop asking, "Can we win this fight?" and start asking, "Can we win this fight here, right now, under this condition?"
You can read a mission in three layers:
- Strategic layer: what the planet modifier says before you land.
- Tactical layer: what the immediate terrain gives you, such as ridges, choke points, or dead ground.
- Tempo layer: what is happening right now, such as storm onset, fire movement, stagger windows, or incoming patrol convergence.
Each layer changes your correct decision. For example:
- On a low-visibility map, a radar station or uplink approach should be slower and more deliberate than on open clear terrain.
- During tremors, exposed reloads and long scoped shots become lower value than short repositioning and cover-based burst fire.
- In fire-heavy zones, defending a terminal from one side can backfire if your escape route gets cut off.
The key adaptation habits are simple but non-negotiable:
Keep Fights Short
Long fights are where hazards compound. If a patrol pulls extra enemies, weather worsens, and your resupply cycle slips, even a clean opening turns into a scramble. Use decisive damage, then rotate. Do not farm one spot unless the objective requires it.
Respect Terrain More Than Kills
A slightly worse angle with a safe retreat is stronger than a high-kill angle with no exit. This is especially true during extraction, geological points of interest, and defend-style objectives where hazards can force sudden movement.
Pre-Move Before the Crisis
The best rotation happens before you are forced. If a fire line is drifting, if visibility is collapsing, or if enemies are starting to wrap your flank, leave early. Beginners usually move one beat too late.
Rebuild Cohesion After Every Disruption
Storms, ragdolls, and panic retreats split squads. As soon as the disruption passes, regroup. Shared lines of fire and cleaner reinforcement spots matter more than squeezing one more isolated kill.
This section is where many players start feeling the co-op design click. Helldivers 2 is a 2024 cooperative multiplayer third-person shooter developed by Arrowhead Game Studios and published by Sony Interactive Entertainment Source, and the "cooperative" part is exactly why hazard knowledge scales so hard. One player who reads the environment well can stabilize the entire squad by choosing safer revive spots, better resupply timing, and cleaner extraction positions.
As a final practical rule, adapt your engagement range to the hazard. In clear conditions, you can thin threats earlier and more comfortably. In storms or blizzards, assume closer fights, faster target acquisition needs, and higher friendly-fire risk. That one adjustment alone prevents a large share of beginner collapses.
Common Mistakes
The most common beginner mistakes with Helldivers 2 environmental hazards come from treating weather and terrain as secondary instead of mission-defining. If you fix these habits early, your success rate climbs quickly.
Mistake 1: Ignoring planet modifiers before dropping.
Players skip the briefing because they want to queue faster or assume all maps play roughly the same.
Fix: Read the operation screen every time and set one loadout rule before launch, such as "shorter-range weapons for low visibility" or "less stratagem dependence for disruption-heavy missions."Mistake 2: Standing still on objectives for too long.
New players tunnel on terminals, uploads, or defense circles and forget that hazards keep evolving around them.
Fix: Clear in short bursts, then rotate your angle. On terminals, one player interacts while others maintain safe lanes and watch for hazard-driven flank routes.Mistake 3: Calling stratagems only after the fight is already lost.
Beginners want maximum value, so they hold support too long and then get denied by enemy pressure or poor terrain.
Fix: Use stratagems proactively. Drop area control before the swarm touches your line, and call resupply before everyone is dry.Mistake 4: Sprinting through poor visibility to "keep momentum."
Sandstorms, fog, or blizzards make players feel slow, so they compensate by overpushing.
Fix: Move in short measured bursts from landmark to landmark. Stop often enough to re-establish bearings and squad spacing.Mistake 5: Fighting fire hazards like they are normal terrain.
Players panic, path through flames, or defend from positions that will become traps.
Fix: Watch where the fire is moving, not just where it is now. Keep lateral exits open and rotate earlier than feels necessary.Mistake 6: Using one universal playstyle against every hazard.
Many beginners copy a favorite support weapon or armor concept and force it everywhere.
Fix: Adjust by mission. A setup that thrives on open sightlines may feel awful in storms; a static defense plan may collapse in fire-heavy environments.Mistake 7: Splitting too far from the squad during weather disruption.
Reduced vision makes solo looting or side-objective greed much riskier than it looks.
Fix: Tighten formation during hazards and only break off when visibility and patrol flow are favorable.Mistake 8: Treating extraction like a final stand instead of a positioning problem.
Beginners often plant on the obvious center point and get boxed in by both enemies and the environment.
Fix: Choose extraction ground with fallback space, cover, and at least one clear route to the shuttle zone.
These mistakes persist because the game's pace hides cause and effect. When you die in a sandstorm while reloading during a tremor after a late resupply, it feels chaotic. In reality, the loss usually began with one bad assumption about the environment thirty seconds earlier.
For a rough measure of how much mastery the game expects over time, HowLongToBeat's 65.01 hours with extras and 89.29 hours for completion Source are useful perspective. Beginners do not need to know everything immediately. They do need to stop repeating the same environmental errors.
Pro Tips
The strongest pro tips for Helldivers 2 environmental hazards are about tempo control, not just survivability. Once you can stay alive, the next step is making hazards work for you or at least reducing how much they tax your execution.
Tip 1. Pre-rotate before extraction gets crowded
If extraction is on open ground and you see fire movement, visibility collapse, or a bad patrol angle developing, shift your hold position early. The best extraction teams are rarely standing on the exact center the whole time; they orbit around a defendable lane and re-enter when the shuttle timing demands it.
Tip 2. Use low-visibility windows to break contact
Storms and blizzards are not only dangerous; they also reduce enemy clarity and can help you disengage. If a fight is turning into a resource sink, stop feeding it. Reposition toward the objective or safer terrain while the map is naturally obscuring lines.
Tip 3. Save one clean answer for panic armor checks
Hazards often make anti-armor execution harder by disrupting aim, spacing, or line of sight. Keep one dependable answer in reserve rather than burning everything on the first wave. This matters on mixed-pressure moments like Chargers entering during poor visibility or Automaton heavies arriving while the squad is already displaced.
Tip 4. Place resupply where you plan to retreat, not where you stand now
Beginners drop resupply at their feet in the current fight. Experienced players drop it on the next stable piece of terrain. On hazard maps, your position may become bad very quickly, so think one rotation ahead.
Tip 5. Fight diagonally across terrain, not straight backward
Backing straight away from bugs or bots often walks you into fire, cliffs, mines, or unseen patrols in poor visibility. Diagonal movement preserves line of fire while opening alternate lanes. This small pathing change is especially strong during blizzards, sandstorms, and tremor-prone areas.
Tip 6. Reassign roles when the map invalidates the original plan
A player who was scouting or anchoring long range on a clear map may need to become a close escort once visibility drops. Hazard adaptation is a squad skill. If the environment changes, roles should change with it.
Tip 7. Use objectives as cover anchors, not bunkers
Many mission structures, consoles, wrecks, and terrain features can briefly shield you from incoming pressure. They are useful anchors for short bursts of control, but they become death traps if you glue yourself to them during spreading fire or collapsing sightlines. Touch, use, and rotate.
These advanced habits are what separate a player who merely survives from a player who stabilizes runs for everyone else. They also tie into broader progression. SteamHunters tracks 38 achievements and 0 currently unobtainable achievements Source, and many of the harder completions naturally become easier once your hazard play improves, because cleaner movement and timing support every mission type.
When You Are No Longer a Beginner
You are out of the beginner phase when Helldivers 2 environmental hazards stop feeling random and start feeling readable enough that you can plan around them before and during a mission. Graduation is less about a specific difficulty number and more about repeatable decision quality under pressure.
Here are the clearest thresholds:
- You check operation modifiers automatically before queueing.
- You change loadouts based on visibility, fire risk, or stratagem disruption without needing reminders.
- You can explain why a mission failed in terms of terrain, timing, and squad spacing rather than just saying it was chaotic.
- You survive extractions by repositioning, not by hoping the shuttle arrives first.
- You know when to disengage, regroup, and re-enter instead of forcing every fight.
- You revive and reinforce from safe terrain rather than the center of collapse.
- You contribute even when your preferred plan is denied by the environment.
A strong practical benchmark is this: if you can enter an unfamiliar hazard map with a basic squad, identify the main environmental threat in the opening minutes, and adjust your tempo accordingly, you have moved beyond the true beginner phase. At that point, the game opens up. You stop learning only "what hurts" and start learning "what works here."
You also begin to understand the larger mission economy. Sample runs, side-objective value, and faction-specific tactics all become easier once you are no longer leaking deaths to the map itself. That progression is part of why Helldivers 2 maintains broad appeal. Metacritic aggregates a critic score of 82/100 across 69 professional reviews Source, and a lot of that reception comes from how the game layers systems together rather than relying on raw shooting alone.
If you want a concrete self-test, run three different hazard-heavy operations in a row and review the outcomes:
- Did you adapt your loadout each time?
- Did you die to the environment less than to enemies?
- Did you preserve mission tempo instead of getting stuck in endless fights?
If the answer is usually yes, you are no longer in the first-step learning bracket.
Related Guides
The best next-step guides after a hazard primer are the ones that turn survival knowledge into stronger progression, loadout building, and mission routing.
- helldivers 2 available platforms Helldivers 2 Best Beginner Stratagems
- related guide Helldivers 2 Best Early Weapons and Loadouts
- related guide Helldivers 2 Samples Farming Walkthrough
- a new enemy faction Helldivers 2 Terminids Beginner Matchup Guide
- related guide Helldivers 2 Automatons Beginner Matchup Guide
- rock galactic remnant outriders Helldivers 2 Best Armor Passives for New Players
- related guide Helldivers 2 Difficulty Progression Guide
FAQ
What are the most dangerous environmental hazards for beginners in Helldivers 2?
The most dangerous hazards for beginners are usually the ones that hide information or deny recovery, especially low-visibility weather, spreading fire, and stratagem disruption. New players can often handle direct combat until the map takes away sightlines or escape routes. That is why sandstorms, blizzards, fire-heavy conditions, and ion-style interference feel worse than they first appear.
Do environmental hazards affect both Terminid and Automaton missions the same way?
Environmental hazards affect both factions, but not with identical pressure. Against Terminids, poor visibility and bad pathing are often worse because enemies can close distance fast and surround you. Against Automatons, disruption to line of sight and stratagem timing can be brutal because ranged pressure and suppression punish exposed repositioning. The same storm can create different failure points depending on the faction.
Should I change my loadout for every planet modifier?
You do not need a full rebuild every mission, but you should make at least one meaningful adjustment when a hazard clearly attacks your normal plan. Examples include trimming overly long-range gear for foggy maps, reducing reliance on fragile setup weapons in tremor zones, or bringing more self-sufficient sustain when stratagem timing looks awkward. Small changes are usually enough for beginners.
Why do I keep dying at extraction during hazardous missions?
Extraction deaths usually come from defending the wrong ground for too long. Players stand on the obvious center point, let patrols converge, then get trapped by fire, visibility loss, or bad retreat angles. The fix is to hold nearby safe terrain, maintain a fallback lane, and only retake the exact shuttle zone when the timing demands it.
Are environmental hazards more important than enemy difficulty?
For beginners, they often are. A lower-threat enemy composition on a brutal hazard map can feel much harder than a stronger enemy group on clean terrain. Hazards change your information, movement, and access to support. If those three things break down, even routine fights snowball.
How long does it take to get comfortable with hazard-heavy missions?
It depends on how deliberately you practice, but most players improve once they stop treating deaths as random and start reviewing what the map denied them. Since HowLongToBeat lists the main story path at 32.43 hours Source, it is reasonable that real comfort with environmental play takes several sessions rather than one night. Focus on one adjustment at a time: reading modifiers, timing support earlier, and rotating before hazards force you out.
Sources
- https://store.steampowered.com/app/553850/
- https://howlongtobeat.com/?q=helldivers2
- https://steamspy.com/app/553850
- https://en.wikipedia.org/wiki/Helldivers_2
- https://steamhunters.com/apps/553850
- https://www.metacritic.com/game/helldivers-2
See also
- Helldivers 2 fan creates indoor dungeon mission concept: Beginner Guide
- Helldivers 2 How to Destroy Fuel Silos and Stockpiled Ammunition
- Helldivers 2 How to Check Galactic War Progress: Beginner Guide
- Helldivers 2 How to Get the EX-03 Prototype 3 Armor Set
- Helldivers 2 How to Fix Stuck in Drop Pod Bug
- Helldivers 2 Pages using DynamicPageList3 parser function: Beginner Guide
- Helldivers 2 Unnamed Super Earth Fighter Craft Beginner Guide
- Helldivers 2 Helldivers 1:Chief Communications Officer Beginner Guide
- Helldivers 2 Pages using Tabber parser tag Beginner Guide
- Helldivers 2 Failed to Establish Network Connection Error Beginner Guide
Screenshots



Reviewed by
HD2 Guides Editorial
Expertise: Editorial team behind HD2 Guides. Content is compiled from official patch notes, community wikis, and playthrough notes, then reviewed and updated on schedule.
Sources
Helldivers 2 Missions Guides →
Browse the complete missions collection and its focused guides.
Related Guides







🔥 Popular Guides
Helldivers 2 Tier List — Weapons, Warbonds, Armor & Stratagems
Master Helldivers 2 tier list hub: warbond rankings, armor passives, weapons, and stratagems. Jump to the warbond or armor list for your build.
Helldivers 2 Armor Tier List — Best Passives Ranked
Helldivers 2 armor tier list ranked by passive value: scout, medium, heavy, and specialist sets. Best passives for solo, co-op, and high difficulties.
Helldivers 2 Warbond Tier List — Best Warbonds to Buy First
Ranked Helldivers 2 warbond tier list: which warbonds to buy first, best value for medals, and what to skip. Updated for current meta.

Helldivers 2 Weapon Tier List: Best Weapons for Every Loadout
Compare the best Helldivers 2 weapons, budget substitutes, late-bloomers, reroll advice, and endgame loadout investments.
📋 Patch Notes & Updates
🛠️ Popular Tools
Frequently Asked Questions
Quick answers from the guide · click a question to expand.
What are the most dangerous environmental hazards for beginners in Helldivers 2?
The most dangerous hazards for beginners are usually the ones that hide information or deny recovery, especially low-visibility weather, spreading fire, and stratagem disruption. New players can often handle direct combat until the map takes away sightlines or escape routes. That is why sandstorms, blizzards, fire-heavy conditions, and ion-style interference feel worse than they first appear.
Do environmental hazards affect both Terminid and Automaton missions the same way?
Environmental hazards affect both factions, but not with identical pressure. Against Terminids, poor visibility and bad pathing are often worse because enemies can close distance fast and surround you. Against Automatons, disruption to line of sight and stratagem timing can be brutal because ranged pressure and suppression punish exposed repositioning. The same storm can create different failure points depending on the faction.
Should I change my loadout for every planet modifier?
You do not need a full rebuild every mission, but you should make at least one meaningful adjustment when a hazard clearly attacks your normal plan. Examples include trimming overly long-range gear for foggy maps, reducing reliance on fragile setup weapons in tremor zones, or bringing more self-sufficient sustain when stratagem timing looks awkward. Small changes are usually enough for beginners.
Why do I keep dying at extraction during hazardous missions?
Extraction deaths usually come from defending the wrong ground for too long. Players stand on the obvious center point, let patrols converge, then get trapped by fire, visibility loss, or bad retreat angles. The fix is to hold nearby safe terrain, maintain a fallback lane, and only retake the exact shuttle zone when the timing demands it.
Are environmental hazards more important than enemy difficulty?
For beginners, they often are. A lower-threat enemy composition on a brutal hazard map can feel much harder than a stronger enemy group on clean terrain. Hazards change your information, movement, and access to support. If those three things break down, even routine fights snowball.
How long does it take to get comfortable with hazard-heavy missions?
It depends on how deliberately you practice, but most players improve once they stop treating deaths as random and start reviewing what the map denied them. Since HowLongToBeat lists the main story path at 32.43 hours Source, it is reasonable that real comfort with environmental play takes several sessions rather than one night. Focus on one adjustment at a time: reading modifiers, timing support earlier, and rotating before hazards force you out.
Was this guide helpful?
Rate this guide so we can improve it.
Share your own tip
Found something not in the guide? Submit it below — our editors review every tip before publishing. No account required.