 Helldivers 2
helldivers 2 builds illuminate: Best Anti-Illuminate Loadouts
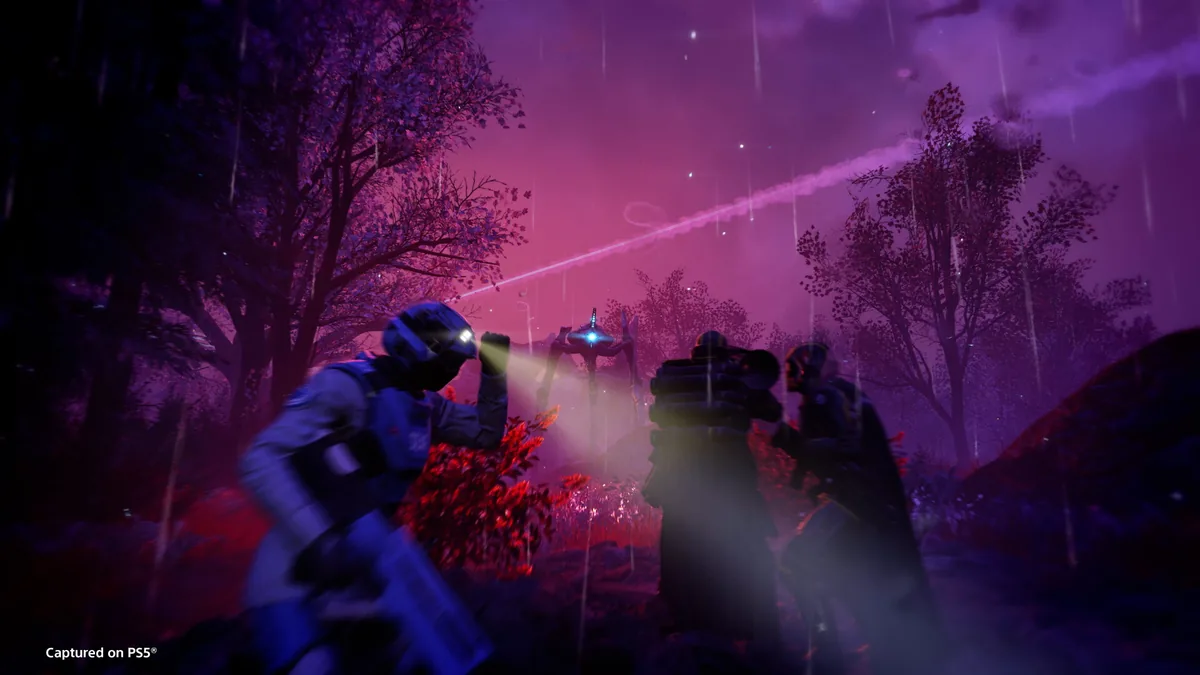
Quick Answer: The best helldivers 2 builds illuminate are fast add-clear plus anti-armor loadouts: pair a reliable crowd-clear primary with stratagems that break shields, delete Overseers, and answer Tripods without overcommitting to one range band.
Build Identity: What This Loadout Does Best
This build is an anti-Illuminate flex setup built to survive pressure, clear Voteless fast, and still have a credible answer to armored targets and shielded objectives. Its core identity is “mobile control”: you are not trying to stat-check every enemy with one weapon, and you are not playing pure support either. Instead, you create breathing room by deleting trash mobs quickly, then pivoting into armor break and objective pressure when a Tripod, shielded ship, or heavy patrol appears. In the current meta, that mixed profile matters because Illuminate fights often escalate from manageable to overwhelming in a very short window.
The easiest way to think about this build is as a squad anchor that keeps the mission moving. If your team is getting swarmed by Voteless, your primary and sidearm should stabilize the lane immediately. If an Overseer pushes at close range, you need a weapon that can punish it without burning all your resources. If a Tripod or shielded enemy structure shows up, your stratagem package should prevent that target from dictating the fight. That is why helldivers 2 builds illuminate tend to favor weapons with either strong penetration, strong elemental clear, or dependable sustained output rather than single-purpose gimmicks.
Playstyle Summary
- Primary job: clear Voteless and soften elite targets before they collapse your formation.
- Secondary job: keep pressure off teammates so they can interact with objectives, reload, or reposition.
- Tertiary job: have one stratagem or support weapon reserved for heavy threats and shielded units.
A practical example is a player running the ARC-12 Blitzer into clustered chaff, while the team’s support stratagems handle priority targets. Another example is the Torcher used to burn through Voteless and close-range Overseers, then swapped off when a Tripod appears. A third example is a Liberator Penetrator / Adjudicator-style precision profile paired with a supply economy tool so you can keep shooting during longer skirmishes. Each version fits the same build identity: stabilize the fight first, then win the objective.
The biggest strength of this setup is adaptability. The biggest weakness is over-specialization. If you bring only close-range clear, Illuminate armor can outlast you. If you bring only anti-armor, Voteless pressure will suffocate your team. This guide focuses on a balanced anti-Squid frame so you can handle the full mission loop instead of only one fight pattern.
Stat and Attribute Priorities
These priorities should be read as build-order priorities for gear, armor traits, and your overall loadout shape rather than traditional RPG stats, because Helldivers 2 rewards function, economy, and handling more than raw character numbers. For helldivers 2 builds illuminate, the order matters because the Illuminate punish slow swaps, poor ammo efficiency, and anyone who cannot recover from being surrounded.
- Mobility and repositioning — You need to break line of sight quickly when shielded enemies, Tripods, or pressure waves force a reset; mobility is often more valuable than raw damage in Illuminate missions.
- Ammo economy / sustain — Illuminate fights can run long, and weapons like the Adjudicator are specifically ammo-hungry, so sustain determines whether you remain effective after the first engagement.
- Close-range crowd clearing — Voteless are the most common source of mission collapse, so your build must delete swarms without requiring perfect aim or long windups.
- Anti-armor access — A build that cannot meaningfully threaten Tripods or other heavy units will stall out on higher pressure moments.
- Shield-breaking or shield-bypassing pressure — Anything that deals well with shielded Illuminate units or shielded structures gets elevated in value because it prevents wasted time and wasted ammo.
- Hands-off utility — Stratagems that continue to work while you move, revive, or kite are premium because Illuminate missions frequently punish stationary play.
Why These Priorities Matter
A common mistake is to treat Illuminate gear selection like a pure DPS check. That approach fails because the faction creates uneven fight states: you may be mowing down Voteless one second and then forced to respond to a dangerous elite or a protected objective the next. The build has to remain useful across those transitions. For example, the ARC-12 Blitzer is valuable because it supplies effortless close-range pressure against clustered enemies. The Torcher is excellent when the battlefield is tight and you need to keep pressure on Voteless or nearby Overseers, but it is not enough by itself against Tripods. The Adjudicator works well when you want stronger accuracy and armor-piercing output, but only if you respect its ammo appetite and run enough sustain to support it.
Priority Table
| Priority | What to look for | Why it matters vs Illuminate |
|---|---|---|
| 1. Mobility | Lightweight movement, fast repositioning, low downtime | Lets you escape swarm collapse and reset angles |
| 2. Sustain | Ammo support, refill access, low waste | Keeps your damage online during longer missions |
| 3. Chaff clear | Splash, chaining, fire, or high-volume output | Deletes Voteless before they overrun the squad |
| 4. Armor answer | Penetration, heavy damage, or dedicated anti-armor | Stops Tripods and other durable threats from taking over |
| 5. Shield pressure | Burst, elemental tick, or focused sustained fire | Prevents shielded units and structures from stalling the push |
The practical takeaway is simple: if a piece of gear helps you survive a second encounter, it is usually more valuable than gear that only looks impressive in a vacuum. The Illuminate often turn one mistake into several.

You might also like
- Helldivers 2 Primary Weapon Tier List
- Helldivers 2 Warbond Tier List
- Helldivers 2 weapon tier list
- Helldivers 2 Tier List Secondary
- Helldivers 2 Build Automaton: Best Loadout and Tactics
Skill Rotation and Ability Priority
Your ability priority is to open with crowd control, preserve your anti-armor cooldowns for elites, and avoid wasting stratagems on targets that your primary could handle. Because Helldivers 2 is a co-op shooter rather than a classic rotation MMO, think of this section as your fight flow: what to press first, what to save, and how to sequence actions under pressure.
Scout the wave and tag priority targets
Identify Voteless density, Overseer threats, and any Tripod or objective shield before you commit resources. If the field is already crowded, do not start with your heaviest answer.Use your primary to thin chaff immediately
The ARC-12 Blitzer can act like a pressure valve by zapping clustered enemies; the Torcher can burn through a lane; the Adjudicator can one-tap Voteless with disciplined shots. Your first goal is to stop the swarm from dictating movement.Save heavy stratagems for shielded or armored targets
If you open with your strongest damage tool on Voteless, you risk having nothing ready for Tripods or a dangerous push through a shielded position. This is especially important when your team is split or reviving.Reposition after each major commit
Once the first target falls or the first wave breaks, move. Illuminate pressure often comes from angles, not just raw numbers, so standing still after a successful kill is how good runs become messy.Reload, resupply, and re-center before the next push
If you use an ammo-hungry weapon like the Adjudicator, make your sustain action part of the rotation, not an emergency reaction. That is where the Supply Pack or nearby ammo boxes matter.
Loadout Priority Table
| Fight state | Best action | Example tool |
|---|---|---|
| Opening swarm | Clear chaff fast | ARC-12 Blitzer, Torcher |
| Mid-fight elite | Commit damage to priority target | Anti-armor stratagem, precision fire |
| Shield pressure | Sustain fire or shield-breaking pressure | Penetrating primary, team focus |
| Reset window | Reposition and reload | Mobility, cover, Supply Pack |
Practical Rotation Examples
- Example 1: Blitzer opener — Fire into the densest Voteless pack, force spacing, then swap to a heavy tool when the lane opens.
- Example 2: Torcher lane clear — Burn the corner, keep Overseers off the squad, then disengage when a Tripod appears.
- Example 3: Adjudicator sustain — Use accurate bursts on Voteless, resupply before empty, and let your stratagems cover what the rifle does not.
This is not a fixed combo list because squad composition changes the order. If your teammates are already on add-clear, you can hold more ammo for elites. If they are carrying anti-armor, you can lean harder into clearing. The priority system remains the same: do not spend premium resources on trivial targets.
Gear and Loadout Table
This loadout works best when every slot has a clear job: one slot for swarm control, one for emergency defense or armor, and one for sustain. The exact picks can shift depending on what you own, but the structure should remain consistent.
| Slot | Item | Reason |
|---|---|---|
| Primary | ARC-12 Blitzer | Excellent pressure into clustered Illuminate fights and very strong for close-range crowd control |
| Primary alternative | Torcher | Ideal for burning Voteless and threatening nearby Overseers at short range |
| Primary alternative | Adjudicator | Armor-piercing and capable of one-hit Voteless kills with clean aim, but ammo-hungry |
| Sidearm | High-safety backup pistol of your choice | Covers reload gaps and lets you finish weak targets without burning main ammo |
| Stratagem 1 | Supply Pack | Supports ammo-hungry weapons like the Adjudicator and extends mission uptime |
| Stratagem 2 | Dedicated anti-armor support | Answers Tripods and other heavy threats when your primary is not enough |
| Stratagem 3 | Area denial or burst damage | Helps clear pressure spikes, especially when the squad is pinned |
| Stratagem 4 | Flexible utility slot | Use for revives, map control, or an extra answer to mission-specific pressure |
Why These Picks Fit the Illuminate
The ARC-12 Blitzer stands out because Illuminate missions often reward weapons that behave consistently under chaos. Its biggest value is that it gives you strong close-range output without requiring you to babysit ammo management. The Torcher is particularly good when you know you will be fighting through narrow lanes or repeatedly resetting enemy pushes. It is excellent at handling Voteless and can pressure Overseers at short range, but it will not solve every problem; it struggles against Tripods and does not meaningfully deal with shielded ship protection on its own.
The Adjudicator sits in a different niche. It is the more disciplined option: accurate, reliable, and capable of deleting Voteless efficiently, but it is also ammo-hungry. That is exactly why the Supply Pack is such a natural partner. If you choose the Adjudicator, you should expect to play a little more conservatively with shot placement and resupply timing. The upside is that in certain scenarios it becomes arguably the best primary, especially when your stratagems cover the weaknesses that the gun cannot cover by itself.
Recommended Loadout Matrix
| Build variant | Primary | Support tool | Best use case |
|---|---|---|---|
| Safe all-rounder | ARC-12 Blitzer | Anti-armor stratagem | Pugs, unknown mission pressure, mixed squads |
| Aggressive lane-clear | Torcher | Area denial | Tight maps, heavy Voteless waves, close objective defense |
| Precision sustain | Adjudicator | Supply Pack | Players who value ammo efficiency through support economy |
Armor and Passive Direction
Because Illuminate pressure often comes from sudden collapses, armor should support recovery and movement rather than force you into a static gunline. If you have a choice between feeling tanky and feeling able to reposition, choose repositioning more often than not. A dead Helldiver does zero damage, and a perfectly armored player who cannot rotate still loses fights to flanks and stagger chains.
The best way to think about gear selection is not “what is the strongest single item?” but “what keeps the whole loadout coherent?” If your primary is weak to long fights, your stratagems must cover sustain. If your primary is excellent against Voteless, one of your other slots must stop Tripods from becoming a hard stop. If your team already has enough anti-armor, you can lean harder into add-clear and utility.
Counters and Hard Matchups
The hard counters to this build are extreme range punishment, sustained anti-armor pressure, and scenarios where your team fails to control swarms or shields early. Illuminate missions are especially dangerous when they force you to fight on multiple fronts at once, because your build is designed to be flexible rather than omnipotent.
What Shuts This Build Down
- Tripod-heavy engagements without backup anti-armor
If your loadout is too focused on chaff clear, a Tripod can absorb too much attention and timing. - Shielded targets or protected enemy structures
Weapons like the Torcher can feel amazing against Voteless and then underperform hard when a shield becomes the real problem. - Ammo starvation during long missions
The Adjudicator can lose its edge fast if you ignore resupply timing or overfire into cheap targets. - Open-field fights with little cover
If you cannot reset safely, Illuminate pressure compounds quickly and your build has less room to recover. - Poor squad spacing
Even strong anti-Illuminate weapons struggle when everyone stacks too tightly and multiplies the value of enemy pressure.
How to Adapt
Bring at least one dedicated answer to heavy units
If your primary is the ARC-12 Blitzer or Torcher, make sure another slot can actually threaten Tripods instead of hoping the team covers everything.Treat shielded targets as a team assignment
Do not tunnel vision them alone. The safest play is to combine your pressure with a teammate’s burst or utility and end the problem quickly.Swap to the Adjudicator only when you can support it
If your squad lacks ammo economy or resupply control, you may be better off with the Blitzer. The Adjudicator is excellent when fed, mediocre when starved.Play corners and break sightlines
Illuminate missions punish exposed lanes. Use terrain to isolate Voteless and prevent Tripods from firing freely into the team.Use the mission flow, not ego duels
If a target is not your job, let the teammate with the better answer handle it while you keep the lane safe.
Matchup Table
| Problem matchup | Why it is hard | Best adaptation |
|---|---|---|
| Tripod pressure | High durability can outlast add-clear builds | Add dedicated anti-armor stratagems |
| Shielded structures | Some primaries waste time into shields | Focus team fire and swap to better utility |
| Dense Voteless swarms | Can overwhelm mobility and reload windows | Use Blitzer/Torcher-style chaff clear |
| Ammo-drain missions | Ammo-hungry weapons lose tempo fast | Run Supply Pack and resupply proactively |
If you find yourself losing because the build “feels weak,” the problem is often sequencing rather than raw power. The Illuminate expose bad priorities quickly. They are a faction where one wasted magazine, one early stratagem, or one bad angle can snowball into mission failure.
Budget vs Endgame Variant
The budget version of this build should prioritize availability, simplicity, and low regret, while the endgame version should focus on consistency, ammo support, and better answers to heavy enemies. Since loadout ownership varies by player progression, the goal is to give you a starter route that still plays correctly before upgrading into the more polished version.
Budget Starter Variant
- Primary: a reliable general-purpose weapon you already own and can aim comfortably with
- Backup: a safe sidearm for finishing weak enemies
- Stratagem core: one ammo support tool if available, one damage tool, one utility slot
- Play pattern: stay near teammates, clear Voteless first, and avoid forcing solo hero plays
A budget player can absolutely emulate the anti-Illuminate plan without the premium feeling. The main thing is to stay disciplined about target selection. If you do not own the ideal weapon yet, pick the gun that lets you control recoil, hit consistently, and avoid running dry mid-fight. If your available options are between an awkward high-damage tool and a dependable mid-tier weapon, choose the dependable one. Illuminate missions reward consistency more than flashy spikes.
Endgame Variant
- Primary: ARC-12 Blitzer for effortless close-range control, or Adjudicator if you can support ammo economy
- Support: Supply Pack if you run ammo-hungry tools
- Damage balance: one stratagem for swarms, one for heavies, one flex slot for mission-specific pressure
- Play pattern: convert every calm moment into spacing, resupply, and a clean target reset
The endgame version gets stronger because each slot solves a different problem without overlapping too much. The Blitzer handles the kind of pressure that causes panic. The Adjudicator rewards clean mechanics and support play. The Torcher is a strong specialist choice when map geometry works in your favor. The support slot then patches the most obvious weakness in your chosen primary.
Budget vs Endgame Comparison
| Category | Budget starter | Endgame version | Why the upgrade matters |
|---|---|---|---|
| Primary | Any dependable generalist weapon | ARC-12 Blitzer / Adjudicator / Torcher | Better matchup spread and clearer role identity |
| Sustain | Whatever ammo is available | Supply Pack if needed | Prevents tempo loss in long fights |
| Anti-armor | Basic team coverage | Dedicated heavy answer | Stops Tripods from stalling the mission |
| Ease of use | Simple and forgiving | Higher ceiling with more decision-making | Rewards smarter target sequencing |
If you are still building out your arsenal, do not force the endgame template too early. The budget route wins by staying clean, especially in public squads where coordination is inconsistent. Once you own the right tools, the endgame route becomes a much stronger version of the same idea rather than a completely different build.
Common Mistakes
These are the mistakes that most often cause helldivers 2 builds illuminate to underperform, even when the gear choices are technically good.
Wasting the primary on easy trash — Players burn too much ammo into Voteless when a cheaper action would have worked.
Why it happens: panic and overcommitment.
Fix: use your strongest clear only when the swarm density justifies it; finish lone targets with your sidearm or a lower-cost burst.Bringing no real answer to Tripods — The build feels great until a heavy target appears and the team has nothing ready.
Why it happens: overvaluing chaff clear.
Fix: always reserve one stratagem or support option for anti-armor.Ignoring ammo economy on Adjudicator setups — Players treat the rifle like a bottomless generalist and go dry at the worst time.
Why it happens: the gun is so reliable that people forget it has a cost.
Fix: pair it with Supply Pack or make resupply part of your normal rotation.Standing still after winning a fight — A clean kill becomes a bad position because players stop moving.
Why it happens: tunnel vision on cleanup.
Fix: reposition immediately after the wave breaks, even if you think the area is safe.Using Torcher at the wrong range — The weapon shines up close but loses value when forced to answer distant pressure.
Why it happens: players expect flame to solve every angle.
Fix: use it as a lane control tool, not a long-range all-purpose solution.Saving all stratagems “just in case” — This creates dead minutes where the squad is under pressure but the build is idle.
Why it happens: fear of wasting cooldowns.
Fix: spend your tools on real threats and trust the next reset window to recover them.Splitting from the squad during objective pressure — Illuminate enemies punish isolated players very hard.
Why it happens: players chase kills or chase a flank.
Fix: stay within supporting distance unless your role specifically requires a separate angle.
Pro Tips
Tip 1. Use chaff deaths as lane control, not just kills
If Voteless are funneling through a doorway, your goal is not merely to get eliminations; it is to keep the doorway unusable for the enemy. The ARC-12 Blitzer and Torcher are especially good when you fire to deny space, then move before the next wave can collapse.
Tip 2. Save your best answer for the first elite you cannot ignore
When a Tripod enters the fight, do not spend your anti-armor tool on a side target first. The correct trigger is “this enemy changes the battlefield right now.” If it is not changing the fight state, it can wait one more second.
Tip 3. Resupply before you feel empty
With ammo-hungry setups like the Adjudicator, the correct moment to refill is usually before you hit zero, not after. That keeps your damage curve stable and prevents the awkward dead zone where the next wave arrives during a reload chain.
Tip 4. Rotate your angle after every successful hold
Once a lane is stabilized, move your feet and change the angle. Illuminate patrols and pushes often punish predictable positions, so even a tiny reposition can break target priority and buy your team another reload window.
Tip 5. Let teammates own the same target if their tool is better
If someone else has a stronger anti-armor answer, support their line instead of stealing the kill. Helldivers 2 rewards squad efficiency, and the best Illuminate runs usually come from everyone covering different layers of the fight.
Tip 6. Treat shields as a tempo check, not a damage race
If a shielded target is eating your ammo and time, stop feeding it inefficiently. Re-center, focus fire with the team, or swap to a better tool. Winning quickly is often more important than winning alone.
FAQ
What is the best primary for Illuminate missions?
The best primary depends on whether you want safer crowd control or stronger precision, but ARC-12 Blitzer, Torcher, and Adjudicator are the most useful profiles for this matchup set.
Is the Adjudicator worth it against Illuminate?
Yes, if you can support its ammo demands. It is strong into Voteless and can be excellent in certain scenarios, but it performs best when paired with sustain like Supply Pack.
Why do people use the Torcher?
Because it is extremely good at burning through Voteless and can pressure nearby Overseers at short range. Its weakness is that it does not solve every heavy target, so it needs support.
Do I need anti-armor in an anti-Illuminate build?
Yes. Even a chaff-focused setup should still include at least one credible answer to Tripods or other durable threats, or your build will stall in harder fights.
Can a beginner run this build?
Absolutely. Start with the simplest reliable weapon you own, keep one sustain tool if available, and play the lane-control game rather than trying to solo everything.
Related Guides
- Helldivers 2 Best Anti-Bug Builds
- Helldivers 2 Best Anti-Automaton Builds
- Helldivers 2 Best Stratagems for Squad Play
- Helldivers 2 Armor and Mobility Guide
- Helldivers 2 Weapon Tier List
- Helldivers 2 Best Support Pack Loadouts
- Helldivers 2 Beginner Loadout Guide
Sources
- https://www.thegamer.com/helldivers-2-best-builds-battle-illuminate/
- https://store.steampowered.com/app/553850/
- https://www.metacritic.com/game/helldivers-2
- https://howlongtobeat.com/?q=Helldivers%202
- https://api.steambase.io/games/553850
- https://www.protondb.com/app/553850
- https://steamcommunity.com/stats/553850/achievements
- https://www.speedrun.com/Helldivers2
- https://www.cheapshark.com/redirect?dealID=m%2FqQjo0uKy1J43MzqV%2B3wHWO4xOCNp9UMfo%2BfATGaNY%3D
See also
- Helldivers 2 helldivers 2 builds reddit: Best Build Guide for Missions, Loadouts, and Team Roles
- Helldivers 2 Build Randomizer: Balanced Flexible Loadout Guide
- Helldivers 2 Build for Illuminate: Best Loadout, Roles, and Counters
- Helldivers 2 update release date: Patch Notes Explained for Arrowhead’s anti-cheat and quality-of-life push
- Helldivers 2 update patch notes Explained: Arrowhead’s anti-cheat push and what it means for players
- Helldivers 2 Builds 2026: Eagle-First All-Rounder Build
- Helldivers 2 update trailer Patch Notes Explained: anti-cheat focus, what changed, and what players should do next
- Helldivers 2 upcoming updates: Patch Notes Explained
- Helldivers 2 next update Explained: What Arrowhead’s latest patch changed
- Helldivers 2 update roadmap: Patch Notes Explained
Captures d'écran


Relu par
HD2 Guides Editorial
Expertise: Editorial team behind HD2 Guides. Content is compiled from official patch notes, community wikis, and playthrough notes, then reviewed and updated on schedule.
Sources
🔥 Tendances du moment
HELLDIVERS™ 2 tous les succès : guide complet des succès
Guide complet des succès de Helldivers 2 avec les trophées les plus rares, les déblocages cachés, les manquables et une route de complétion à 100%.
Guide des succès Super Helldive de Helldivers 2
Guide des succès pour Helldivers 2 couvrant les trophées rares, les conditions cachées, le timing des éléments manquables et un parcours complet de complétion en Super Helldive.
Heure de sortie de la mise à jour de Helldivers 2 : explication des notes de patch pour la poussée anti-triche d’Arrowhead
Heure de sortie de la mise à jour Helldivers 2 expliquée : patch anti-triche du 10 juillet 2026, surveillance des Super Credits, gagnants, perdants et actions des joueurs.
Liste des déblocables et coût du Premium Warbond Urban Legends de Helldivers 2
Urban Legends coûte 1 000 Super Credits, contient 22 déblocables et nécessite 836 Medals pour être entièrement terminé dans Helldivers 2.
📋 Notes de patch expliquées
- → Heure de sortie de la mise à jour de Helldivers 2 : explication des notes de patch pour la poussée anti-triche d’Arrowhead
- → Notes de patch de Helldivers 2 du 2026-08-06 : le crossover avec Warhammer 40,000 expliqué
- → Nouvelles armes de Warbond et mise à jour des ennemis de Helldivers 2 : les changements du patch du 23 juillet 2026
🛠️ Outils populaires
Questions fréquentes
Réponses rapides du guide · cliquez sur une question pour l'ouvrir.
What is the best primary for Illuminate missions?
The best primary depends on whether you want safer crowd control or stronger precision, but ARC-12 Blitzer, Torcher, and Adjudicator are the most useful profiles for this matchup set.
Is the Adjudicator worth it against Illuminate?
Yes, if you can support its ammo demands. It is strong into Voteless and can be excellent in certain scenarios, but it performs best when paired with sustain like Supply Pack.
Why do people use the Torcher?
Because it is extremely good at burning through Voteless and can pressure nearby Overseers at short range. Its weakness is that it does not solve every heavy target, so it needs support.
Do I need anti-armor in an anti-Illuminate build?
Yes. Even a chaff-focused setup should still include at least one credible answer to Tripods or other durable threats, or your build will stall in harder fights.
Can a beginner run this build?
Absolutely. Start with the simplest reliable weapon you own, keep one sustain tool if available, and play the lane-control game rather than trying to solo everything.
Ce guide vous a-t-il aidé ?
Évaluez ce guide pour nous aider à l'améliorer.
Share your own tip
Found something not in the guide? Submit it below — our editors review every tip before publishing. No account required.