 Helldivers 2
Helldivers 2 Extraction Shuttle Beginner Guide
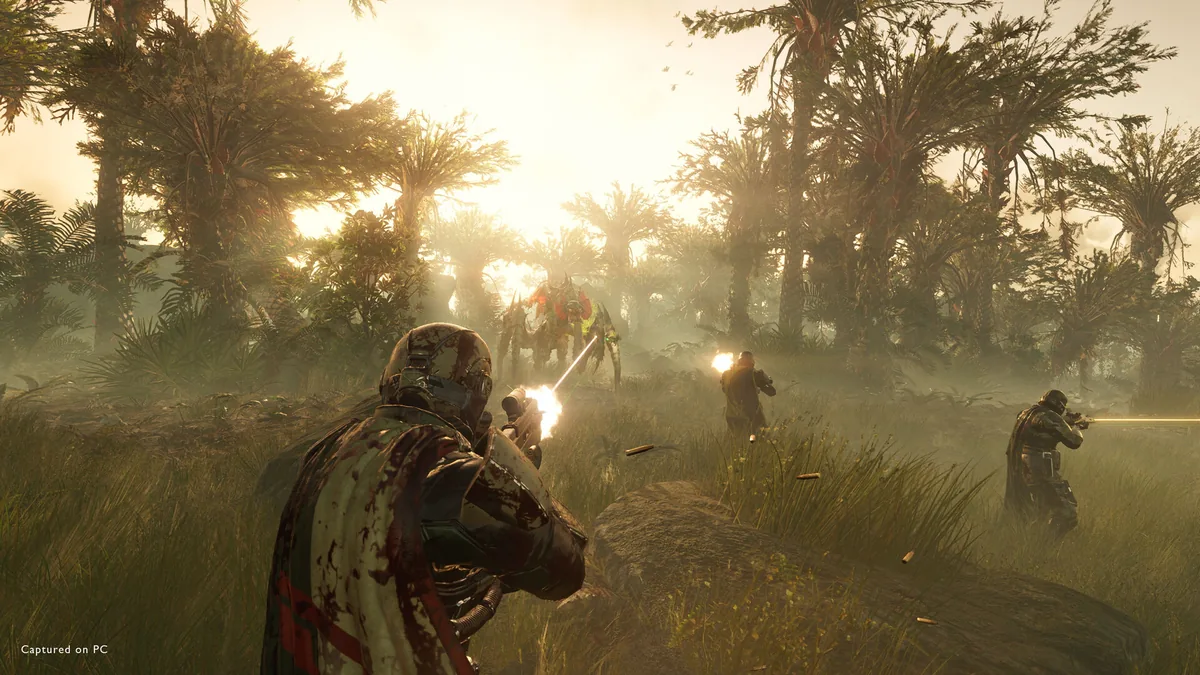
Quick Answer: The Helldivers 2 Extraction Shuttle is the safe way home after a mission, but beginners should treat extraction as a managed objective: clear the landing zone, call it early, watch reinforcements, and board only when the team is ready.
What the Extraction Shuttle Actually Means
The Helldivers 2 Extraction Shuttle is not just an end screen animation; it is the mission’s final decision point. In practice, it is where good squads convert a messy operation into sample value, mission XP, and a clean finish. New players often think extraction is automatic once the primary objective is done, but Helldivers 2 rewards teams that still play carefully during the last minutes. The shuttle can be called while enemies are still active, and that creates a very real risk-reward tradeoff: call it too early and you may get boxed in, call it too late and you may waste time after completing the mission.
Helldivers 2 is a cooperative third-person shooter developed by Arrowhead Game Studios and set in a hostile 22nd-century war for Super Earth’s “managed democracy” Source. That framing matters because the game’s systems are built around momentum, not safe downtime. A beginner who learns the extraction flow early will die less, keep more samples, and become useful to any public squad much faster.
The extraction phase usually follows the same pattern across mission types: finish the objective, move toward the extraction point, fight for space, and hold the area until the shuttle lands. Two examples show why this matters. On a simple bug mission, the team might finish an egg clear, then need to defend the LZ against scavengers and Chargers while waiting. On an Automaton operation, the team may be dealing with rockets, turrets, and heavy armor while trying to keep the timer under control. In both cases, the shuttle is a pressure test of awareness, not a formality.
A beginner’s job is to make the extraction zone stable before the shuttle arrives. That means resupplying, reloading, and positioning support stratagems so the final fight does not become a scramble. If you learn one thing first, learn this: the shuttle is easiest to use when the squad has already decided who covers, who calls stratagems, and who boards first.
First-Hour Checklist
Your first hour should be spent learning mission flow, not chasing perfect loadouts. In Helldivers 2, early success comes from understanding how to survive a full mission loop: drop in, finish a target, manage reinforcements, and extract with something in your pocket. The fastest way to improve is to run a few low-risk missions with the goal of learning the map markers, stratagem cadence, and extraction timing rather than farming rewards blindly.
Here is a practical first-hour checklist:
- Complete the tutorial and read the mission briefing before launching a real operation.
- Run one or two low-difficulty missions to learn movement, stratagem input, and reinforcement calls.
- Test at least one primary weapon, one support weapon, and one orbital or eagle stratagem.
- Practice calling Resupply and reinforce under pressure, not only when the area is quiet.
- At extraction, intentionally watch the shuttle timer, landing zone, and boarding order.
The first hour is also the right time to learn how the game expects you to use the battlefield. For example, a beginner who uses an Orbital Precision Strike on a nest or a bot fabricator gets immediate feedback on whether they understand timing. A player who equips a machine gun support weapon and then discovers how long the reload takes in a moving fight learns why positioning matters. A squad that experiments with a Jetpack or Shield Generator Backpack can see how mobility and survivability change extraction behavior.
A useful early habit is to treat the mission as four phases: opening move, objective clear, extraction setup, and shuttle boarding. In the opening move, stick with the team and avoid lone-wolfing into side objectives. During the objective clear, learn how patrols escalate into breaches or drops. In extraction setup, reload everything, drop ammo, and secure a firing lane. During boarding, wait until the shuttle is stable unless the team has already agreed on a risky save.
If you have only one hour, do not obsess over perfect unlocks. Learn the shape of the game. Helldivers 2 has enough layered systems that mechanical comfort beats theoretical knowledge early on, and that applies especially to the Helldivers 2 Extraction Shuttle, where panic losses happen more often than strategic failures.

You might also like
- Helldivers 2 Available Platforms Updated 3/7/2024 See all the available platforms and consoles for Beginner Guide
- Helldivers 2 similar games co op shooter deep rock galactic remnant outriders Beginner Guide
- Helldivers 2 fourth faction alternative multiple enemies planet why Beginner Guide
- Helldivers 2 Why Now May Be the Perfect Time for a New Enemy Faction
- Helldivers 2 Which enemy faction do you enjoy fighting in: Beginner Guide
Resource Priority Order
Spend and hoard resources in a way that improves consistency first, not raw damage first. The best beginner progression in Helldivers 2 is about unlocking flexible tools and reducing mission failure, because those gains help every future run, including the final extraction. Super Credits, Medals, Requisition Slips, Samples, and ship upgrades all matter, but they do not all deserve equal attention at the start.
A simple priority order works well in the current meta:
| Priority | Resource or Unlock Type | Why It Matters Early | Beginner Rule |
|---|---|---|---|
| 1 | Stratagem unlocks that solve survival or crowd control | They change how often you survive full missions | Buy tools that help extraction and objective defense first |
| 2 | Ship module upgrades | They improve your entire account’s mission consistency | Upgrade broadly before chasing narrow damage boosts |
| 3 | Samples | They gate stronger ship progression | Do not waste runs by dying deep in enemy territory with samples unbanked |
| 4 | Medals | They unlock warbond gear and broaden loadout options | Spend on versatile weapons and utility before gimmicks |
| 5 | Super Credits | They can be used for premium unlock paths and purchases | Hoard them until you know which gear you actually want |
| 6 | Requisition Slips | They fund stratagem purchases | Keep enough for practical mission tools, not cosmetic or speculative spending |
The mistake beginners make is treating every reward as equally urgent. They are not. Samples are more valuable than they look because they are tied to ship progression, and ship progression pays off across many missions. Medals are also important, but you should spend them on loadout options that fit multiple mission types. A weapon or stratagem that helps on both Terminid and Automaton maps is a better early purchase than something that only shines in niche situations.
Here are three concrete examples of good early spending logic:
- If you are dying during extraction because enemies close distance too easily, prioritize tools that create space, such as crowd-control stratagems or defensive backpacks.
- If your squad keeps failing objectives under pressure, invest in support calls that can protect a holdout, not just in higher single-target damage.
- If you find yourself constantly short on flexibility, unlock a warbond path that gives you a strong general-purpose primary rather than a flashy specialist option.
Hoarding also matters. Samples should be banked by successful extraction, not treated as guaranteed. Super Credits should not be burned the moment you see a store page if you have not yet built a stable basic loadout. Requisition should keep a buffer so you can swap to mission-appropriate tools when the operation changes from bugs to bots or from open terrain to tight compounds.
The practical rule is this: spend first on tools that reduce mission failure, then on tools that increase kill speed. In Helldivers 2, kill speed feels good, but extraction reliability wins more missions.
Common Mistakes
Common beginner mistakes in Helldivers 2 mostly come from misunderstanding how pressure builds across the whole mission. The game punishes overextension, friendly-fire risk, and poor extraction discipline more than it punishes imperfect aim. If you can correct the mistakes below, you will jump from fragile beginner to dependable squadmate quickly.
Mistake 1: Calling extraction too early
Players do this because they want to “finish the mission” the moment the main objective is done. The fix is to clear nearby threats, gather samples, reload support weapons, and only then call the Helldivers 2 Extraction Shuttle.
Mistake 2: Running off alone to chase side objectives
New players often split up because the map looks open and every marker feels important. The workaround is to stay near the team until you can read enemy pressure and reinforcement flow, then peel off only when the squad is stable.
Mistake 3: Ignoring sample recovery on the way out
Beginners sometimes leave samples behind after a chaotic firefight, which wastes progression. The fix is to assign one player to sample pickup or to create a verbal checkpoint before moving to extraction.
Mistake 4: Treating stratagems like panic buttons only
Players fall into this habit because they are afraid of wasting cooldowns. The correct approach is to use orbitals, eagles, and support calls proactively to shape the fight around the shuttle landing zone.
Mistake 5: Boarding the shuttle before the team is ready
This usually happens because someone sees the timer and assumes speed is always best. The fix is to confirm whether the squad still has samples, whether anyone is pinned down, and whether the LZ is still contested before entering.
Mistake 6: Standing still in the extraction zone
Beginners often plant their feet and try to aim through the whole fight. The better answer is to reposition after every major threat, because rockets, chargers, and breach spawns punish static play.
These mistakes show up in different mission types. On bug missions, a bad extraction usually starts with one overconfident player baiting a breach at the LZ. On bot missions, the same failure may come from ignoring line-of-sight threats and letting heavies pressure the landing pad. In both cases, the issue is not just aim. It is mission discipline.
Pro Tips
Advanced play in Helldivers 2 is mostly about sequencing, spacing, and tempo. The more you understand how fights escalate, the easier the extraction becomes. These tips are not beginner basics; they are the habits that make a squad feel organized even without voice comms.
Tip 1. Pre-clear the landing lane
When the shuttle is called, fire a support weapon or orbital strike into the approach path before enemies fully stack the area. This is especially useful on open terrain where Chargers, Devastators, or patrols can close distance from multiple angles.
Tip 2. Drop resupply before the last defense
If the squad is low on ammo, call Resupply before the extraction fight reaches peak intensity. That avoids the common failure where everyone burns their final magazines at the same time and cannot answer the second wave.
Tip 3. Save one crowd-control tool for the final wave
A stun, barrage, airstrike, or other area-denial option should usually be held in reserve for the moment enemies begin flooding the pad. This is more reliable than spending everything on the first contact.
Tip 4. Let one player own boarding timing
The cleanest extractions happen when one player watches the shuttle state and calls for boarding while the others keep firing. That role can rotate, but the squad should not have four different people making the decision at once.
Tip 5. Carry at least one answer to heavy armor
A beginner loadout that cannot handle a Charger, Hulk, or equivalent heavy threat will collapse during extraction. Bring a tool that can threaten armor so the final minutes are not decided by what spawns first.
Tip 6. Fight from cover, not the center of the pad
The extraction zone is not a dueling circle. Use rocks, elevation, supply crates, or terrain edges to keep angles manageable while still protecting the shuttle arrival zone.
Tip 7. Board with intent when the run is already won
If the shuttle is down, the samples are secure, and the area is stabilized, do not stay outside for vanity kills. The game rewards completed missions, not dramatic last-second mistakes.
These habits matter because the Helldivers 2 Extraction Shuttle is the final place where small errors get punished hard. One bad reposition, one missed reload, or one wasted strike can turn a successful mission into a wipe. Strong players do not just kill more; they create cleaner final states.
Graduation Threshold
You are out of the beginner phase when you can finish missions consistently without relying on luck at extraction. That threshold is less about raw level and more about whether you can read mission pressure, pick appropriate tools, and keep the squad functional under chaos. In practical terms, you have graduated when you stop asking, “How do I survive the shuttle?” and start asking, “What is the cleanest way to get everyone out with samples?”
Three signs show you are past the beginner stage:
- You can recognize when a mission is about to become unstable and reposition before the wipe starts.
- You understand which stratagems solve which problem, such as crowd control, armor removal, or emergency defense.
- You extract with samples regularly even when the mission has gone sideways.
Here are a few real examples of that transition. On a bug mission, a beginner might burn every orbital call during the first nest fight and have nothing left when the shuttle lands. A more experienced player keeps at least one zone-control tool in reserve for extraction. On an Automaton mission, a beginner may panic when a Hulk or heavy patrol appears at the pad, while an intermediate player already knows where to rotate, when to call reinforcements, and when to stop chasing kills.
Another useful marker is loadout discipline. Beginners often switch weapons constantly because every unlock looks promising. Once you are out of the beginner phase, you start building around mission roles: one setup for crowd control, one for anti-armor, one for objective speed, and one for safe extraction. That does not mean you need a perfect meta build. It means you can explain why each slot is there.
If you can also help weaker teammates without losing the mission, you are clearly beyond the first stage. That includes calling Reinforce cleanly, pinging threats, dropping ammo at the right time, and warning the squad before an extraction call. At that point, the Helldivers 2 Extraction Shuttle becomes just another controlled system rather than the moment the mission suddenly becomes stressful.
Common Mistakes
The biggest beginner errors are usually the same ones that break extraction discipline, but they deserve their own focused treatment because they show up across almost every mission type. This section is practical: mistake, cause, fix.
- Mistake: Ignoring reinforcement economy. Players get used to fast respawns and do not think about total squad lives. The fix is to treat every death as mission pressure and to stop playing recklessly once the team starts burning reinforces.
- Mistake: Bringing a loadout with no answer to armor. This happens because early weapons feel similar on light targets. The fix is to ensure at least one stratagem or support weapon can handle heavies like Chargers or Hulks.
- Mistake: Chasing kills instead of mission position. New players often stand in the open to farm enemies. The fix is to move with the objective and keep the fight near favorable terrain or cover.
- Mistake: Forgetting to reload before calling extraction. A surprising number of failed final holds happen because everyone is empty at once. The fix is to reload and resupply before the shuttle timer matters.
- Mistake: Not communicating sample priority. Players assume everyone knows who is carrying the samples. The fix is to call it out or keep samples on the player least likely to die on the final push.
- Mistake: Treating the shuttle as a victory lap. The run is not over until everyone is aboard or the timer expires. The fix is to keep playing the mission state all the way through boarding.
These mistakes are common because Helldivers 2 gives players a lot of freedom, and beginners often confuse freedom with safety. The game’s actual lesson is that coordination matters more than individual aggression, especially at the end of a mission.
Related Guides
These are the next articles that naturally follow a beginner extraction guide.
- Helldivers 2 Best Early Stratagems
- Helldivers 2 Beginner Loadouts
- Helldivers 2 Sample Farming Guide
- Helldivers 2 Difficulty Tier Breakdown
- Helldivers 2 Automaton Mission Walkthrough
- Helldivers 2 Terminid Mission Walkthrough
Sources
See also
- Helldivers 2 Super Destroyer Screen Display Interactive Update: Beginner Guide
- Helldivers 2 Ground All Terrain Extraction Rig GATER Beginner Guide
- Helldivers 2 Reviewed by Game878Helldivers 2Read Full Review Story5Gameplay9Visuals9Audio8Value forMoney8 Beginner Guide
- Helldivers 2 fan creates indoor dungeon mission concept: Beginner Guide
- Helldivers 2 Beginner Guide: Start Strong, Spend Smart, and Survive the Early War
- Helldivers 2 How to Destroy Fuel Silos and Stockpiled Ammunition
- Helldivers 2 How to Check Galactic War Progress: Beginner Guide
- Helldivers 2 How to Get the EX-03 Prototype 3 Armor Set
- Helldivers 2 How to Fix Stuck in Drop Pod Bug
- Helldivers 2 Pages using DynamicPageList3 parser function: Beginner Guide
Screenshots



Reviewed by
HD2 Guides Editorial
Expertise: Editorial team behind HD2 Guides. Content is compiled from official patch notes, community wikis, and playthrough notes, then reviewed and updated on schedule.
Sources
Helldivers 2 Missions Guides →
Browse the complete missions collection and its focused guides.
Related Guides







🔥 Popular Guides
Helldivers 2 Tier List — Weapons, Warbonds, Armor & Stratagems
Master Helldivers 2 tier list hub: warbond rankings, armor passives, weapons, and stratagems. Jump to the warbond or armor list for your build.
Helldivers 2 Armor Tier List — Best Passives Ranked
Helldivers 2 armor tier list ranked by passive value: scout, medium, heavy, and specialist sets. Best passives for solo, co-op, and high difficulties.
Helldivers 2 Warbond Tier List — Best Warbonds to Buy First
Ranked Helldivers 2 warbond tier list: which warbonds to buy first, best value for medals, and what to skip. Updated for current meta.

Helldivers 2 Weapon Tier List: Best Weapons for Every Loadout
Compare the best Helldivers 2 weapons, budget substitutes, late-bloomers, reroll advice, and endgame loadout investments.
📋 Patch Notes & Updates
🛠️ Popular Tools
Was this guide helpful?
Rate this guide so we can improve it.
Share your own tip
Found something not in the guide? Submit it below — our editors review every tip before publishing. No account required.