 Helldivers 2
Helldivers 2 Communications Device Beginner Guide
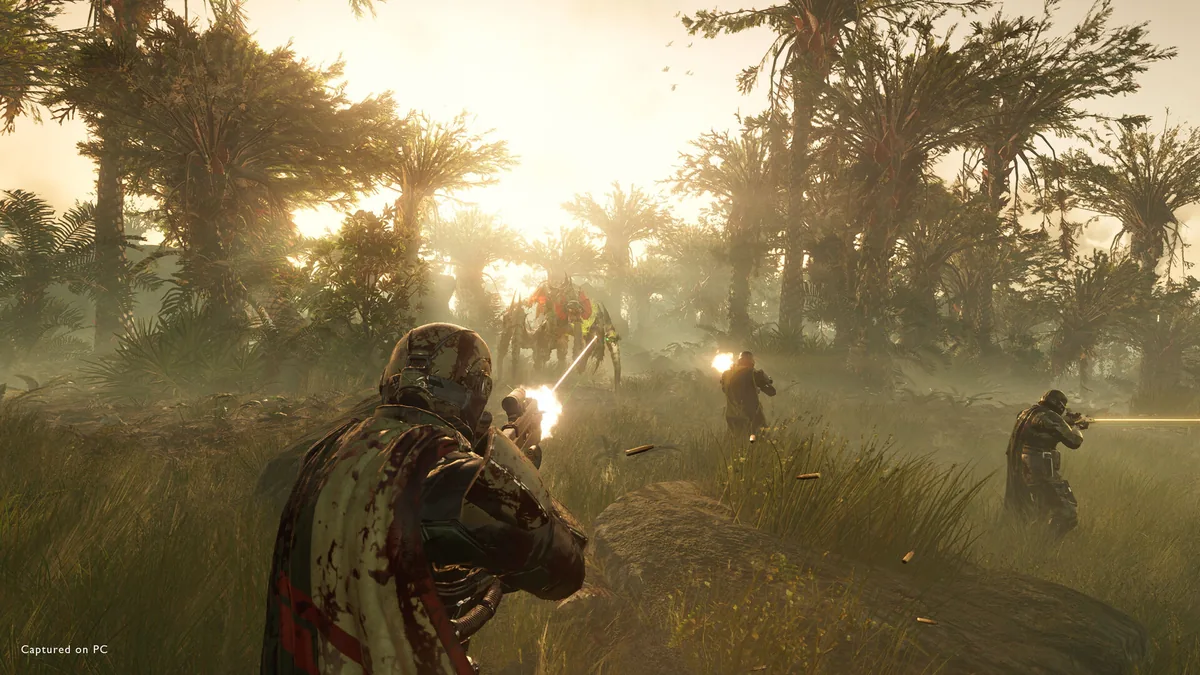
Quick Answer: The Helldivers 2 Communications Device is best understood as the game’s early information and coordination layer: learn the mission flow, use stratagems cleanly, spend resources on survivability first, and you will stop feeling lost within the first few operations.
What The Communications Device Means In Practice
The Helldivers 2 Communications Device is not a single flashy upgrade you rush for; it is the early-game habit of reading mission intel, coordinating stratagem calls, and using your ship and squad tools without hesitation. In practical terms, that means you should treat every briefing, map ping, callout, and stratagem input as part of one communication loop rather than as separate features. Helldivers 2 is a 2024 cooperative multiplayer third-person shooter developed by Arrowhead Game Studios and published by Sony Interactive Entertainment Source, and its design rewards players who make information work for them.
That matters because the game is built around fast, messy battlefield decisions. You are not only shooting bugs or Automatons; you are deciding where to land, when to split, when to regroup, when to call a supply drop, and when to extract before the map becomes unmanageable. The game’s own store page describes it as “The Galaxy’s Last Line of Offence” and frames the fight as a “fast, frantic, and ferocious third-person shooter” Source. That description is accurate enough for beginners: if you ignore communication, the game feels overwhelming; if you read the flow correctly, it becomes manageable very quickly.
For a new player, the communications device mindset shows up in a few concrete places. On your ship, you should be learning where mission selection, loadout changes, warbond progression, and ship modules live. In a mission, you should be using map markers and pings to tell teammates where patrols, objectives, and dangerous terrain are. In combat, you should be calling stratagems while moving to safe ground, not after you have already been pinned down. Those habits sound basic, but they are the difference between a first mission that ends in chaos and a first mission that teaches you the game’s rhythm.
A good beginner approach is to think in three layers. First, understand the mission briefing and the objective markers. Second, coordinate with the squad through pings and simple movement choices. Third, build your loadout so you can contribute before you are fully comfortable with advanced weapon handling. If you do those three things consistently, the “communications” side of Helldivers 2 stops feeling like a special system and starts feeling like the backbone of normal play.
First-Hour Checklist
Your first hour should focus on learning mission flow, unlocking your basic tools, and leaving with a stable starter loadout that supports your team. Do not spend that time chasing perfection or trying to master every weapon at once. The early goal is to become useful in a squad with minimal friction.
1. Complete the tutorial and read the ship interfaces
Start with the onboarding prompts and then walk your ship deliberately. Check the mission table, the stratagem terminal, the armory, and the warbond menus. You do not need to memorize every option immediately, but you do need to know where to return when the game asks you to make a decision. New players often waste time because they know how to shoot but not how to navigate the ship quickly.
Concrete examples of what to learn right away:
- The mission table, where you choose operations and difficulty.
- The stratagem terminal, where you inspect what support tools are available.
- The armory, where you swap primary, secondary, grenade, armor, and boosters.
- The warbond screen, where long-term unlocks are managed.
2. Run low-stakes missions on an easy difficulty
Pick the lowest comfortable difficulty and treat the first few missions as practice for movement, calling stratagems, and reading enemy behavior. The point is not to prove anything; the point is to build muscle memory while mistakes are cheap. You want to see how patrols move, what a resupply feels like, and how extraction works when the squad is under pressure.
Use the first missions to practice these three habits:
- Call a supply drop before you are completely dry.
- Ping points of interest and enemy groups.
- Stay near cover when reloading or typing a stratagem input.
3. Spend your first resources on reliability
Early resource spending should favor consistency over style. Upgrade what keeps you alive and what helps the whole squad, not the flashy option that only looks strong in a perfect scenario. If you unlock a useful armor passive, a dependable stratagem, or a booster that helps the team survive, that is usually more valuable than chasing a niche damage option.
4. Try at least one mission against each enemy faction you encounter
If the current operation flow lets you sample different enemy types, do it. Helldivers 2 becomes much easier once you realize that bugs and Automatons punish different mistakes. Bugs often pressure you with close-range swarms and movement disruption, while Automatons tend to punish exposed positioning and careless peeking. A beginner who learns only one side of the game gets blindsided later.
5. Extract even from messy runs
Do not abandon missions just because they go badly. A messy extraction still teaches you more than an early quit. The game rewards completed objectives, squad survival, and clean extraction habits, but it also teaches failure recovery extremely well. Learn to salvage bad situations by moving together, calling supplies early, and prioritizing the mission objective over kills.
If you have one clear target for the first hour, it is this: leave with a basic primary weapon you can control, a support weapon you understand, and a sense of where your team wants you to be during a fight. That is enough to get you out of the absolute beginner phase.

You might also like
- Helldivers 2 Available Platforms Updated 3/7/2024 See all the available platforms and consoles for Beginner Guide
- Helldivers 2 similar games co op shooter deep rock galactic remnant outriders Beginner Guide
- Helldivers 2 fourth faction alternative multiple enemies planet why Beginner Guide
- Helldivers 2 Why Now May Be the Perfect Time for a New Enemy Faction
- Helldivers 2 Which enemy faction do you enjoy fighting in: Beginner Guide
Resource Priority Order
Your resource priority order in Helldivers 2 should favor unlocks that improve survivability, team consistency, and mission completion before anything cosmetic or situational. The exact optimal order can change with the current meta, but the beginner logic stays stable: buy tools that solve common problems, not rare ones.
| Priority | What To Spend On | Why It Comes First | Beginner Example |
|---|---|---|---|
| 1 | Survival and team-support upgrades | These reduce mission failure and make you useful in every squad | Better armor choices, reliable support stratagems, helpful boosters |
| 2 | Core loadout flexibility | Lets you adapt to bugs, Automatons, and mixed mission types | A dependable primary, a workable support weapon, and one or two utility stratagems |
| 3 | Ship modules and long-term account power | Strengthens your whole account instead of one mission | Upgrades that improve stratagem cooldowns, payloads, or team uptime |
| 4 | Warbond progression for standout tools | Unlocks stronger options once you know what you actually need | Weapons and armor that fit your preferred mission style |
| 5 | Cosmetics and personal preference items | Nice to have, but not important for learning | Capes, visuals, and other non-functional unlocks |
The main rule is simple: hoard anything that affects broad utility until you know what your role is. Early on, that means you should be cautious with currencies and unlock points until you have at least one complete mission-ready setup. Some players make the mistake of spreading resources across too many half-finished choices. That usually leaves them with several mediocre options instead of one dependable kit.
A practical beginner spending pattern looks like this. First, unlock one primary weapon you can trust in a firefight. Second, get one support weapon that complements that primary. Third, pick a stratagem package that solves ammo, armor, or crowd pressure. Fourth, invest in ship upgrades that benefit your whole squad. Finally, only then start spending on more specialized warbond branches. If you are unsure, lean toward options that help on both objective runs and chaotic defense sequences.
For example, a new player struggling with swarms will usually get more value from a support tool and a survivability boost than from a niche damage pickup. A player having trouble against armored targets should prioritize anti-armor coverage before chasing pure crowd control. A squad that dies during extraction usually benefits more from better uptime and emergency response tools than from another weapon with high theoretical damage.
The best way to manage resources as a beginner is to ask one question before every spend: “Will this help me finish ordinary missions more often?” If the answer is yes, it belongs near the top of your list. If the answer is “only in a specific build,” leave it for later.
Common Mistakes
New players usually fail in Helldivers 2 because they misunderstand tempo, positioning, or the purpose of support tools. Those mistakes are common because the game looks like a straightforward shooter at first, but actually rewards disciplined movement and quick decision-making.
1. Calling stratagems too late
Players often wait until they are already trapped, then try to type a stratagem input under pressure. That fails because combat in Helldivers 2 escalates quickly and enemies punish hesitation.
Fix: call your supply, reinforcement, or offensive stratagem before the fight reaches critical mass. If you know a heavy enemy is coming, prepare the input while moving to cover.
2. Ignoring map pings and team movement
Many beginners play as if the mission is a solo shooter, which leads to scattered squads, missed objectives, and unnecessary deaths. The game is much more forgiving when everyone moves with the same plan.
Fix: ping objectives, patrols, and extraction points. Follow a visible team lead for your first several missions and only split when the mission clearly benefits from it.
3. Spending on flashy unlocks before stable tools
Players see powerful-looking equipment and rush toward it, even when they still lack basic survivability or ammo consistency. That leaves them with a loadout that looks impressive but collapses under routine pressure.
Fix: prioritize one reliable primary, one dependable support choice, and one utility stratagem before chasing specialized gear.
4. Fighting every patrol they see
Beginners often treat every enemy contact as mandatory combat. That burns ammo, raises chaos, and pulls the squad into fights that do not help the mission.
Fix: avoid unnecessary engagements. If a patrol is not blocking your route or objective, move around it. Save your resources for objectives, extraction, and unavoidable fights.
5. Standing still during reloads and inputs
A lot of early deaths happen because players stop moving while reloading or entering stratagem commands. That is a bad habit in a game where positioning matters constantly.
Fix: reload behind cover, while backing away, or after breaking line of sight. Enter stratagems from a safe angle and keep an escape path in mind.
6. Bringing the wrong tool for the enemy type
A weapon that feels fine against one faction may perform poorly against another. Beginners sometimes assume one loadout can solve everything, then get frustrated when it fails.
Fix: build with enemy behavior in mind. Bugs usually demand crowd control and mobility. Automatons usually punish exposure and reward careful anti-armor play.
7. Extracting without checking the area
Players sometimes rush the shuttle as soon as it lands and get wiped in the final seconds. Extraction is a fight, not a victory screen.
Fix: clear immediate threats, place yourself with room to move, and let one player watch flanks while others cover the objective or the landing zone.
Those errors are fixable because they are mostly habits, not mechanical ceilings. Once you stop making them, your mission success rate usually rises faster than your raw aim.
Pro Tips
Advanced beginner play in Helldivers 2 is mostly about timing, loadout awareness, and knowing when to stop fighting. These tips matter once you already understand the basics and want your games to become calmer and cleaner.
Tip 1. Use stratagems on the move
Call support while drifting into cover or while repositioning between terrain features. A stationary Helldiver is an easy target, and many mission failures begin with someone freezing in the open to finish an input.
Tip 2. Keep one answer for armored targets
Have a single reliable plan for heavy enemies such as Chargers or Hulk-type threats, even if the rest of your loadout is flexible. That can be a support weapon, a stratagem, or a team role, but it should be obvious before the mission starts.
Tip 3. Save one emergency tool for extraction
Do not spend every strong option the moment a fight begins. If you hold one emergency stratagem or support call until extraction, you usually have a way to stabilize the final push.
Tip 4. Learn when to disengage
If an objective is already completed and the area has turned into a losing fight, stop farming kills and leave. The mission timer and extraction are usually more important than proving you can survive one more wave.
Tip 5. Build around repeated mistakes, not rare highlights
If you keep dying to running out of ammo, fix ammo economy. If you keep falling to flanking fire, fix positioning. If your squad keeps collapsing under armor pressure, fix anti-armor coverage. The right answer is usually to solve the problem that happens every run, not the impressive failure that happened once.
Tip 6. Use simple callouts that match mission landmarks
Instead of long explanations, use short, useful labels tied to the map and objectives. “North side,” “extract,” “nest,” “fabricator,” and “supply” are enough for most public squads.
Tip 7. Treat mission completion as the main objective
Kills help, but they are not the mission. A squad that completes objectives cleanly will progress faster than a squad that chases enemy body counts and forgets the task.
These tips are especially useful once you can already survive routine patrols and basic objective fights. They turn decent runs into efficient runs.
Graduation Threshold
You are out of the beginner phase when you can complete ordinary missions without depending on panic, guesswork, or constant revives. The clearest sign is not a level number; it is whether your decisions are starting to look intentional.
A player has likely graduated from beginner status when they can do the following consistently:
- Read a mission briefing and pick the right kind of loadout without copying someone else blindly.
- Use stratagems quickly enough that the squad benefits before the fight collapses.
- Recognize when to fight and when to bypass a patrol.
- Survive extraction with at least a basic plan instead of improvising every second.
- Contribute to team survival, not just personal damage.
Concrete examples of graduation look like this. You enter a bug mission and bring tools that help with swarms and armored targets instead of random favorites. You land near the objective, clear one path, and move as a group instead of scattering. You notice the team is out of supplies, call a resupply before someone empties the last magazine, and keep the run moving. You do not need perfect execution to be past the beginner phase; you only need your actions to be consistent and mission-aware.
Another useful marker is confidence with common failure points. If you can survive a messy reinforcement chain, recover from a bad landing, and keep the mission from spiraling out of control, you have crossed an important line. Players who are still in the beginner phase tend to ask “what is happening?” Players who are past it ask “what is the best route to finish this objective safely?”
There is also a broader account-level signal. If you have settled on a loadout core, understand how your preferred weapon handles, and know which unlocks you still want, you are no longer learning the game from scratch. You are refining preferences. That is the real boundary between beginner and intermediate play in Helldivers 2.
Related Guides
These are the next guides that naturally follow this beginner article, especially if you want to go from basic competence to reliable mission performance.
- Helldivers 2 Early-Game Stratagem Tier Guide
- Helldivers 2 Best Beginner Loadouts
- Helldivers 2 Mission Walkthrough for New Players
- Helldivers 2 Ship Module Upgrade Guide
- Helldivers 2 Warbond Progression Guide
- Helldivers 2 Anti-Armor Weapons Guide
- Helldivers 2 Bug Faction Beginner Guide
- Helldivers 2 Automaton Faction Beginner Guide
Sources
- https://store.steampowered.com/app/553850/
- https://en.wikipedia.org/wiki/Helldivers_2
- https://howlongtobeat.com/?q=helldivers2
- https://www.metacritic.com/game/helldivers-2
- https://store.steampowered.com/stats/app/553850/achievements/
See also
- Helldivers 2 Super Destroyer Screen Display Interactive Update: Beginner Guide
- Helldivers 2 Ground All Terrain Extraction Rig GATER Beginner Guide
- Helldivers 2 Reviewed by Game878Helldivers 2Read Full Review Story5Gameplay9Visuals9Audio8Value forMoney8 Beginner Guide
- Helldivers 2 fan creates indoor dungeon mission concept: Beginner Guide
- Helldivers 2 Beginner Guide: Start Strong, Spend Smart, and Survive the Early War
- Helldivers 2 How to Destroy Fuel Silos and Stockpiled Ammunition
- Helldivers 2 How to Check Galactic War Progress: Beginner Guide
- Helldivers 2 Pages using DynamicPageList3 parser function: Beginner Guide
- Helldivers 2 How to Get the EX-03 Prototype 3 Armor Set
- Helldivers 2 How to Fix Stuck in Drop Pod Bug
Screenshots



Reviewed by
HD2 Guides Editorial
Expertise: Editorial team behind HD2 Guides. Content is compiled from official patch notes, community wikis, and playthrough notes, then reviewed and updated on schedule.
Sources
Helldivers 2 Missions Guides →
Browse the complete missions collection and its focused guides.
Related Guides







🔥 Popular Guides
Helldivers 2 Tier List — Weapons, Warbonds, Armor & Stratagems
Master Helldivers 2 tier list hub: warbond rankings, armor passives, weapons, and stratagems. Jump to the warbond or armor list for your build.
Helldivers 2 Armor Tier List — Best Passives Ranked
Helldivers 2 armor tier list ranked by passive value: scout, medium, heavy, and specialist sets. Best passives for solo, co-op, and high difficulties.
Helldivers 2 Warbond Tier List — Best Warbonds to Buy First
Ranked Helldivers 2 warbond tier list: which warbonds to buy first, best value for medals, and what to skip. Updated for current meta.

Helldivers 2 Weapon Tier List: Best Weapons for Every Loadout
Compare the best Helldivers 2 weapons, budget substitutes, late-bloomers, reroll advice, and endgame loadout investments.
📋 Patch Notes & Updates
🛠️ Popular Tools
Was this guide helpful?
Rate this guide so we can improve it.
Share your own tip
Found something not in the guide? Submit it below — our editors review every tip before publishing. No account required.