 Helldivers 2
Helldivers 2 Super Destroyer Screen Display Interactive Update: Beginner Guide
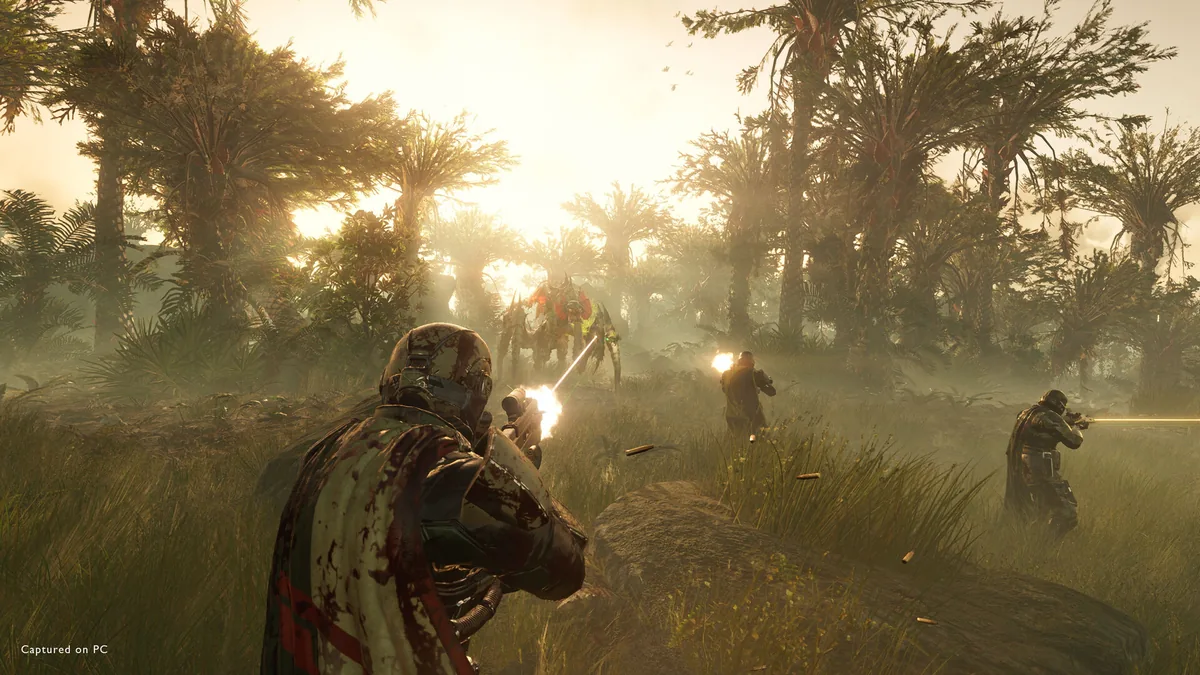
Quick Answer: The Helldivers 2 super destroyer screen display interactive update is the ship-side interface you use to manage missions, stratagems, ship modules, and warbond progress; beginners should learn it early because it controls nearly every important upgrade and deployment decision.
What The Super Destroyer Screen Actually Does
The Super Destroyer screen is your command hub, and learning it quickly makes Helldivers 2 far less chaotic. It is where you pick missions, set your loadout, spend ship resources, inspect upgrades, and keep track of the tools that turn a fragile recruit into a functional squadmate. In practice, the “interactive update” part of the phrase matters because the ship interface is not just decorative: every major choice starts there, from the planet you drop on to the stratagems you carry and the warbond items you unlock.
Helldivers 2 is a cooperative third-person shooter set in a hostile galaxy, where you fight to spread managed democracy across the front lines Source. The game is built around short, high-pressure missions, so the Super Destroyer is effectively your prep screen between those missions. A beginner who ignores it often ends up under-equipped, while a beginner who learns it fast can immediately improve mission success without needing perfect aim or deep shooter experience.
Two things make the ship screen especially important for new players. First, it ties together multiple progression layers at once: ship modules, stratagems, warbonds, requisition, samples, medals, and Super Credits all feed into different parts of your long-term power. Second, the interface teaches game flow. If you can read the ship screen confidently, you will understand what the game expects next: pick a mission, prepare tools, drop in, extract, then spend what you earned on something that strengthens the next run.
A helpful mindset is to treat the Super Destroyer like a loadout workshop, not a menu. Before every mission, check whether your chosen tools solve the mission’s actual problem. For example, an Automaton defense mission may reward heavier anti-armor and crowd control, while an insect-heavy mission often punishes sloppy positioning and weak area denial. The screen is where you make those adjustments before the hellpod launches.
First-Hour Checklist
Your first hour should focus on learning mission flow, unlocking basic stratagems, and building a loadout that works in more than one situation. Helldivers 2 can feel overwhelming at first because the screen is full of systems, but the opening hour is really about a few repeatable actions that teach you how the whole loop works.
1. Finish one low-difficulty mission chain
Start with the easiest mission tier available to you and play it to completion. Do not rush into harder content just because it is open on the planet map. The point of the first run is to learn how objective markers, extraction, reinforcements, and stratagem calls actually behave in live combat. A sample opening sequence could be:
- Drop into a basic objective mission.
- Practice calling down a support weapon.
- Use a defensive stratagem at least once.
- Extract even if the mission feels messy.
This gives you a working sense of mission pacing before the map starts asking more from you.
2. Unlock at least one reliable support weapon
Pick a support weapon that fits your current comfort level, then use it repeatedly until the call-in motion becomes automatic. Early examples include the MG-43 Machine Gun for sustained anti-infantry fire, the EAT-17 Expendable Anti-Tank for simple anti-armor bursts, and the Anti-Materiel Rifle if you like precision shots. You do not need the “best” option on day one; you need one tool that you can deploy under pressure without hesitation.
3. Set one anti-armor stratagem and one survival stratagem
Your first practical loadout should include a way to kill armored targets and a way to stay alive when things go wrong. For example, pairing an anti-armor strike with Resupply or a defensive emplacement teaches you that survivability is not just about personal aim. A strong beginner habit is to keep one slot for emergencies and one slot for problem solving.
4. Spend some currency, but not all of it
Use your early rewards to unlock a few essential tools, then stop and reassess. The game rewards steady progression, not impulsive spending. In the first hour, prioritize anything that makes missions more stable rather than flashy. If a purchase helps you survive longer, extract more often, or contribute more consistently to a squad, it is usually worth more than a cosmetic detour.
5. Learn the mission screen before you deploy
Before you launch, read the planet, objective type, and team composition. If your squad already has strong anti-armor, you may want to bring crowd control or area denial instead of doubling up on the same job. That habit matters from the first hour onward because Helldivers 2 is built around overlapping roles, not solo carry fantasy.
6. Practice the full loop once
A good beginner loop is: prep on the ship, deploy, complete an objective, call extraction, return to ship, spend rewards. Doing that once cleanly teaches the real rhythm of the game. You will start to understand why experienced players seem to move between screens so quickly: they are not guessing, they are following a loop they have already internalized.
The main goal of this first-hour checklist is not to look strong. It is to make the ship screen familiar enough that it stops being noise and starts being a decision tool.

You might also like
- Helldivers 2 similar games co op shooter deep rock galactic remnant outriders Beginner Guide
- Helldivers 2 Available Platforms Updated 3/7/2024 See all the available platforms and consoles for Beginner Guide
- Helldivers 2 fourth faction alternative multiple enemies planet why Beginner Guide
- Helldivers 2 Which enemy faction do you enjoy fighting in: Beginner Guide
- Helldivers 2 Why Now May Be the Perfect Time for a New Enemy Faction
Resource Priority Order
Your best resource order in Helldivers 2 is usually mission progress first, ship upgrades second, warbond unlocks third, and cosmetic or convenience spending last. The exact best purchase depends on what you have unlocked, but beginners get the most value by buying systems that increase mission consistency rather than short-term novelty.
| Resource | Best early use | Why it matters | Beginner priority |
|---|---|---|---|
| Requisition Slips | Basic stratagem unlocks and early support tools | Expands what you can bring on missions | Very high |
| Medals | Warbond progression for weapons, armor, and utilities | Unlocks core account power over time | Very high |
| Samples | Ship module upgrades | Improves your whole squad’s effectiveness | Very high |
| Super Credits | Premium warbond pages or cosmetics | Good long-term value, but easy to overspend | Medium |
| Credits/other spendable rewards | Whatever directly improves your loadout | Depends on current unlock state | Situational |
The strongest early habit is to hoard anything that advances power broadly and spend anything that unlocks a real mission advantage. Requisition Slips are usually best used on stratagems that solve common beginner problems: sustaining fire, dealing with armor, or handling emergency crowd pressure. Samples are especially valuable because ship modules affect your entire playstyle, not just one weapon. Medals are similarly important because they unlock warbond progress, which feeds your account-wide growth. Super Credits are the one resource beginners often waste by spending too early on something that looks appealing but does not actually improve mission success.
A practical way to think about spending is this: ask whether the item changes how often you fail missions. If the answer is yes, it is probably a strong buy. If it only changes how stylish your build looks, leave it for later. For example, a better support weapon, a stronger defensive stratagem, or a ship module that improves cooldowns can all save missions. A cosmetic detour cannot.
Beginners also need to avoid “resource fragmentation,” where they buy a little bit of everything and end up with no coherent build. That is a common trap in Helldivers 2 because the ship screen is full of options that sound useful. Instead of spreading rewards thinly, commit to a narrow early plan. Unlock one dependable anti-armor answer, one dependable crowd-control answer, and a small number of ship upgrades that improve the tools you already use. Then build outward from there.
The best example of this priority order in action is a player who spends Requisition Slips on a useful stratagem like EAT-17, uses Medals to progress toward a weapon or armor piece that fits their style, and saves Samples until they can buy ship modules that boost the whole squad. That path is much stronger than spending everything on whatever looks rare in the moment.
Common Mistakes
The most common beginner mistakes in Helldivers 2 come from trying to play it like a straightforward shooter instead of a resource-heavy squad game. The fixes are simple, but they only work if you build the habit early.
1. Bringing a loadout with no answer to armor
Many new players stack weapons that feel good against basic enemies and then get pinned when armored targets show up. This happens because the early game tempts you to optimize for what you see first, not for the threats that end runs. The fix is to always bring at least one anti-armor option, such as an EAT-style launcher, a heavy support weapon, or a stratagem strike that can delete a hard target on demand.
2. Wasting stratagems the moment they come off cooldown
Beginners often throw support tools too early, then have nothing left when the fight turns messy. That mistake comes from panic and from not yet understanding how mission tempo works. The workaround is to save one slot for emergencies and use the others only when they solve a specific problem, such as clearing a nest, stopping a push, or covering extraction.
3. Ignoring the mission objective and chasing enemies
Helldivers 2 rewards objective discipline more than kill counts. New players fall into combat loops because the firefights are loud, immediate, and tempting. The fix is to move with purpose: finish the target, regroup, then leave. If the objective is done and the area is still crawling with enemies, your job is usually to extract, not to “clean up.”
4. Standing still while calling stratagems
A lot of beginners get caught trying to type in codes in the middle of open ground. That happens because the ship screen makes stratagem use look calm and clean, while live missions are chaotic. The fix is to call stratagems from cover, from behind terrain, or while another teammate draws attention. Treat the input sequence like a vulnerable action, not a free action.
5. Burning reinforcements too quickly
New teams often treat reinforcements like infinite retry tokens. The reason is simple: the game gives you enough rope early that the danger is easy to underestimate. The fix is to pause after each death and ask what caused it. If the answer is “bad positioning,” “no anti-armor,” or “separated from the team,” adjust immediately instead of forcing another identical attempt.
6. Spending samples before knowing what modules matter
Samples are easy to mismanage because they look like a generic upgrade currency. Beginners sometimes spend them on the first available ship module without checking whether it helps their actual loadout. The fix is to read each module carefully and prioritize upgrades that improve the stratagems and weapons you already use in most missions.
7. Splitting from the squad too early
Solo wandering is a classic mistake because it feels efficient in the moment. In practice, it usually creates extra deaths and slower objective progress. The fix is to stay close enough that teammates can rescue, reinforce, or cover you when an elite enemy or patrol appears. Some mission types allow separation later, but beginners should default to sticking together.
The big pattern here is simple: most mistakes are not mechanical failures, they are planning failures. The super destroyer screen helps prevent that by forcing you to think before you drop.
How To Read The Ship Screen Like A Veteran
You read the ship screen like a veteran by treating every panel as a question: what problem am I solving, what resource am I spending, and what will this choice improve next mission? That mindset sounds obvious, but it is the difference between random progression and deliberate progression.
The ship screen usually presents several layers of decision-making at once. Mission selection tells you what type of threat you are about to face. Loadout selection tells you whether your squad can answer armor, crowds, and emergencies. Stratagem and module menus tell you whether your account is getting more stable over time. Warbond menus tell you whether you are building toward a weapon, armor set, or utility piece that actually fits your playstyle. Beginners often see these as separate menus; experienced players see them as one linked system.
A simple way to improve fast is to do a “three-question check” before every mission:
- What is the main threat on this planet or objective?
- What tool in my loadout answers that threat?
- What backup do I have if that tool fails?
For example, if your mission involves dense enemy pressure, a machine gun or crowd-control stratagem may matter more than a long-range precision weapon. If you expect armored units, a launcher or heavy strike becomes the centerpiece. If extraction has been rough, a defensive placement or resupply habit becomes more valuable than another damage option. This is where the Helldivers 2 super destroyer screen display interactive update becomes genuinely useful: it turns your pre-drop time into tactical preparation instead of button-pushing.
You should also learn to distinguish “account power” from “mission power.” Account power is permanent growth such as ship modules, warbond unlocks, and core stratagem access. Mission power is the specific loadout you carry into a single operation. Both matter, but beginners should lean into permanent upgrades first because they keep paying off. A single smart module purchase can improve dozens of future drops. A single flashy mission-only choice usually cannot.
A veteran player also reads the ship interface with squad context in mind. If your teammates already have anti-armor covered, your best contribution might be mobility, revives, or crowd control. If the squad lacks area denial, then one player bringing a wide-impact stratagem can stabilize the whole run. That is the real skill behind the screen: matching your build to the team and the mission at the same time.
Graduation Threshold
You are out of the beginner phase when you can prepare a useful loadout without hesitation, survive mission pressure without constant panic, and spend rewards with a clear long-term plan. That threshold is less about level and more about decision quality.
A good sign that you have graduated from beginner status is that you can look at a mission and immediately answer three things: what will kill me, what will kill the objective, and what will help extraction. If you can do that from the ship screen before the mission starts, you are no longer guessing. Another sign is that you stop relying on one favorite weapon and start adjusting your kit to the threat profile. For example, you may bring one setup for bug-heavy map control, another for armored robot-style pressure, and another for objective-running with the team.
You are also probably past the beginner phase when resource spending becomes intentional. Instead of asking “What can I buy?” you start asking “What keeps improving my core loop?” That shift matters because Helldivers 2 scales better when your choices are coherent. A player who understands ship modules, stratagem synergy, and squad roles can contribute on more difficulty levels even without perfect reflexes. A player who still spends blindly usually hits a wall when missions stop forgiving bad prep.
Another useful benchmark is extraction consistency. If you are regularly finishing missions, preserving reinforcements, and leaving with enough samples to make upgrades worthwhile, your fundamentals are solid. If you can also handle unexpected threats without freezing on the ship screen next time, you have moved into the phase where optimization matters more than survival.
A practical rule: you are no longer a beginner once you can explain why each slot in your loadout exists. If every choice has a reason, you have the basics. If you can explain how those choices change by mission type, enemy type, and squad composition, you are beyond basics and ready for deeper build planning.
Pro Tips
The best early advanced habits are small, repeatable actions that create a big difference in real missions.
Tip 1. Keep one stratagem for emergencies, not style
When your team is surrounded, the best stratagem is the one that buys time, not the one that looks impressive. Use this rule on missions where extraction often goes bad, especially if your squad tends to split up or spend reinforcements too early.
Tip 2. Call supplies before the fight becomes a crisis
If your primary weapon is running low and you know a big encounter is coming, resupply early. Players often wait until they are already empty, which creates panic and forces bad positioning. Calling ammo from the ship screen mindset means thinking one fight ahead.
Tip 3. Use terrain as part of your loadout
A hill, rock, wall, or narrow approach can be just as valuable as a weapon. When you enter a mission, scan for places where stratagems can be thrown safely and where enemy lines can be broken. That habit is especially strong when paired with area denial tools.
Tip 4. Pair roles instead of duplicating them
Two players with the same job often waste flexibility. One player can bring anti-armor while another brings crowd control or utility. In public matches, this often matters more than chasing the “best” solo build because the squad wins by covering gaps.
Tip 5. Leave before the situation becomes unwinnable
A clean extraction with mission progress beats a heroic collapse. If the objective is done and the area is saturated with enemies, moving out is usually the right call. Beginners lose many missions by staying one fight too long.
Tip 6. Reuse one loadout until you understand its weak point
Swapping gear constantly makes it hard to learn what is actually failing. Stick with a setup long enough to identify whether the problem is armor, swarm control, cooldown management, or positioning. Once you know the weak point, you can replace the right tool instead of guessing.
Related Guides
- Helldivers 2 Best Early Stratagems
- Helldivers 2 Beginner Loadouts
- Helldivers 2 Ship Modules Guide
- Helldivers 2 Warbond Progression Guide
- Helldivers 2 Mission Types Walkthrough
- Helldivers 2 Armor and Survivability Guide
Sources
- https://store.steampowered.com/app/553850/
- https://howlongtobeat.com/?q=helldivers2
- https://www.metacritic.com/game/helldivers-2
- https://store.steampowered.com/app/553850/
See also
- Helldivers 2 Ground All Terrain Extraction Rig GATER Beginner Guide
- Helldivers 2 Reviewed by Game878Helldivers 2Read Full Review Story5Gameplay9Visuals9Audio8Value forMoney8 Beginner Guide
- Helldivers 2 fan creates indoor dungeon mission concept: Beginner Guide
- Helldivers 2 How to Destroy Fuel Silos and Stockpiled Ammunition
- Helldivers 2 How to Check Galactic War Progress: Beginner Guide
- Helldivers 2 Beginner Guide: Start Strong, Spend Smart, and Survive the Early War
- Helldivers 2 How to Fix Stuck in Drop Pod Bug
- Helldivers 2 Pages using DynamicPageList3 parser function: Beginner Guide
- Helldivers 2 How to Get the EX-03 Prototype 3 Armor Set
- Helldivers 2 Unnamed Super Earth Fighter Craft Beginner Guide
Screenshots



Reviewed by
HD2 Guides Editorial
Expertise: Editorial team behind HD2 Guides. Content is compiled from official patch notes, community wikis, and playthrough notes, then reviewed and updated on schedule.
Sources
Helldivers 2 Missions Guides →
Browse the complete missions collection and its focused guides.
Related Guides





🔥 Popular Guides
Helldivers 2 Tier List — Weapons, Warbonds, Armor & Stratagems
Master Helldivers 2 tier list hub: warbond rankings, armor passives, weapons, and stratagems. Jump to the warbond or armor list for your build.
Helldivers 2 Armor Tier List — Best Passives Ranked
Helldivers 2 armor tier list ranked by passive value: scout, medium, heavy, and specialist sets. Best passives for solo, co-op, and high difficulties.
Helldivers 2 Warbond Tier List — Best Warbonds to Buy First
Ranked Helldivers 2 warbond tier list: which warbonds to buy first, best value for medals, and what to skip. Updated for current meta.

Helldivers 2 Weapon Tier List: Best Weapons for Every Loadout
Compare the best Helldivers 2 weapons, budget substitutes, late-bloomers, reroll advice, and endgame loadout investments.
📋 Patch Notes & Updates
🛠️ Popular Tools
Was this guide helpful?
Rate this guide so we can improve it.
Share your own tip
Found something not in the guide? Submit it below — our editors review every tip before publishing. No account required.