 Helldivers 2
Helldivers 2 Should the 500kg Stratagem get a buff
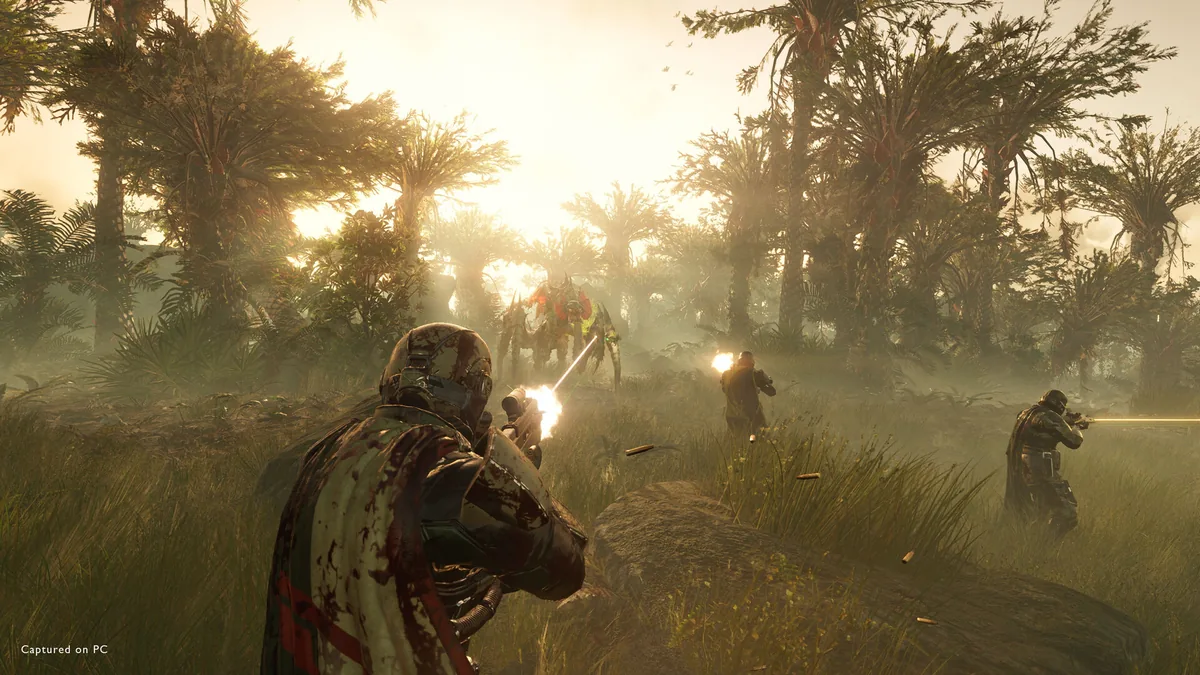
Quick Answer: The 500kg Bomb probably needs a consistency buff rather than a raw damage buff: improve its effective blast coverage or make the impact point easier to predict, while keeping it as a high-value answer to elite targets.
TL;DR
The fastest way to judge whether the 500kg Bomb needs a buff is to bring it into a mission with large targets, throw it with a clear line of approach, and compare the result against what the beacon appeared to promise. The bomb can already destroy Chargers, Hulks, Tanks, and Bile Titans with one hit when the placement and explosion connect properly, so its main weakness is reliability rather than a lack of power. Source
A practical answer to “Helldivers 2 Should the 500kg Stratagem get a buff” is therefore: yes, but mainly to its consistency and communication. A slightly more dependable blast shape, clearer impact behavior, or a better visual indication of the lethal area would solve the frustration without turning every heavy encounter into a free fireworks show.
Prerequisites
You need the following before you can properly test or use the Eagle 500kg Bomb:
- Required level: The stratagem is listed as unlocking at Level 15. Source
- Required requisition: The listed purchase cost is 10,000 requisition slips. Source
- Required item: The Eagle 500kg Bomb must be unlocked and equipped in your loadout.
- Party: Solo testing works, but a two- to four-player squad makes it easier to create controlled heavy-target scenarios and observe whether nearby enemies survive.
- Difficulty: Use a difficulty where Chargers, Hulks, Tanks, or Bile Titans can appear. Lower difficulties are still useful for learning beacon placement, but they may not provide enough heavy targets for a meaningful test.
- Patch: Use the current live version of Helldivers 2. No specific patch number is assumed here because balance values and explosion behavior can change between updates.
- Eagle support: Leave an Eagle stratagem slot available and make sure you understand whether Eagle-1 is available for another strike before starting the test.
- A safe test area: Choose open ground whenever possible. Dense rocks, buildings, cliffs, and terrain edges can make the explosion look weaker or behave less predictably.
- A target you can observe: Examples include a Charger crossing open terrain, a Hulk approaching down a road, or a stationary Tank near a clear objective.
- A way to record results: You can use simple notes, screenshots, or short clips. Record the target, beacon location, approach direction, and whether the target died, staggered, or survived.
The important prerequisite is not merely owning the bomb. You need a situation where the bomb’s intended job is obvious. Throwing it into a tangled patrol containing a Devastator, a Scout Strider, several Warriors, and a heavy target creates too many variables. A clean test against a single Charger, Hulk, Tank, or Bile Titan tells you much more.
The bomb is an offensive stratagem that drops an anti-tank weapon, embeds it in the ground, and then explodes. Source That description matters because the weapon is not simply a giant instant-delete button that appears exactly at the center of your crosshair. The beacon’s landing position, the Eagle’s approach, the target’s movement, and the surrounding terrain all influence the practical result.
For a fair comparison, test the 500kg Bomb beside other answers to the same problem. For example, compare it with a dedicated anti-armour support weapon against a Hulk, a different Eagle strike against a group of smaller enemies, and an orbital option against a stationary objective. The point is not to declare one stratagem universally best. The point is to identify whether the 500kg Bomb fails because it lacks damage, lacks area coverage, or simply makes the player guess where the explosion will matter.

You might also like
- Helldivers 2 Available Platforms Updated 3/7/2024 See all the available platforms and consoles for Beginner Guide
- Helldivers 2 similar games co op shooter deep rock galactic remnant outriders Beginner Guide
- Helldivers 2 call of duty black ops 6 movement shooters freedom
- Helldivers 2 Viper Commandos Premium Warbond List of Unlockables and Cost
- Helldivers 2 new steam game like satisfactory pax autocratica: Reference Guide
What The 500kg Bomb Already Does Well
The 500kg Bomb already has enough single-target power that a straightforward damage buff is difficult to justify as the first solution. The weapon is described as capable of destroying Chargers, Hulks, Tanks, and Bile Titans with one bomb when the hit connects. Source That gives it a very strong role against priority targets.
Its value is easiest to see in three common situations:
- A Charger blocks an escape route: Throw the beacon ahead of the Charger, move away from the approach line, and let the bomb punish its commitment.
- A Hulk advances through an open lane: Place the beacon where the Hulk will arrive rather than where it currently stands, then avoid standing between the target and the Eagle’s approach.
- A Bile Titan pressures the squad near an objective: Use the bomb when the Titan’s movement is constrained by terrain, a mission structure, or the need to turn toward a player.
The bomb also has utility outside ordinary heavy-target kills. A 500kg Bomb can destroy inactive parked Dropships during the Sabotage Air Base mission. Source That gives the stratagem a useful objective interaction, especially when the squad wants to clear a dangerous area before moving through it.
The weapon’s strengths can be summarized like this:
| Situation | What the 500kg Bomb offers | Practical limitation |
|---|---|---|
| Charger or Hulk in open terrain | Potentially immediate heavy-target removal | The target must be close enough to the actual blast |
| Tank near an objective | High-value answer without requiring a long duel | Terrain and approach direction can spoil the hit |
| Bile Titan encounter | A way to punish a predictable or constrained route | Moving targets can leave the most damaging area |
| Parked Dropship objective | Can destroy an inactive Dropship | Only useful on the relevant mission objective |
| Mixed enemy group | Strong burst damage around the impact point | Smaller enemies outside that area may survive |
The central debate is caused by the gap between the bomb’s visual promise and its reliable gameplay coverage. The description says it is a large bomb that obliterates almost any target close to impact, while also warning players to clear the area. Source Players naturally read that as “anything near this huge explosion should be in serious trouble.” When a heavy enemy survives despite appearing close, the weapon feels defective even if the actual damage calculation only missed the relevant hit area.
That is why the 500kg Bomb can be both powerful and frustrating. A perfect strike feels excellent. A near miss can feel like the game ignored a tactical decision that looked correct. In a cooperative shooter built around quick choices, that difference matters more than the theoretical maximum damage.
Step-By-Step 500kg Bomb Test
You can test whether the 500kg Bomb needs a buff by controlling placement, target movement, and Eagle approach direction one variable at a time.
Step 1. Choose a clean target
Start with one heavy enemy in open ground rather than a crowded fight. A Charger, Hulk, Tank, or Bile Titan gives you a clear result because each is specifically listed as a target that one 500kg Bomb can destroy. Source
Do not begin by throwing the bomb into a Bug Breach or Bot Dropship event. Those situations are useful for measuring battlefield value later, but they combine moving targets, terrain, reinforcements, and visual clutter. For the first test, wait until the target is separated from its escort.
A good test looks like this:
- The Charger is walking across a reasonably open patch of ground.
- The Hulk is moving down a road or between two obvious landmarks.
- The Tank is stationary or turning slowly near a clear objective.
- The Bile Titan is approaching one player while the rest of the squad has room to retreat.
The target should be visible from the moment you throw the beacon until the explosion. If the enemy disappears behind a wall, hill, or smoke cloud, mark that attempt as inconclusive instead of treating it as proof that the bomb failed.
Step 2. Observe the approach line
Before throwing, identify the direction from which Eagle-1 will arrive. The Eagle approaches in the direction indicated by where the stratagem ball was thrown, and a bouncing beacon can change or obscure that direction. Source
This is the most important setup detail for repeatable testing. Stand so that the target, beacon, and approach line are easy to understand. Avoid throwing the ball against a wall, rock, slope, or structure where it may bounce. A beacon that lands somewhere different from the intended spot turns a placement test into a bounce test.
For example, if a Hulk is walking north, throw from the south or southeast on clear ground so you can see both the beacon and the expected Eagle path. If a Charger is running directly toward you, do not panic-throw at its feet while backing into a rock. Place the beacon in its route, then move sideways to keep the target and beacon visible.
Step 3. Place the beacon where the target will be
Lead the target instead of targeting its current position. A stationary Tank gives you the easiest first attempt, while a Charger or Bile Titan requires more anticipation.
Use a different lead for each example:
- Charger: Place the beacon several body lengths ahead of its current path, then sidestep so it continues toward the marked area.
- Hulk: Place the beacon near the point where the Hulk must turn or pass through a narrow route, but leave yourself an escape lane.
- Bile Titan: Place the beacon where the Titan’s next movement will take it, not directly beneath its current legs if it is already changing direction.
The goal is to make the bomb meet the target at the moment of detonation. A technically accurate beacon thrown too late is still a miss if the enemy has already crossed the blast area.
Step 4. Clear yourself and your squad
Move away immediately after the beacon lands. The weapon is designed to create a large explosion, and the bomb’s own description tells players to clear the area. Source
Call out the strike using a clear phrase such as “500 on the Hulk” or “bomb on Titan.” This gives teammates a chance to stop shooting, avoid reinforcing the target into a new position, and prevent an accidental team wipe. A squadmate using a shield, jump pack, or heavy weapon should still respect the beacon rather than assuming the blast is harmless.
For testing, keep the recovery simple:
- If the target enters the marked zone, observe the detonation.
- If the target turns away before the bomb arrives, record the attempt as a movement miss.
- If the target remains close but survives, record the distance and terrain.
- If a teammate kicks or bounces the beacon, discard the result and repeat.
Step 5. Repeat with controlled changes
Run several attempts while changing only one factor at a time. You do not need laboratory equipment; you need consistent observations.
Try these comparisons:
- Stationary Tank in open ground versus Tank near a wall.
- Charger crossing open ground versus Charger turning around a rock.
- Hulk walking straight toward the beacon versus Hulk moving laterally across it.
- Bile Titan in a clear field versus Bile Titan beside a mission structure.
If the bomb destroys the target when the beacon is placed ahead of its route but misses when thrown directly at its current location, the problem is largely timing and prediction. If it repeatedly fails against a target that visibly passes close to the impact point, the result supports a consistency or hit-area buff.
Step 6. Test battlefield value
After the single-target test, use the bomb in an actual objective situation. Try a Bug Breach, a Bot position, a stationary Tank near an objective, and a parked Dropship on Sabotage Air Base. The parked Dropship interaction is specifically documented as a use for the bomb. Source
Measure practical success rather than body count:
- Did the bomb remove the priority heavy target?
- Did the squad gain enough space to reload or revive?
- Did smaller enemies remain numerous enough to interrupt the team?
- Did the strike force the squad to abandon the objective?
- Did the Eagle’s arrival line make the placement difficult?
This final test separates a weapon that is technically strong from one that is consistently useful. A bomb that kills a Bile Titan but leaves the squad trapped under a swarm may still be worth taking, but its role is narrower than a player may expect from its huge visual effect.
Step 7. Decide what kind of buff is justified
Conclude the test by identifying the failure category:
- Damage failure: The target survives despite being reliably inside the effective blast area.
- Coverage failure: The blast looks enormous, but targets slightly outside the central zone survive too often.
- Guidance failure: The beacon bounces, the approach direction is unclear, or the impact point is difficult to predict.
- Timing failure: The bomb arrives after fast enemies have already moved away.
- Role failure: The bomb kills one heavy target but contributes too little against the rest of the encounter.
This method produces a useful balance opinion. Instead of saying “the bomb feels bad,” you can say “the bomb’s heavy-target damage is already strong, but its effective coverage and approach readability create too many near misses.” That is a much better answer to the buff question.
Should The 500kg Bomb Get A Buff?
The 500kg Bomb should receive a consistency-focused buff if Arrowhead wants the weapon to match player expectations, but it does not obviously need more single-target damage. A community discussion summarized the same tension: the bomb was described as the strongest anti-massive stratagem by a wide margin despite consistency issues caused by its small effective radius, with the argument that its expectations may need clearer communication more than a direct buff. Source
That position makes sense because the bomb already has a clear high-value niche. It can remove a Charger, Hulk, Tank, or Bile Titan when the attack connects, and it can destroy an inactive parked Dropship during a specific Sabotage Air Base objective. A direct increase to damage could make those existing successes even more excessive without solving the reason players miss.
The better buff targets are the ones that reduce unfair-feeling outcomes:
- More dependable effective coverage: Targets close to the apparent impact point should be affected more consistently.
- Clearer blast communication: The visual explosion should better communicate which area is genuinely dangerous.
- More predictable beacon behavior: Players should be able to understand where a bouncing beacon will leave the bomb.
- Better approach readability: The Eagle’s direction should be easier to judge when terrain is uneven.
- A modest improvement against clustered heavies: The bomb could reward good placement without becoming a universal crowd-clear tool.
A balance change should preserve the weapon’s tradeoffs. The 500kg Bomb should remain dangerous to use near teammates, should still require deliberate placement, and should not replace every other offensive option. A squad should still have reasons to bring an Eagle Airstrike, Orbital Precision Strike, Orbital Railcannon Strike, support weapons, or crowd-control tools depending on the mission.
| Possible change | Likely benefit | Balance risk |
|---|---|---|
| Increase effective blast coverage | Fewer frustrating near misses against heavy targets | Could erase the need for careful placement |
| Improve beacon landing behavior | More reliable planning around rocks and structures | Could make the strike too easy to use |
| Clarify the lethal zone visually | Players understand failures and successes better | Does not solve a genuinely weak hit area |
| Add more damage | Better performance against already vulnerable targets | Least useful fix if coverage is the real issue |
| Improve multi-target consistency | More value during breaches and Bot assaults | Could make one slot dominate mixed encounters |
The strongest design answer is a small reliability improvement paired with clearer feedback. For example, the bomb could remain just as powerful at the center while making near-center heavy targets more consistently vulnerable. That would preserve the satisfying “one big target, one big boom” identity without making every patrol disappear.
Players should also separate weapon balance from expectation management. The bomb is not necessarily broken because its visual explosion is larger than its dependable kill zone. However, if the game repeatedly presents a target as being close enough and then produces no meaningful result, the player experiences that as a balance problem regardless of the underlying damage model.
The answer can therefore be both “yes” and “no” depending on what buff means. No, it does not obviously need a raw damage increase. Yes, it would benefit from better consistency, impact readability, and practical reliability. That is the version of the buff that improves player trust without flattening the stratagem roster.
Common Mistakes
The most common 500kg Bomb mistakes come from treating a spectacular visual effect as a guaranteed area-clear tool instead of a precision strike against a priority target.
Mistake 1. Throwing directly at the target’s current position
Players often throw at a Charger, Hulk, or Bile Titan exactly where it stands. They fall into this habit because the beacon feels like a grenade and the target appears large enough to cover the whole blast.
Fix: Lead moving targets. Place the beacon on the route the Charger is committing to, near the lane a Hulk must cross, or ahead of a Bile Titan that is advancing toward the squad. If the target turns, stop counting that attempt as a damage failure.
Mistake 2. Ignoring the Eagle’s approach direction
A player may assume the bomb drops vertically over the beacon with no meaningful approach geometry. This becomes especially costly near walls, cliffs, rocks, and objectives.
Fix: Throw from a clear position and watch the direction of travel. The Eagle arrives in the direction associated with the throw, while a bouncing beacon can make the final direction harder to track. Source Avoid bouncing the beacon off a structure when a direct landing is possible.
Mistake 3. Using the bomb as the first answer to every crowd
The explosion is enormous on screen, so players often spend it on a group of smaller enemies. They then have no answer ready when a Tank, Hulk, or Bile Titan appears.
Fix: Reserve the bomb for a priority heavy, a packed high-value group, or a relevant objective. Use other tools for ordinary patrols when possible. Examples include clearing basic Bug enemies with a crowd-control option, handling Bot infantry with a weapon suited to light targets, or saving the Eagle slot for the Tank that arrives during an objective.
Mistake 4. Throwing it into cramped terrain
A beacon placed beside a building, rock formation, or cliff can bounce or create an unclear approach. The target may also be partially hidden from the effective impact area.
Fix: Pull the target into open ground before calling the strike. Against a Hulk near a wall, kite it down a road. Against a Charger near rocks, move laterally until it commits to a clear path. Against a Tank beside an objective, use the open side of the area rather than throwing behind the structure.
Mistake 5. Standing too close after the beacon lands
The bomb’s warning to clear the area is not decorative text. Players often keep firing because they want to finish the target or retrieve dropped equipment.
Fix: Disengage immediately, call out the strike, and circle back only after the explosion. If the target is a Charger, do not run in a straight line toward the beacon. If it is a Hulk, retreat behind cover that does not place the squad on the Eagle’s approach line. If it is a Bile Titan, keep enough distance to avoid combining the blast with its own attack.
Mistake 6. Blaming the bomb after an interrupted test
A teammate can shove the target, kill it early, bounce the beacon, or trigger another explosion that hides the result. The player then concludes that the 500kg Bomb failed.
Fix: Repeat the test with one target and announce the plan before throwing. Use phrases such as “watch the Tank” or “do not shoot the Charger yet.” Treat interference as an invalid result, not evidence for or against a buff.
Mistake 7. Carrying it on the wrong mission
The 500kg Bomb is a heavy-target answer, so taking it into a mission where the main challenge is sustained crowd pressure can leave the squad short on area control.
Fix: Match the loadout to the objective. Bring it when heavy enemies or a major defensive target are likely to decide the fight. Consider another offensive stratagem when the mission repeatedly demands wide crowd clearing, fast movement, or repeated damage over time.
Pro Tips
Advanced 500kg Bomb play comes from controlling enemy movement and the beacon’s landing conditions before the throw.
Tip 1. Use terrain as a funnel
When a Charger, Hulk, or Bile Titan has only one practical route toward the squad, place the beacon at the end of that route. A road, bridge approach, objective entrance, or gap between rocks can turn a moving-target problem into a timing problem. Make sure the terrain does not also cause the beacon to bounce.
Tip 2. Throw from the side, not from the retreat line
A side angle gives you more room to watch the target and move away from the blast path. Against a Charger, step off its charge line before throwing. Against a Hulk, avoid retreating directly behind the beacon. Against a Tank, use the side of the objective that keeps both the target and the Eagle’s approach visible.
Tip 3. Delay the throw until the target commits
A Bile Titan changing direction is a poor target for a precision strike. Wait until it turns toward a player, enters a narrow lane, or begins moving around an obstacle. The same principle works on a Hulk leaving cover and a Charger beginning a charge. The trigger is commitment: once the enemy has chosen its route, the beacon becomes much more valuable.
Tip 4. Assign one player as the strike caller
In a coordinated squad, one player should call the target and location while others maintain spacing. “500 on Tank, move left” is more useful than four players independently throwing explosives. This prevents a second teammate from pushing the heavy away from the beacon or dropping another strike on top of the same area.
Tip 5. Use the bomb to create space, not only kills
Even when the target survives, a well-placed bomb can force the squad to reposition and interrupt an advance. Against a Bile Titan near an objective, the best result may be killing it; the second-best result may be making the team retreat safely while another weapon finishes the job. Do not chase a damaged heavy into the explosion zone.
Tip 6. Test parked Dropships separately
The parked Dropships on Sabotage Air Base are a distinct objective use. When the squad is clearing that mission, treat the bomb as an objective tool rather than spending it casually on a patrol. The documented interaction makes it especially valuable when the inactive aircraft is positioned in a dangerous area. Source
Tip 7. Keep a backup for targets that move unpredictably
If the mission is likely to produce several heavies at once, the bomb should not be your only answer. Pair it with a support weapon or another offensive option that can finish a wounded Charger, Hulk, Tank, or Bile Titan after a near miss. The 500kg Bomb is strongest when it begins the engagement or removes the key target, not when the entire loadout depends on one perfect throw.
How To Verify A Successful Strike
You confirm a successful 500kg Bomb test by checking the target’s state immediately after the explosion and comparing it with the recorded beacon placement. A reliable kill is an in-game result: the Charger, Hulk, Tank, or Bile Titan is destroyed, the objective target is removed, or the parked Dropship is visibly eliminated.
Use a simple verification checklist:
- Target death: The heavy enemy disappears or leaves the battlefield as a confirmed kill.
- Objective result: The bomb destroys the inactive parked Dropship during Sabotage Air Base.
- No friendly casualties: The squad survives the blast and can continue the objective.
- Repeatability: A similar throw against the same target type produces a similar outcome.
- Placement match: The target was near the intended impact point rather than already moving away.
- No outside interference: Another weapon, explosion, teammate, or environmental event did not decide the result.
A single kill does not prove that the bomb is perfectly consistent. It only proves that the strike worked once. Likewise, a single miss does not prove that a buff is necessary. The useful signal comes from repeated, comparable attempts.
For example, if a Charger dies when it runs directly through the marked area but survives when it passes just outside that point, the weapon is behaving like a concentrated strike. If a Tank dies in open ground but survives beside a wall, terrain and approach direction are likely contributing to the result. If a Bile Titan repeatedly survives despite crossing the apparent center, that supports the argument for a reliability improvement.
There is no special achievement or dialogue required to validate the weapon. The verification is the battlefield outcome. The game’s broader achievement system does not provide a dedicated 500kg Bomb confirmation, so do not wait for an unlock notification. The relevant confirmation is visual and tactical: the target is gone, the objective is damaged or destroyed, and the squad has enough space to continue.
A successful test should also answer whether the bomb helped the team. Killing a Hulk while three squadmates are caught in the blast is not a clean success. Destroying a Tank but losing the objective because the Eagle arrival forced everyone away may still be a poor trade. The best result removes the priority target and leaves the squad positioned to complete the mission.
Optional Faster And Alternative Methods
The fastest practical method is to use the 500kg Bomb during a live heavy encounter and judge whether it removes the priority target without requiring a second full engagement. This skips controlled testing, but it reflects the experience that matters most in real missions.
Try these alternatives:
- Open-ground heavy test: Find one Charger, Hulk, Tank, or Bile Titan, throw ahead of its route, and retreat sideways.
- Objective test: Use the bomb on a Tank near a mission objective or on the inactive parked Dropship during Sabotage Air Base.
- Squad funnel method: Have one player draw the heavy through a road, bridge approach, or clear gap while the bomb carrier throws at the committed route.
- Near-miss recovery: If the heavy survives, do not throw a second strike immediately. Use a support weapon or another player’s anti-armour option while the target is staggered, damaged, or repositioning.
- Crowd-control alternative: If the encounter contains many small enemies and no priority heavy, use a stratagem better suited to sustained area control and preserve the 500kg Bomb.
- Expectation-management method: Treat the bomb as a precision anti-heavy strike with a dramatic explosion, not as a guaranteed full-screen clear.
The closest thing to a cheese method is forcing the enemy into a route where it cannot easily dodge. A Charger chasing a player through a narrow gap, a Hulk moving down a road, or a Tank parked beside an objective is easier to predict than a target roaming through open terrain. This is not an exploit; it is ordinary battlefield positioning.
Another fast method is to let a teammate become the visible target while the bomb carrier throws from an offset angle. The heavy keeps moving toward the teammate, and the bomb lands ahead of that movement. The teammate must have a clear escape route, and the squad must communicate so nobody accidentally turns the target or runs through the beacon.
Do not rely on a bounce-based shortcut. The beacon’s direction becomes harder to track after bouncing, so a ricochet throw may occasionally land in a useful spot but is poor for repeatable testing. Source Clear ground and a controlled approach are faster over the whole mission because they reduce failed throws.
FAQ
Does the 500kg Bomb need more damage?
The 500kg Bomb more clearly needs reliability improvements than additional raw damage. It can already destroy Chargers, Hulks, Tanks, and Bile Titans with one bomb when the hit connects. Source
A damage buff would help only when the target is already inside the effective damage area and somehow survives. Many player complaints instead come from the target being close to the explosion but outside the most effective zone, moving away before detonation, or standing near terrain that changes the result. Increasing damage without improving coverage would leave those complaints intact.
A better change would make near-center hits more dependable, clarify the actual blast area, or reduce uncertainty around the bomb’s approach. That keeps the weapon’s heavy-target identity intact. The best practical test is to record whether the target was genuinely close to the impact point and whether the beacon landed cleanly before asking for more damage.
Is the 500kg Bomb good against Bile Titans?
The 500kg Bomb is a strong option against Bile Titans when the Titan’s route is predictable and the beacon lands cleanly. The weapon is specifically listed as capable of destroying a Bile Titan with one bomb. Source
It works best when the Titan is approaching a player, moving through a narrow area, or turning around an objective. It is less dependable when the Titan is wandering across open ground, changing direction repeatedly, or partially obscured by terrain. Lead the target rather than throwing at its current position.
After throwing, move away from both the beacon and the Titan’s attack path. If the bomb misses, use the opening to apply another anti-armour option instead of standing near the impact point waiting for a second miracle. A Bile Titan that survives a near miss is still dangerous, and the squad should treat the bomb as one part of the engagement rather than the entire plan.
Can one 500kg Bomb destroy a Tank or Hulk?
One 500kg Bomb can destroy a Tank or Hulk when the strike connects properly, and both target types are listed among the enemies vulnerable to a one-bomb kill. Source
For a Tank, stationary or slow movement makes placement easier. Throw on open ground, keep the Eagle’s approach clear, and avoid placing the beacon behind a structure. For a Hulk, wait until it leaves cover or commits to a lane. A Hulk moving laterally across the beacon can be harder to catch than one walking directly toward it.
The most common failed attempt happens when the player throws at the Tank or Hulk’s visible body but does not account for the actual approach and detonation timing. Use the enemy’s route, not its silhouette, as your aiming reference. If the first strike fails, reposition and let another player finish the target rather than stacking more players in the blast zone.
What is the safest way to throw the beacon?
The safest throw is a clean, direct landing from the side of the target’s route, followed by immediate movement away from the blast area. Avoid walls, rocks, cliffs, and other surfaces that can bounce the beacon or obscure the Eagle’s direction.
The documented behavior states that Eagle-1 arrives according to the direction in which the stratagem ball was thrown, while a bouncing beacon can change that direction or make it harder to track. Source That means a safe throw is partly about geometry, not just distance.
Against a Charger, stand off its charge line and throw ahead of it. Against a Hulk, use the open side of the road or objective. Against a Bile Titan, throw from an offset position so you can retreat without crossing the beacon. Always warn teammates before the bomb arrives, because a technically correct placement can still become a squad wipe if everyone keeps fighting inside the marked area.
Should I bring the 500kg Bomb on every mission?
You should bring the 500kg Bomb when heavy targets or a high-value objective are likely to decide the mission, not automatically on every operation. Its strongest examples are a Charger blocking an extraction route, a Hulk defending a Bot position, a Tank controlling an objective lane, or a Bile Titan threatening a Bug objective.
It is less attractive when the mission’s main problem is continuous light-enemy pressure, rapid movement between objectives, or repeated situations where the squad cannot safely create distance. In those cases, a crowd-control or sustained-damage option may contribute more often.
Build around the rest of the squad. If another player already carries a reliable heavy-target answer, the team may gain more from a tool that clears surrounding enemies or supports defensive objectives. If nobody has a way to handle a Tank, Hulk, Charger, or Bile Titan, the 500kg Bomb becomes much more valuable even if it occasionally demands a careful throw.
Is the 500kg Bomb better than other offensive stratagems?
The 500kg Bomb is better than many alternatives when the squad needs a concentrated answer to a single massive target, but it is not automatically better for crowds, repeated attacks, or uncertain movement. Its role is defined by high burst value and demanding placement.
Use it for a Tank near a terminal, a Hulk walking through an exposed lane, a Bile Titan closing on an objective, or a parked Dropship on Sabotage Air Base. Choose another offensive option when the squad needs repeated area coverage, sustained pressure, or a safer response to scattered enemies.
The useful comparison is not “which stratagem has the biggest explosion?” It is “which tool solves the next problem with the least risk?” A bomb that removes one Bile Titan can be the correct choice even if another strike kills more small enemies. Conversely, spending the 500kg Bomb on a minor patrol can be wasteful if a heavy target arrives moments later.
Related Guides
The most useful companion guides are the ones that improve heavy-target positioning, Eagle timing, and squad loadout planning. They should sit near this article because the 500kg Bomb’s performance depends as much on setup and communication as on the stratagem itself.
- Best Anti-Armour Stratagems in Helldivers 2
- How To Kill Bile Titans in Helldivers 2
- How To Destroy Hulks and Tanks
- How To Deal With Chargers
- Best Eagle Stratagem Loadouts
- How To Use Stratagem Beacons Without Teamkills
- Best Stratagems for Bug Missions
- Best Stratagems for Bot Missions
- Sabotage Air Base Mission Guide
A strong follow-up guide should explain how to combine the 500kg Bomb with support weapons. For example, a player can use the bomb to create the opening against a Hulk, then let a teammate finish the survivor while the squad moves toward the objective. Another useful sibling article would compare the bomb with other anti-heavy options by role rather than by raw spectacle: single-target burst, area control, repeatability, and safety.
The most relevant loadout advice is also mission-specific. A Bug mission with repeated Chargers and Bile Titans rewards a different pairing from a Bot operation where Hulks and Tanks appear around fortified positions. The same bomb can feel excellent in one environment and awkward in another because terrain, enemy movement, and squad spacing change the number of clean throws available.
Use the linked topics to build a complete plan: identify the enemy faction, select the heavy-target answer, choose a second tool for nearby enemies, and decide who calls Eagle strikes. That turns the “should it get a buff?” debate into a practical question about whether the weapon is doing its assigned job in the mission you are actually playing.
Sources
The article uses the following factual sources for the 500kg Bomb’s unlock information, behavior, target interactions, and community balance perspective:
- Helldivers Wiki: Eagle 500kg Bomb
- Helldivers Fandom: Eagle 500kg Bomb
- Steam Community discussion on the 500kg Bomb
See also
- Helldivers 2 halo infinite helljumpers game mode similar explained
- Helldivers 2 fourth faction alternative multiple enemies planet why Beginner Guide
- Helldivers 2 Why Now May Be the Perfect Time for a New Enemy Faction
- Helldivers 2 Which enemy faction do you enjoy fighting in: Beginner Guide
- Helldivers 2 Super Destroyer Screen Display Interactive Update: Beginner Guide
- Helldivers 2 Ground All Terrain Extraction Rig GATER Beginner Guide
- Helldivers 2 Reviewed by Game878Helldivers 2Read Full Review Story5Gameplay9Visuals9Audio8Value forMoney8 Beginner Guide
- Helldivers 2 fan creates indoor dungeon mission concept: Beginner Guide
- Helldivers 2 Select the Right Weapons for the Job
- Helldivers 2 new warbond weapons enemy update: what changed in the July 23, 2026 patch
Screenshots



Reviewed by
HD2 Guides Editorial
Expertise: Editorial team behind HD2 Guides. Content is compiled from official patch notes, community wikis, and playthrough notes, then reviewed and updated on schedule.
Sources
Helldivers 2 Stratagems Guides →
Browse the complete stratagems collection and its focused guides.
Related Guides



🔥 Popular Guides
Helldivers 2 helldivers 2 warhammer 40k collaboration update Patch Notes Explained
Helldivers 2’s Warhammer 40K crossover adds Castellan’s Creed, new weapons, armor, enemies, missions, SEAF allies, and more.
Helldivers 2 super helldive achievement guide
Achievement guide for Helldivers 2 covering rare trophies, hidden requirements, missable timing, and a full Super Helldive completion route.
HELLDIVERS™ 2 all achievements: complete achievements guide
Full Helldivers 2 achievements guide with rarest trophies, hidden unlocks, missables, and a 100% completion route.

Helldivers 2 patch notes 7.0.2: What changed in the Void update era
What changed in Helldivers 2 patch notes 7.0.2, including new Illuminate threats, SEAF support, the level cap increase, and squad action items.
📋 Patch Notes & Updates
🛠️ Popular Tools
Frequently Asked Questions
Quick answers from the guide · click a question to expand.
Does the 500kg Bomb need more damage?
The 500kg Bomb more clearly needs reliability improvements than additional raw damage. It can already destroy Chargers, Hulks, Tanks, and Bile Titans with one bomb when the hit connects. Source
Is the 500kg Bomb good against Bile Titans?
The 500kg Bomb is a strong option against Bile Titans when the Titan’s route is predictable and the beacon lands cleanly. The weapon is specifically listed as capable of destroying a Bile Titan with one bomb. Source
Can one 500kg Bomb destroy a Tank or Hulk?
One 500kg Bomb can destroy a Tank or Hulk when the strike connects properly, and both target types are listed among the enemies vulnerable to a one-bomb kill. Source
What is the safest way to throw the beacon?
The safest throw is a clean, direct landing from the side of the target’s route, followed by immediate movement away from the blast area. Avoid walls, rocks, cliffs, and other surfaces that can bounce the beacon or obscure the Eagle’s direction.
Should I bring the 500kg Bomb on every mission?
You should bring the 500kg Bomb when heavy targets or a high-value objective are likely to decide the mission, not automatically on every operation. Its strongest examples are a Charger blocking an extraction route, a Hulk defending a Bot position, a Tank controlling an objective lane, or a Bile Titan threatening a Bug objective.
Is the 500kg Bomb better than other offensive stratagems?
The 500kg Bomb is better than many alternatives when the squad needs a concentrated answer to a single massive target, but it is not automatically better for crowds, repeated attacks, or uncertain movement. Its role is defined by high burst value and demanding placement.
Was this guide helpful?
Rate this guide so we can improve it.
Share your own tip
Found something not in the guide? Submit it below — our editors review every tip before publishing. No account required.