 Helldivers 2
Helldivers 2 Launch Trailer Beginner Guide
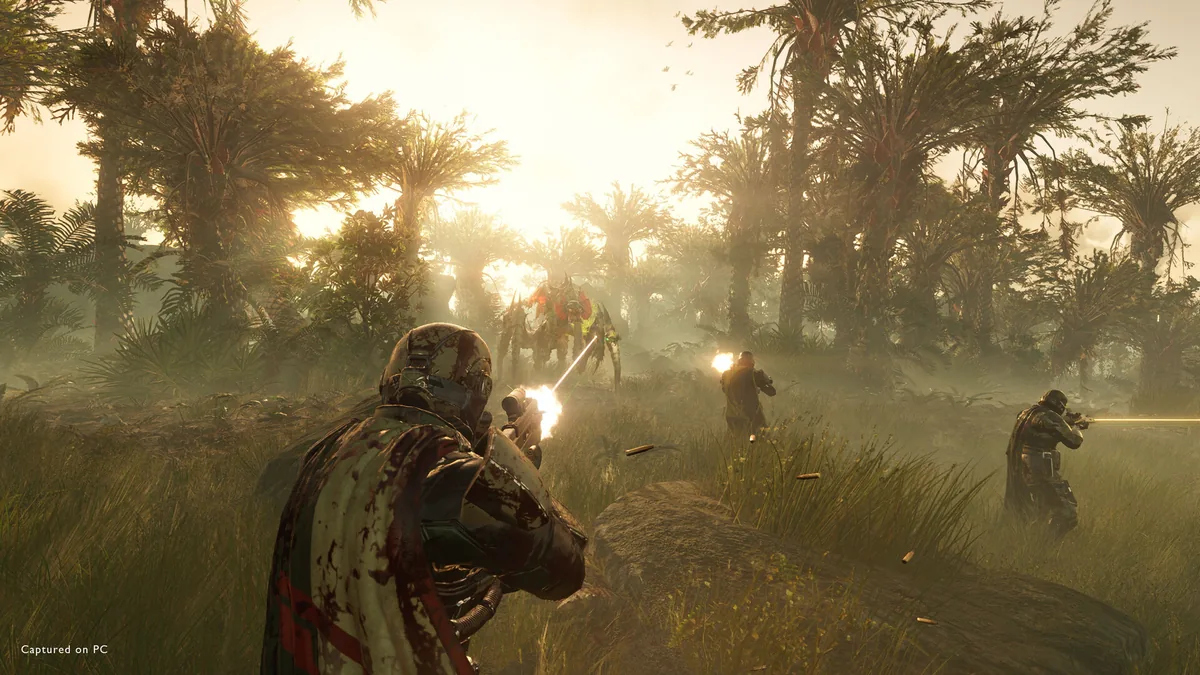
Quick Answer: Helldivers 2 is a cooperative third-person shooter about building a strong loadout, learning mission flow, spending early resources on survivability, and avoiding friendly fire while you unlock stronger stratagems and ship upgrades.
What Helldivers 2 Is Good At
Helldivers 2 is at its best when you treat it as a teamwork-first shooter rather than a pure run-and-gun game. The core loop is simple on paper: pick a mission, drop onto a hostile planet, complete objectives, extract, and convert the run into better gear and more options for future deployments. In practice, the game rewards discipline, communication, and good priorities far more than raw aim alone.
That is also why the Helldivers 2 Launch Trailer still makes a useful reference point for new players. It sells the game’s tone accurately: chaotic, fast, and loud, but still built around squads trying to complete objectives under pressure. If you are coming in from the trailer and expecting a power fantasy where you can ignore your team, the real game will correct that idea quickly. If you come in expecting a tactical co-op shooter with high damage, high risk, and frequent failure states, the learning curve makes sense.
A few concrete examples help frame the beginner experience. A fresh player might start with a basic assault rifle, a simple orbital strike, and a supply pack, then discover that the real challenge is not killing one bug or one Automaton unit. The challenge is moving through an objective chain, staying alive long enough to call in reinforcements, and not wasting the squad’s resources on avoidable mistakes. Another player may rely on a support weapon like the Autocannon or a crowd-control option like the Eagle Airstrike and immediately feel the difference between “I have a gun” and “I have a role.” A third may learn that mission success is often decided by extraction, not by the midpoint firefight that felt dramatic in the moment.
This guide focuses on the first part of that journey: what to do in your first hour, what to spend first, what mistakes to fix early, and how to know when you have moved beyond beginner status. It is written for the player who wants to become functional quickly rather than memorizing every edge case in the arsenal.
First-Hour Checklist
Your first hour in Helldivers 2 should be spent unlocking core mission habits, not chasing perfect builds. The goal is to become useful in a squad, survive longer, and leave the first session with a clear sense of what to improve next.
1. Finish the opening tutorial with attention, not speed
The tutorial teaches more than controls; it teaches the game’s language. Pay attention to stratagem input, calling in supplies, using grenades, and understanding that friendly fire is always part of the system. If you rush it, you often miss the most important lesson: the game expects you to handle pressure while managing menus, map pings, and reinforcement logic.
Concrete examples of what to notice:
- Calling a reinforcement after a teammate dies.
- Requesting ammo and support weapons instead of hoarding everything.
- Moving out of the drop zone instead of standing still after extraction begins.
2. Open the loadout screen and test a simple, balanced setup
Your first loadout should cover three jobs: basic damage, crowd control, and emergency support. Good beginner examples are a primary weapon you can aim comfortably, one orbital or Eagle strike for groups, and one utility stratagem that keeps you alive or helps the team recover.
A safe early pattern is:
- A controllable primary rifle for ordinary enemies.
- An area-damage stratagem for bug swarms or bot clusters.
- A resupply or defensive option that helps when the squad is under strain.
You do not need a “perfect” setup on day one. You need a loadout that lets you learn how the game feels under stress.
3. Play low to moderate difficulty missions first
Start where you can actually learn the objective flow without being overwhelmed. Low difficulty missions let you practice landing, reading the map, completing side tasks, and extracting while still having enough enemy pressure to force real decisions.
Examples of useful early mission learning:
- One mission against Terminids to learn swarm spacing and retreat timing.
- One mission against Automatons to learn cover, line of sight, and ranged threats.
- One mission with a simple objective chain so you can practice map reading and reinforcement timing.
This is the point where many players make the mistake of trying to prove skill too early. Helldivers 2 rewards experience under manageable pressure more than it rewards a single flashy victory on a harder setting.
4. Pick up samples, requisition, and medals whenever it is safe
Every run should teach you resource discipline. Samples matter because they feed ship progression. Medals matter because they unlock warbond rewards. Requisition is useful because it expands your stratagem access. Early on, you should pick up what you can without breaking the mission.
A practical habit:
- Grab nearby samples while passing through an objective area.
- Take medals and other rewards when the squad is already safe or regrouping.
- Do not chase a single pickup if it pulls you away from the mission or into a death spiral.
5. Practice reinforcement and regrouping on purpose
A beginner often treats death as a personal failure. In Helldivers 2, it is also a squad logistics event. Reinforcement is a core action, not an emergency only used after everything collapses.
Use your first hour to learn:
- How quickly you can call a reinforce under pressure.
- How to respawn without running into enemy fire.
- How to move back to the team after being dropped in a bad spot.
A squad that recovers cleanly from deaths wins more missions than a squad that never takes risks.
6. End the session by checking what actually improved
At the end of the first hour, do a quick self-review:
- Did you die because of enemy damage, or because of your own positioning?
- Did you use stratagems early enough to matter?
- Did you extract with samples or leave them behind?
- Did you understand at least one enemy type better than when you started?
If the answer to any of these is “not really,” your next session has a clear goal. That is better than just playing more missions without intent.

You might also like
- Helldivers 2 similar games co op shooter deep rock galactic remnant outriders Beginner Guide
- Helldivers 2 Available Platforms Updated 3/7/2024 See all the available platforms and consoles for Beginner Guide
- Helldivers 2 fourth faction alternative multiple enemies planet why Beginner Guide
- Helldivers 2 Which enemy faction do you enjoy fighting in: Beginner Guide
- Helldivers 2 Why Now May Be the Perfect Time for a New Enemy Faction
Resource Priority Order
You should spend early resources on unlocks that make you survive longer and contribute more consistently, not on flashy options that only look good in a trailer. In the current progression curve, the most valuable investments are the ones that improve mission reliability across multiple enemy types.
| Priority | What to Spend | Why It Comes First | Example Early Use |
|---|---|---|---|
| 1 | Ship modules that improve core survivability or mission uptime | These affect many runs, not just one loadout | Better support for Eagles, orbitals, or resupply usage |
| 2 | Warbond unlocks that expand reliable weapons and utility | They widen your practical choices without overcomplicating play | A stronger primary, a better grenade, or a useful passive |
| 3 | Stratagems that solve common beginner problems | These give immediate value in squads and solo queue | Anti-armor, crowd control, or emergency support |
| 4 | Cosmetic or low-impact side unlocks | They are nice to have, but they do not fix weak fundamentals | Armor styles or nonessential extras |
| 5 | Experimental niche picks | These are better after you know your preferred role | Specialist tools for specific squad compositions |
The early mistake is assuming that every unlock is equally urgent. It is not. In practice, the best first purchases are the ones that let you stay alive, keep the mission moving, and handle unexpected enemy spawns without relying on perfect execution.
Here is the simplest rule set:
- Spend first on versatility. If an unlock helps on both bug and bot missions, it has strong early value.
- Hoard for meaningful upgrades. If you are not sure whether a purchase improves survival or mission speed, wait.
- Avoid overcommitting to one gimmick. A beginner-friendly arsenal should handle ordinary fights, not only the one scenario that looked fun in a clip.
Three example spending paths show the difference:
- A player who buys a more dependable support option and a useful ship upgrade will notice more value across a whole week of missions.
- A player who buys a niche crowd-control tool too early may enjoy one satisfying mission, then struggle everywhere else.
- A player who spends medals on cosmetic progression while ignoring mission tools often feels stuck even though they are technically “unlocking” things.
The same logic applies to hoarding. Keep enough resources available so you can adapt when a better upgrade appears, especially after you discover which enemy faction you fight most often. Terminids and Automatons punish different weaknesses, so an unlock that is great in one context may be merely decent in another.
Common Mistakes
New players usually fail in Helldivers 2 for understandable reasons, but the fixes are straightforward once you name the problem clearly. The game is demanding, yet most beginner losses come from repeatable habits rather than rare bad luck.
Mistake 1: Treating the game like a solo shooter
Players do this because the combat feels immediate and the launch trailer makes every fight look like a personal action scene. The fix is to think in squad terms: stay near teammates, call reinforcements quickly, and use stratagems to support the group rather than to pad your own kill count.
Mistake 2: Ignoring friendly fire until it becomes a pattern
Players fall into this because many shooters let you spray through allies without consequence. In Helldivers 2, orbital strikes, grenades, and careless movement can wipe the squad. The fix is simple: announce dangerous stratagem calls, throw explosives from stable positions, and keep sight of where allies are running before you fire.
Mistake 3: Chasing kills instead of objectives
This happens because enemy waves are loud, visible, and satisfying to fight. The fix is to check the mission map after every major engagement and move with purpose. If the objective is already active, advance. If the fight is dragging, disengage and reposition rather than farming enemies.
Mistake 4: Calling support too late
Players often wait until the team is collapsing before they request ammo, reinforcements, or help clearing a lane. The fix is to treat support as preemptive. If you are low on supplies, one teammate is dead, or a heavy enemy is approaching, call the tool before the situation becomes unrecoverable.
Mistake 5: Bringing a loadout that covers only one problem
Beginners sometimes build around one favorite weapon or one dramatic stratagem. The fix is to cover at least basic enemies, a medium threat, and a recovery tool. A balanced beginner loadout can include a reliable primary, one anti-group tool, and one answer to armor or emergency pressure.
Mistake 6: Ignoring enemy faction differences
Players can forget that Terminids and Automatons ask for different positioning and target priorities. The fix is to adjust your habits by faction: fight bugs with better spacing and crowd control, and fight bots with cover, lane control, and more disciplined exposure.
Mistake 7: Leaving samples and rewards behind for no reason
This usually comes from tunnel vision during extraction or from panic after a messy fight. The fix is to pick up nearby rewards whenever the path is safe, and to prioritize samples before the final extraction sprint if the area is clear enough to do so.
Pro Tips
The strongest beginner habits in Helldivers 2 are small, repeatable decisions made at the right moment. These tips go a step beyond basic survival and start to separate a competent squad mate from someone still learning the game’s pace.
Tip 1. Use terrain to break enemy pressure
When a fight starts to spiral, stop standing in the open and use hills, rocks, walls, and wreckage to force enemies into cleaner angles. This matters most against Automatons, where line of sight determines how quickly you get chipped down, but it also helps against bugs when you need a second to reload or call support.
Tip 2. Throw stratagems where the fight is going, not where it is
If a patrol is advancing, place your orbital strike or Eagle call slightly ahead of the group’s movement path. This gives the effect time to land on the enemy instead of on empty ground. The same logic applies to extraction defense: predict the lane, then commit the call.
Tip 3. Learn one answer to heavies and one answer to swarms
A beginner who only prepares for one threat type usually folds when the mission composition changes. Keep one tool for large targets and one for mass enemies. For example, a support weapon can handle armor while an area strike clears a wave, or vice versa depending on your preferred role.
Tip 4. Reload and reposition before the magazine is empty
The game punishes standing still while under fire. Reload during short pauses, then move to a new angle. That habit matters with weapons like the Breaker style of close-range damage, precision primaries, or support weapons that need time to reset after a burst.
Tip 5. Watch the minimap and mission objective together
A lot of beginner deaths happen because the player sees enemies but not the mission state. Checking both tells you whether you should clean up, move on, or call the squad to regroup. This is especially useful on missions with multiple objective points, where a short detour can become an unnecessary death loop.
Tip 6. Do not spend every life for a lost fight
Sometimes the correct move is to leave. If the squad has no supplies, the objective is not in a defensible state, and the enemy pressure keeps climbing, disengage and reset the engagement. Surviving with progress intact is better than turning a bad fight into a full wipe.
Tip 7. Practice one faction until its patterns feel obvious
If you alternate factions too often while learning, you may never internalize basic enemy behavior. Spend several missions focused on one enemy type, then compare the difference. That makes the next faction easier to learn because you are not constantly rebuilding your instincts from scratch.
Graduation Threshold
You are out of the beginner phase when you can complete missions consistently without needing the squad to carry your decision-making. The threshold is not a level number or a single weapon unlock; it is the point where your choices stop being reactive and start being intentional.
A good way to judge this is by asking whether you can do the following without outside help:
- Read the mission type and choose a sensible loadout before drop.
- Survive the opening engagement without wasting major stratagems.
- Move between objectives with a clear idea of when to fight and when to bypass.
- Use reinforcements, resupplies, and support calls early enough to matter.
- Extract with the squad more often than not, even after a messy mission.
You are also likely past the beginner stage when you can explain why a mission failed. If your answer is still “everything was chaos,” you are probably still in the learning phase. If your answer becomes specific, such as “we overextended on a bot objective without cover” or “we spent our anti-armor tool on the wrong target,” then you are making the kind of analysis that leads to improvement.
A few concrete signs show real progress:
- You stop overvaluing kill counts and start valuing mission tempo.
- You know when to use a support weapon versus when to save it.
- You can identify at least one dangerous enemy type on sight.
- You adjust your stratagem choice based on the faction and mission objective.
- You can join a random squad and remain useful without constant instructions.
For many players, that moment happens before they feel “expert,” because the game’s floor is high and its ceiling is much higher. Once you can play cleanly on a stable difficulty and contribute meaningfully in mixed squads, you have crossed the beginner line.
Related Guides
- Helldivers 2 Tier List
- Helldivers 2 Best Beginner Loadouts
- Helldivers 2 Walkthrough
- Helldivers 2 Stratagem Guide
- Helldivers 2 Weapons Guide
- Helldivers 2 Armor Guide
Sources
- https://store.steampowered.com/app/553850/
- https://howlongtobeat.com/?q=helldivers2
- https://www.metacritic.com/game/helldivers-2
- https://store.steampowered.com/app/553850/
See also
- Helldivers 2 Super Destroyer Screen Display Interactive Update: Beginner Guide
- Helldivers 2 Ground All Terrain Extraction Rig GATER Beginner Guide
- Helldivers 2 Reviewed by Game878Helldivers 2Read Full Review Story5Gameplay9Visuals9Audio8Value forMoney8 Beginner Guide
- Helldivers 2 fan creates indoor dungeon mission concept: Beginner Guide
- Helldivers 2 How to Destroy Fuel Silos and Stockpiled Ammunition
- Helldivers 2 How to Check Galactic War Progress: Beginner Guide
- Helldivers 2 Beginner Guide: Start Strong, Spend Smart, and Survive the Early War
- Helldivers 2 How to Fix Stuck in Drop Pod Bug
- Helldivers 2 Pages using DynamicPageList3 parser function: Beginner Guide
- Helldivers 2 How to Get the EX-03 Prototype 3 Armor Set
Screenshots



Reviewed by
HD2 Guides Editorial
Expertise: Editorial team behind HD2 Guides. Content is compiled from official patch notes, community wikis, and playthrough notes, then reviewed and updated on schedule.
Sources
Helldivers 2 Missions Guides →
Browse the complete missions collection and its focused guides.
Related Guides





🔥 Popular Guides
Helldivers 2 Tier List — Weapons, Warbonds, Armor & Stratagems
Master Helldivers 2 tier list hub: warbond rankings, armor passives, weapons, and stratagems. Jump to the warbond or armor list for your build.
Helldivers 2 Armor Tier List — Best Passives Ranked
Helldivers 2 armor tier list ranked by passive value: scout, medium, heavy, and specialist sets. Best passives for solo, co-op, and high difficulties.
Helldivers 2 Warbond Tier List — Best Warbonds to Buy First
Ranked Helldivers 2 warbond tier list: which warbonds to buy first, best value for medals, and what to skip. Updated for current meta.

Helldivers 2 Weapon Tier List: Best Weapons for Every Loadout
Compare the best Helldivers 2 weapons, budget substitutes, late-bloomers, reroll advice, and endgame loadout investments.
📋 Patch Notes & Updates
🛠️ Popular Tools
Was this guide helpful?
Rate this guide so we can improve it.
Share your own tip
Found something not in the guide? Submit it below — our editors review every tip before publishing. No account required.