 Helldivers 2
Helldivers 2 Despotic Explosive Beginner Guide
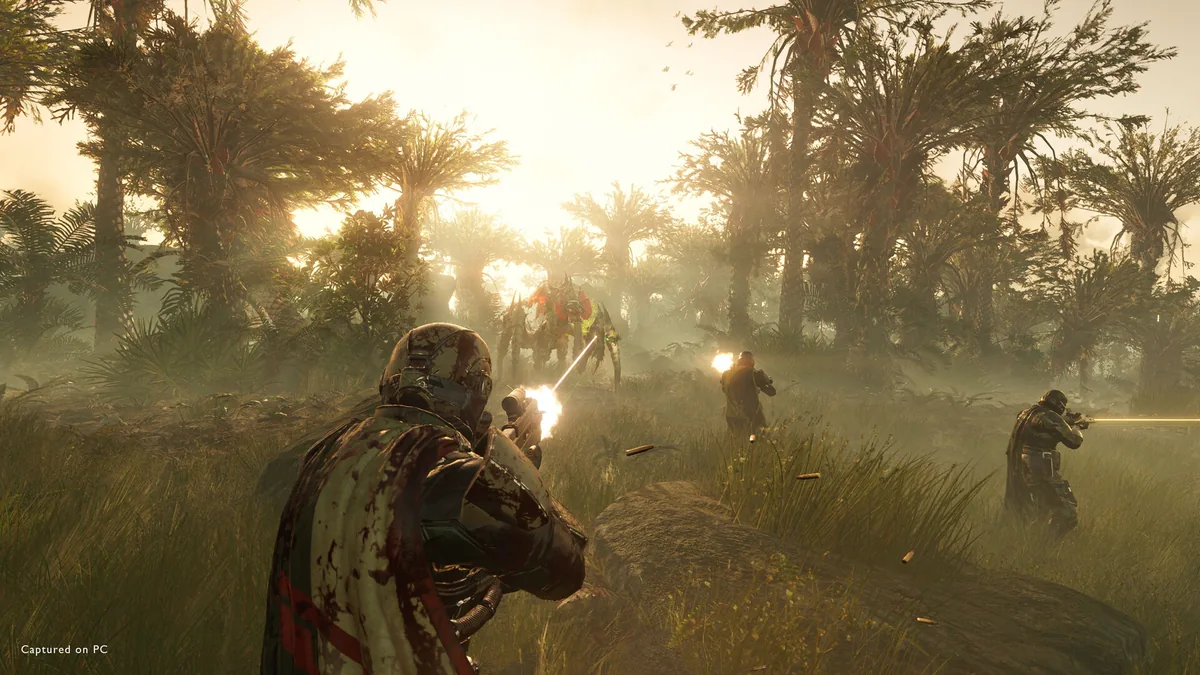
Quick Answer: Helldivers 2 Despotic Explosive is a beginner-friendly explosive playstyle focused on safe spacing, stratagem timing, and mission control, letting new players clear waves, crack armor, and support the squad without overcommitting.
What Helldivers 2 Despotic Explosive Means
Helldivers 2 Despotic Explosive is a practical beginner archetype built around explosive damage, area denial, and controlled chaos rather than pure run-and-gun aim. In Helldivers 2, that usually means leaning on tools like the Eagle Airstrike, Orbital Precision Strike, Autocannon, Grenade Launcher, and anti-armor stratagems that let you punish grouped enemies and handle heavier targets without needing perfect mechanical play.
The name matters less than the function: you are trying to turn enemy formations into predictable blast zones. That works especially well in Helldivers 2 because missions constantly throw mixed threats at you, from scavenger swarms and bile-spewing heavies to armored walkers and objective defenses. A good explosive setup gives you answers for all of those situations, as long as you respect blast radius and friendly fire.
This is also one of the easiest ways for a new player to feel useful early. A clean Eagle Airstrike can wipe a patrol, open space for a revive, or soften a nest. An Autocannon can delete durable targets and objective structures. A well-timed grenade can save a terminal from being overrun. The learning curve is not about aiming for headshots on every enemy; it is about reading engagement distance, picking the right tool, and not standing where your own ordnance lands.
From a broader game context, Helldivers 2 is a 2024 cooperative multiplayer third-person shooter developed by Arrowhead Game Studios and published by Sony Interactive Entertainment Source. It is built for squad play, but explosive loadouts remain strong because they scale with smart positioning rather than raw precision alone. The game also has serious staying power: Steam’s current review summary is “Mostly Positive” at 75.1% positive across 1,151,055 reviews, which is a solid signal that the core loop keeps players engaged Source.
First-Hour Checklist
Your first hour in Helldivers 2 should be spent unlocking basic control, testing explosive stratagems, and building habits that keep you alive when the screen turns into fire and shrapnel. The opening hour is not the time to roleplay a hero; it is the time to build a repeatable routine around movement, resupply, and objective pacing.
1. Complete the tutorial and practice the stratagem inputs
Your first action should be the training sequence, because it teaches the core rhythm of calling support while under pressure. Pay attention to input timing for stratagems like the Supply Pack call, the Eagle Airstrike, and your extraction sequence. Those inputs are part of the real game, not a side mechanic.
After the tutorial, enter a low-difficulty mission and deliberately call in a few different stratagems in a safe window. Try the Eagle Airstrike on a patrol, then call a resupply, then use a support weapon call like the Autocannon or Grenade Launcher if you have it available. You are building muscle memory for the motion, not testing damage numbers.
2. Use one explosive support weapon and one orbital or eagle strike
A beginner explosive setup works best when it has one repeatable support weapon and one reliable panic button. The Autocannon is a classic example because it handles medium armor, structures, and grouped enemies with one weapon slot. The Grenade Launcher is another strong early pick if you prefer crowd clear and objective pressure. For your airborne or orbital slot, Eagle Airstrike is the easiest general-purpose tool to learn.
Use these in real mission situations:
- A patrol starts bunching near an objective terminal.
- A bug breach or enemy alarm escalates into a dense wave.
- A heavy target forces the squad to reposition.
That combination teaches you how to create breathing room and how to conserve ammo for actual threats instead of wasting it on lone enemies.
3. Learn the reinforcement and revive rhythm
You should practice reinforcing teammates quickly, because explosive loadouts often create messy fights where somebody gets clipped. The moment a teammate drops, you need to think about two things: can you safely reinforce, and can you do it without dropping the pod onto the active fight?
Good beginner habits include:
- Moving a few steps away from the blast zone before reinforcing.
- Dropping the reinforcement where the squad can recover equipment.
- Using the pod as a last-resort weapon only when the team is already stable.
A lot of new players panic and throw reinforcements into the middle of a swarm. That can work, but it can also create a second death and wipe your support weapon. Build the habit of spacing first.
4. Spend the first missions on learning objectives, not farming kills
Helldivers 2 rewards mission completion, not kill count. Use your first-hour missions to understand the flow of side objectives, samples, extraction timing, and how enemy responses escalate when you linger. If you get distracted farming every patrol, you will burn ammo, waste stratagem cooldowns, and increase the chance of a bad extract.
Good first missions to repeat are simple objective types with clear routes:
- Destroy bot fabricators or bug nests.
- Activate terminals and hold the area.
- Escort or defend a point while learning spacing.
These scenarios are ideal for explosive play because they naturally create clustered enemies and hard targets. You get real practice without needing to jump into the most punishing missions immediately.
5. Extract even when the run feels messy
Extraction is part of the lesson. A messy mission still teaches you if you finish it and watch how the squad survives the final waves. Many beginners quit mentally once the objective is done, but extract is where bad positioning gets exposed. Stand near cover, keep your explosive tools for the last push, and do not throw everything the moment the shuttle arrives.
That final stretch is where the Helldivers 2 Despotic Explosive style starts to click. You begin to see how a single airstrike can reshape the landing zone, how a support weapon can hold a lane, and how cooldown discipline matters more than flashy play.

You might also like
- Helldivers 2 Available Platforms Updated 3/7/2024 See all the available platforms and consoles for Beginner Guide
- Helldivers 2 similar games co op shooter deep rock galactic remnant outriders Beginner Guide
- Helldivers 2 fourth faction alternative multiple enemies planet why Beginner Guide
- Helldivers 2 Why Now May Be the Perfect Time for a New Enemy Faction
- Helldivers 2 Which enemy faction do you enjoy fighting in: Beginner Guide
Resource Priority Order
You should spend your early resources on survival, mission consistency, and support tools before chasing luxury unlocks. Helldivers 2 gives you multiple currencies and progression tracks, but beginners get the most value by improving reliability first.
A simple priority order looks like this:
| Priority | What to Spend On | Why It Comes First | Early Examples |
|---|---|---|---|
| 1 | Core stratagem unlocks | Gives you real mission tools immediately | Eagle Airstrike, Resupply, support weapon call-ins |
| 2 | Ship modules that improve common tools | Makes every mission easier without changing your playstyle | Orbital cooldown, eagle performance, support weapon upgrades |
| 3 | Warbond unlocks that fit your loadout | Expands your weapon and armor options | Explosive primaries, utility armor, grenades |
| 4 | Samples for targeted upgrades | Strengthens the squad without forcing a style swap | Common samples, then rare samples as missions improve |
| 5 | Cosmetic or niche side goals | Nice to have, not essential early | Armor looks, weapon variants you are not yet using |
The key idea is to avoid spreading everything thin. If you spend samples on random upgrades that do not affect your current weapons, you delay the point where your explosive setup becomes genuinely smoother. In practice, that means you should first improve the tools you already deploy every match.
What to hoard
You should hoard samples and premium currency until you know which explosive lane you actually enjoy. If you like area denial and objective damage, prioritize upgrades that help orbital and eagle patterns. If you prefer sustained fire, prioritize the support weapon path. If you are still unsure, keep your spending conservative and let the game show you what you use most.
Hold onto resources for:
- Ship modules that reinforce common stratagems.
- Warbond unlocks that match your regular loadout.
- Armor or boosters that solve a problem you actually encounter.
Do not dump everything into novelty unlocks just because they look powerful in a menu. In Helldivers 2, a tool is only valuable if you bring it into missions often enough to learn the rhythm.
What to spend immediately
Spend early on anything that improves mission reliability:
- A dependable explosive primary if your current gun feels weak.
- A support weapon you can use on most mission types.
- A team utility booster if your squad lacks one.
- The first useful ship upgrades that affect your favorite stratagems.
That is especially true for Helldivers 2 Despotic Explosive players, because this style gets stronger when the battlefield is predictable. Anything that reduces cooldown friction, improves ammo economy, or sharpens your explosive output has real value.
What to ignore for now
Ignore optimization traps that do not help your current missions. A flashy niche weapon you rarely equip is less valuable than a simple setup that works every run. The same goes for over-investing in secondary options before your core call-ins are stable.
Beginners often think the right answer is to chase the biggest explosion possible. The real answer is to buy consistency. In this game, consistency wins more missions than spectacle.
Common Mistakes
New players usually fail in the same few ways, and most of those mistakes are easy to fix once you know what to watch for. Helldivers 2 is generous with power but ruthless about positioning, so the most dangerous habits are often the ones that feel exciting.
1. Standing too close to your own blasts
Players do this because explosive weapons feel strongest at point-blank range, and the camera makes it easy to underestimate splash damage. The fix is simple: fire from a step farther back than feels natural, then move again before the next impact. Eagle Airstrike, Orbital Precision Strike, and Grenade Launcher all punish overconfidence here.
2. Saving stratagems for “the perfect moment”
Beginners often hoard airstrikes and orbital calls until the fight is already collapsing. That happens because they do not want to waste cooldowns, but the result is usually worse. Use your tools to control the fight early, especially on patrols, bug breaches, and fabricator defenses. A used stratagem that keeps the squad alive is better than a perfect one that never leaves the orbit menu.
3. Ignoring objective pressure to chase kills
This is one of the fastest ways to lose a mission. Players fall into it because enemy numbers make kills feel urgent, but Helldivers 2 often wants movement and completion, not extermination. Fix this by checking the objective after every engagement. If the terminal is clear, move. If a side target can be destroyed quickly with an explosive tool, do it and leave.
4. Bringing only crowd-clear and no answer for armor
A lot of new explosive players load up on grenades, blast primaries, and area weapons, then get stuck when a Charger, Hulk, or similar armored threat shows up. The fix is to keep at least one anti-armor answer in the loadout, such as an Autocannon, Recoilless Rifle, EAT-style support, or a heavy stratagem. You need one tool that solves durable targets, not just swarms.
5. Dropping reinforcements in the wrong place
Players make this mistake because the instinct is to get a teammate back into the fight immediately. The workaround is to reinforce into usable space, not into chaos. If the area is covered in explosives, beam fire, or enemies, step off-angle first, then call the reinforcement where the squad can regroup and reclaim equipment.
6. Treating samples like junk
New players often leave samples behind because the mission feels hectic and the extraction timer is ticking. That is a long-term mistake, since samples are part of meaningful progression. The fix is to assign one teammate, or yourself if you are safe, to grab samples during quiet movement segments and extract them whenever possible.
Pro Tips
The jump from beginner to useful squad member usually comes from small timing habits, not from one giant unlock. These tips are about reading the mission better and making your explosive kit work harder.
Tip 1. Throw explosives where enemies must move, not where they stand
A cluster of enemies is good, but a choke point is better. If you can place an Eagle Airstrike across a narrow path, a bridge, or the line into an objective, you force the enemy into damage instead of hoping they sit still.
Tip 2. Use the first blast to shape the second fight
After a successful strike, do not linger to admire the result. Move to the next angle while the enemy is still recovering. In practice, this works beautifully on bot installations and bug nest approaches, where the next wave often arrives from a predictable direction.
Tip 3. Keep one tool for “panic now” and one for “prepare ahead”
A good explosive beginner setup has one instant response and one planned response. For example, Eagle Airstrike can answer sudden pressure, while an orbital strike can be saved for a fixed point or objective defense. That split keeps you from burning every tool at once.
Tip 4. Use stratagems to buy time, not just damage
Sometimes the correct play is not maximum kills. If your squad is trying to complete a terminal, a stun-like delay from explosions, a cleared lane, or a forced reposition is enough. Mission progress matters more than the body count on the ground.
Tip 5. Learn one mission type deeply before branching out
If you keep rotating mission types every run, you never learn how enemies approach the same objective. Repeating destroy, defend, or terminal-based missions helps you see the same enemy responses and makes your explosive timing much cleaner.
Tip 6. Reserve support ammo for armor and emergencies
Support weapons like the Autocannon feel amazing, so beginners often burn ammo on every target. That creates trouble later. Fire at clusters when needed, but keep enough reserve to answer the heavy units that actually threaten the squad.
Graduation Threshold
You are out of the beginner phase when you can finish missions while making deliberate, repeatable decisions instead of reacting to every threat at full panic. In Helldivers 2, that threshold is less about level and more about habits.
You have likely graduated from beginner status when these things happen consistently:
- You can call stratagems under pressure without misinputing constantly.
- You know when to use an Eagle Airstrike, an orbital strike, or a support weapon.
- You stop chasing random kills and keep the mission moving.
- You carry a specific anti-armor answer in every loadout.
- You help with reinforcements, samples, and extraction without being prompted every time.
For Helldivers 2 Despotic Explosive players, the clearest sign is this: you start using explosives to control the fight, not to celebrate it. A beginner throws a blast because enemies are nearby. A competent player throws a blast because the route, objective, or spawn pattern demands it.
A practical way to measure this is mission consistency. If you can join a spread of mission types and still understand when to hold position, when to retreat, and when to spend your big tools, you are past the beginner phase. If you are still relying on one favorite weapon to carry every problem, you are not there yet.
The game’s broader structure supports that progression. HowLongToBeat reports roughly 32.43 hours for the main story, 65.01 hours with extras, and 89.29 hours for completion Source. That kind of range fits a game where the skill ceiling is much more about mastery than scripted campaign finish line. Helldivers 2 also has a large active audience, with Steam showing about 29,205 players in game right now and a long-running all-time peak of 458,046 on Steambase Source. In other words, there is plenty of room to keep improving after the first few missions.
Related Guides
These are the next pieces that naturally follow this beginner guide:
- Helldivers 2 Best Early Stratagems
- Helldivers 2 Beginner Loadouts
- Helldivers 2 Armor and Passive Guide
- Helldivers 2 Weapon Tier List
- Helldivers 2 Mission Types Walkthrough
- Helldivers 2 Sample Farming Guide
Sources
- https://store.steampowered.com/app/553850/
- https://howlongtobeat.com/?q=helldivers2
- https://api.steambase.io/games/553850
- https://www.metacritic.com/game/helldivers-2
- https://www.protondb.com/app/553850
- https://steamcommunity.com/stats/553850/achievements
- https://steamspy.com/app/553850
- https://www.cheapshark.com/redirect?dealID=m%2FqQjo0uKy1J43MzqV%2B3wHWO4xOCNp9UMfo%2BfATGaNY%3D
See also
- Helldivers 2 Super Destroyer Screen Display Interactive Update: Beginner Guide
- Helldivers 2 Ground All Terrain Extraction Rig GATER Beginner Guide
- Helldivers 2 Reviewed by Game878Helldivers 2Read Full Review Story5Gameplay9Visuals9Audio8Value forMoney8 Beginner Guide
- Helldivers 2 fan creates indoor dungeon mission concept: Beginner Guide
- Helldivers 2 Beginner Guide: Start Strong, Spend Smart, and Survive the Early War
- Helldivers 2 How to Destroy Fuel Silos and Stockpiled Ammunition
- Helldivers 2 How to Check Galactic War Progress: Beginner Guide
- Helldivers 2 How to Get the EX-03 Prototype 3 Armor Set
- Helldivers 2 How to Fix Stuck in Drop Pod Bug
- Helldivers 2 Pages using DynamicPageList3 parser function: Beginner Guide
Screenshots



Reviewed by
HD2 Guides Editorial
Expertise: Editorial team behind HD2 Guides. Content is compiled from official patch notes, community wikis, and playthrough notes, then reviewed and updated on schedule.
Sources
Helldivers 2 Missions Guides →
Browse the complete missions collection and its focused guides.
Related Guides





🔥 Popular Guides
Helldivers 2 Tier List — Weapons, Warbonds, Armor & Stratagems
Master Helldivers 2 tier list hub: warbond rankings, armor passives, weapons, and stratagems. Jump to the warbond or armor list for your build.
Helldivers 2 Armor Tier List — Best Passives Ranked
Helldivers 2 armor tier list ranked by passive value: scout, medium, heavy, and specialist sets. Best passives for solo, co-op, and high difficulties.
Helldivers 2 Warbond Tier List — Best Warbonds to Buy First
Ranked Helldivers 2 warbond tier list: which warbonds to buy first, best value for medals, and what to skip. Updated for current meta.

Helldivers 2 Weapon Tier List: Best Weapons for Every Loadout
Compare the best Helldivers 2 weapons, budget substitutes, late-bloomers, reroll advice, and endgame loadout investments.
📋 Patch Notes & Updates
🛠️ Popular Tools
Was this guide helpful?
Rate this guide so we can improve it.
Share your own tip
Found something not in the guide? Submit it below — our editors review every tip before publishing. No account required.